Twin-Roller Boat-Shaped Presser Foot: Structure and Working Principle
This article explains the internal structure and working principle of the twin-roller boat-shaped presser foot, a specialised sewing machine accessory used for quilting and joining bulky, high-friction fills such as cotton wadding, down, and spray-bonded nonwoven. It gives concrete parameter ranges for roller diameter, presser foot pressure, stitch length, and machine speed, and it includes a symptom-to-fix troubleshooting table you can work from at the machine. A dedicated section covers how the two passive rollers interact with the feed dog, why the curved sole matters, and what the electroplated finish does and does not do on an industrial lockstitch machine.
Related guide: presser foot — types, fitting and machine compatibility.
Why a Standard Presser Foot Fails on Loose Fill
On a single-needle lockstitch machine, the standard presser foot does one job: it holds the fabric down against the needle plate while the feed dog pushes it forward from below. That works because the foot's flat sole and the feed dog's teeth grip the material from opposite sides, and the material itself is thin enough that the top and bottom surfaces move together.
Loose fill breaks that assumption. A batt of cotton wadding, down clusters, or spray-bonded nonwoven is thick, compressible, and has low shear strength. When a flat presser foot presses down on it, three things happen at once:
- The foot compresses the fill, reducing its loft and permanently flattening the seam line.
- The feed dog's teeth engage the bottom layer, but the top layer is only held by friction against a stationary metal sole. The two layers slide against each other.
- The top layer drags, puckers, or shifts sideways, and the resulting seam is wavy or misaligned.
The operator's usual response is to reduce presser foot pressure. That helps, but it also reduces the foot's grip, and on very lofty material the foot may lift off the work entirely and the feed becomes erratic. The twin-roller boat-shaped presser foot is one answer to this specific conflict.
How the Twin-Roller Presser Foot Works
The rollers convert sliding friction into rolling friction
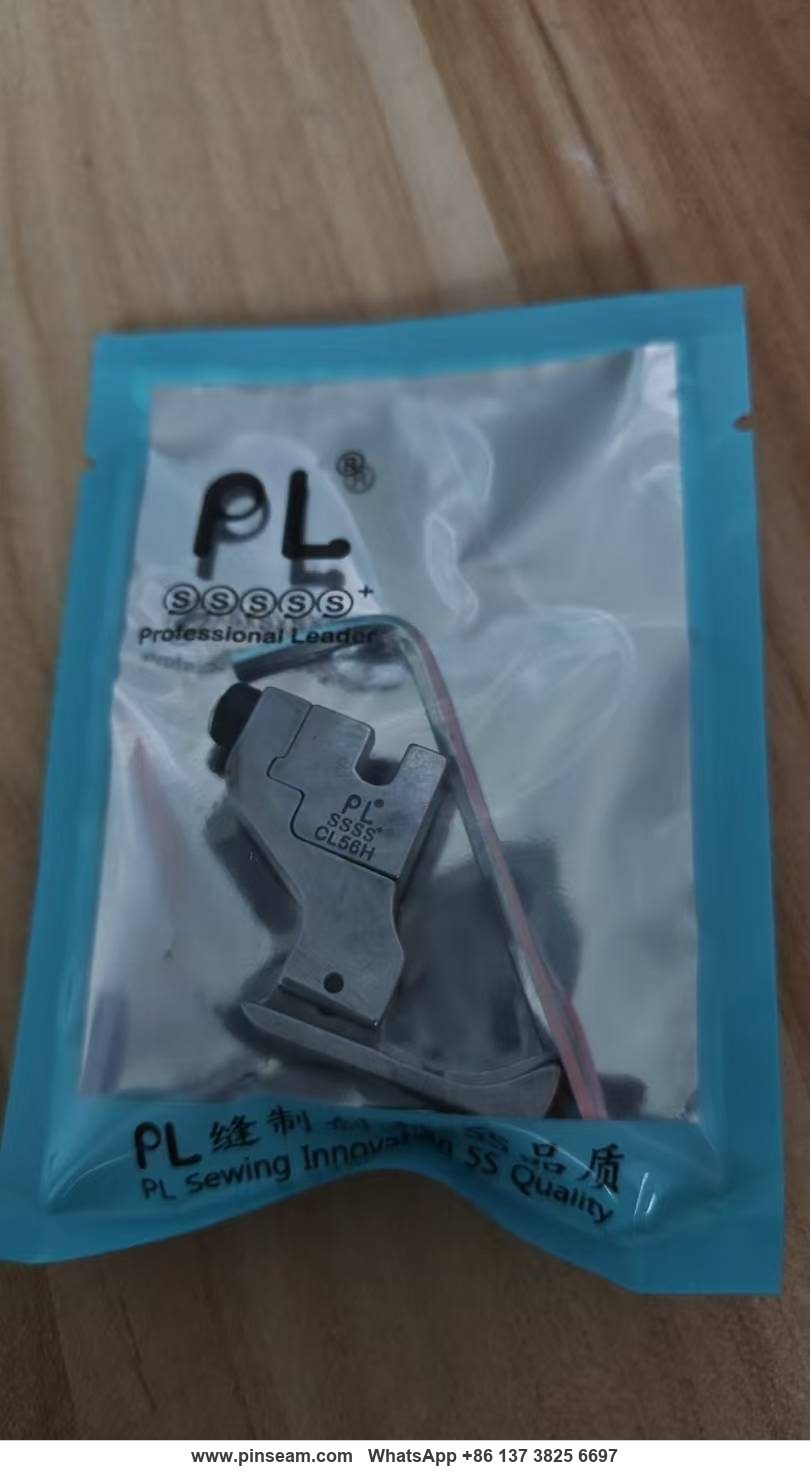
The defining feature of this presser foot is its two exposed rollers mounted in the sole, oriented so their axes are perpendicular to the sewing direction. As the feed dog drives the material forward, the rollers rotate with it rather than scraping against it. Sliding friction between the foot and the top surface is replaced by rolling friction, which is roughly an order of magnitude lower for the same normal load.
The practical consequence is that the foot can apply enough downward force to keep the material flat and under control, without that force turning into drag on the top layer. The operator no longer has to choose between "too much pressure, fabric crushed" and "too little pressure, feed unreliable".
Why two rollers instead of one
A single roller would work, but it creates a pivot point. With one roller, the foot tends to rock fore and aft around that roller as the material thickness varies, and the front or rear of the sole can dig into the work. Two rollers spaced along the sole give the foot a stable two-point contact, so it stays level as it rides over thickness changes — a seam crossing, a quilted line, or the edge of a batt.
The boat-shaped sole and its function
The "boat" or curved sole is not cosmetic. The sole is shaped so that the front and rear edges curve upward away from the material, leaving only the central region — where the rollers sit — in contact. This matters for three reasons:
- Entry and exit angles. A curved leading edge lets the foot ride up onto a thick cross-seam instead of catching on it and stalling the feed.
- Reduced contact area. Less metal touching the fabric means less total friction and less chance of the foot pressing a visible track into the fill.
- Roller protection. Because the sole curves away, the rollers are the lowest points of the foot. The material contacts the rollers first, which is exactly what the design intends.
What the foot does not do
It is important to be clear about the mechanism: the rollers are passive. They are not driven, they do not pull the material, and they do not replace the feed dog. All feeding force still comes from below, from the feed dog and the machine's feed mechanism. The rollers only reduce the resistance that the top of the material experiences.
This is why the foot is not a substitute for a walking foot or a unison feed (compound feed) machine. On a walking-foot lockstitch machine, the upper feed mechanism is positively driven and moves in sync with the lower feed dog; that is a fundamentally different and more capable solution. The twin-roller foot is a low-cost retrofit for machines that do not have upper feeding, and it works best on material that is uniform in thickness and not extremely slippery.
Internal Structure: What Is Inside the Foot
The body
The body is a single metal casting or machined piece that carries the shank (the part that clamps to the presser bar) and the sole. The shank geometry determines which machines the foot fits; the sole geometry determines what it can sew. On most versions of this design the shank is a standard low-shank or high-shank pattern with a cross-hole for the presser bar screw.
The rollers and their axles
Each roller is a small cylinder mounted on a pin axle retained in the body by staking, a set screw, or a pressed fit. Roller diameter on production versions of this foot generally falls between 5 mm and 9 mm, with 6–7 mm the most common size for general quilting work. The roller surface may be smooth, knurled, or grooved:
- Smooth rollers give the least marking on delicate fill and the lowest friction, but less grip. Typical surface roughness is in the Ra 0.4–0.8 µm range on polished steel versions.
- Knurled or grooved rollers grip better on slick material such as coated nonwoven or down-proof shell fabric, at the cost of a slight track mark on very soft fill. Knurl pitch is usually 0.5–1.0 mm.
Roller diameter is a trade-off. Larger rollers roll more easily over small thickness variations and are less likely to stall, but they raise the sole higher off the needle plate, which can affect needle-to-foot clearance and the timing of the foot's lift. Smaller rollers sit lower and give a more conventional foot height, but are more sensitive to lint packing in the axle gap. As a rule of thumb, use 5–6 mm rollers for fine wadding and down, 6–7 mm for general quilting, and 7–9 mm where the material varies in thickness or where a cross-seam is crossed regularly.
Axle-to-body clearance is typically 0.02–0.05 mm on a new foot. Below 0.02 mm the roller will bind when fibre enters the gap; above 0.05 mm the roller develops lateral play and can track unevenly.
Clearance and the lint problem
The single most common failure mode of any roller foot is lint and fibre packing into the gap between the roller and the body. Cotton wadding and down release a great deal of short fibre, and that fibre migrates into the axle area. Once packed, the roller stops turning and the foot behaves like a plain foot — with the added disadvantage that a jammed roller can drag and mark the material.
This is a maintenance characteristic, not a design defect, but it should be planned for. On high-volume quilting lines, checking roller freedom at each bobbin change is a reasonable interval — typically every 60–90 minutes of running time on wadding work.
Materials, Finish, and What the Electroplating Actually Does
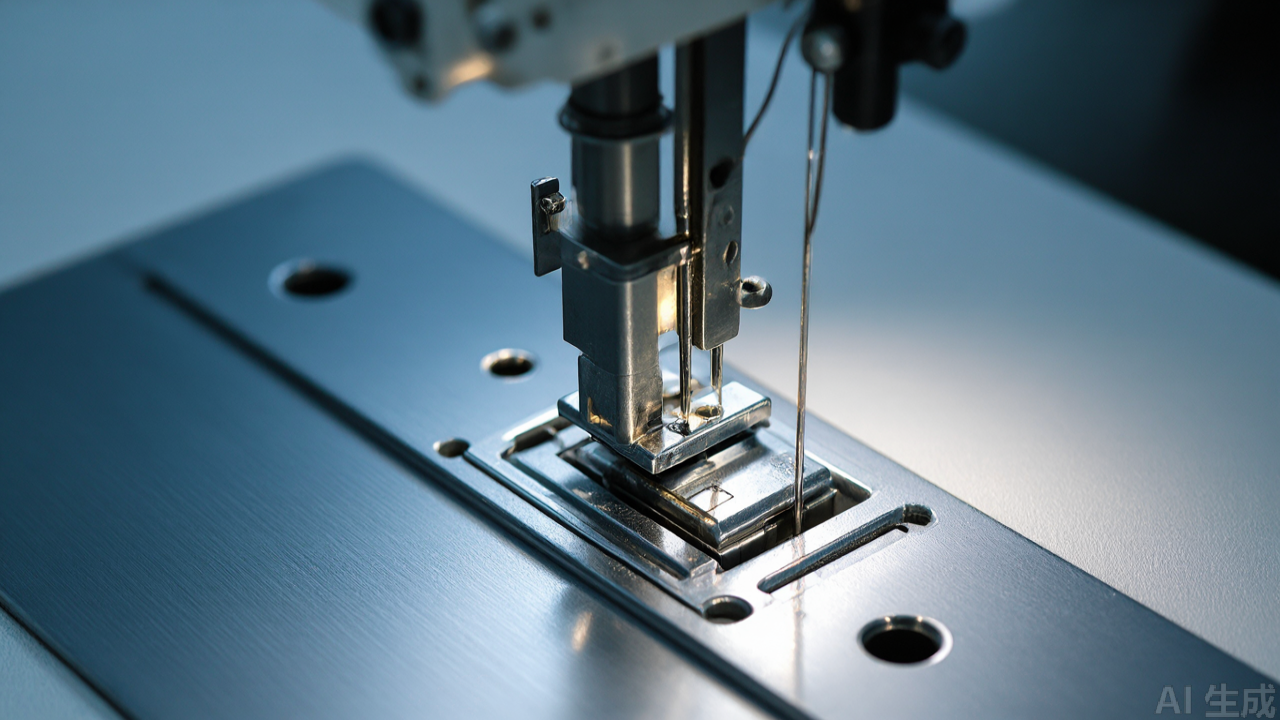
The body of this type of foot is typically a steel or zinc-alloy casting finished with an electroplated coating — usually nickel or chrome over a nickel strike. Plating thickness on this class of accessory is normally 5–15 µm. The coating serves two purposes:
- Corrosion resistance. Workshop environments are humid, and wadding and down can carry residual moisture and processing aids. An electroplated surface resists surface rust far better than bare steel.
- Surface hardness and wear resistance. The plated layer is harder than the base metal — typically 400–600 HV for hard chrome — so the sole and the shank contact areas wear more slowly under continuous use.
What electroplating does not do is make the foot dimensionally stable under heat or immune to mechanical damage. The coating is thin and a scraper, a screwdriver, or a dropped foot on a concrete floor will remove it locally. Once the base metal is exposed, corrosion starts at that point and can creep under the plating. Storage in a dry cabinet or a lightly oiled cloth wrap is the standard practice.
There is also a fit consideration. Plating thickness varies slightly between batches, and on a foot with a tight shank-to-presser-bar fit, a heavy plate layer can make installation stiff. This is rarely a problem on standard shank patterns, but it is worth checking if you are swapping feet frequently.
Installation and Setup on a Lockstitch Machine
Step 1: Verify the shank interface
Before anything else, confirm the shank pattern. Measure the presser bar diameter, the position and diameter of the cross-hole, and the width of the shank slot. Low-shank feet typically use a 6.35 mm (1/4 in) bar with a slot width around 5 mm; high-shank feet use a 7.94 mm (5/16 in) bar. Industrial single-needle lockstitch machines use several shank standards, and a foot that fits one will not fit another. The most common mismatch is a low-shank foot offered for a high-shank machine, or vice versa.
Step 2: Fit and set the presser bar height
With the needle bar at its lowest position, the foot should sit flat on the needle plate with the rollers just touching. A useful check: with the foot resting on the plate, the gap between the shank and the presser bar shoulder should be 0.5–1.0 mm. If the foot rides high, the rollers will not contact the material and the design's advantage is lost. If it sits too low, the foot will press the material against the plate and the feed dog cannot move it.
Step 3: Set presser foot pressure
Start with less pressure than you would use for a standard foot. On machines with a spring-loaded pressure regulator, that means starting around 15–20 N of measured foot pressure for light wadding, 20–30 N for medium fill, and 30–40 N only where the material is dense or the seam crosses multiple layers. A standard foot on woven cotton typically runs 35–50 N; the roller foot's advantage disappears above that range on lofty fill.
The practical field test is simple: increase pressure in quarter-turn steps until the feed is consistent, then stop. Excessive pressure defeats the purpose — it compresses the fill, increases the load on the roller axles, and can cause the rollers to skid rather than roll.
Step 4: Check roller freedom by hand
Before threading, rotate each roller with a finger. Both should spin freely with no gritty feel and no lateral play greater than about 0.1 mm. If a roller is stiff, do not force it — clean the axle gap first.
Step 5: Set stitch length and test on scrap of the actual material
Set stitch length and tension on the production material, not on a swatch of plain cotton. For loose fill, a stitch length of 3.0–3.5 mm is a good starting point; going above 4.0 mm on low-shear wadding allows the top layer to gather between needle penetrations and produces puckering. Going below 2.5 mm increases needle heat and fibre breakage without improving the seam. Sew a short run, inspect the seam for puckering and layer shift, and adjust from there.
Step 6: Reduce speed if needed
On very lofty material, a high stitch rate can outrun the rollers' ability to keep the top layer moving. Typical working speeds on wadding with a roller foot are 2,500–3,500 stitches per minute; above roughly 4,000 spm the top layer frequently lags. If you see the top layer lagging behind the bottom, reduce machine speed before changing any other setting. This is a feed-synchronisation issue, not a tension issue.
Where This Presser Foot Type Works — and Where It Does Not
Good applications
- Quilting and joining cotton wadding, down-proof shells, and spray-bonded nonwoven.
- Bedding, sleeping bags, quilted jackets, and down garments where loft must be preserved.
- Cushion, pet-bed, and home-textile filling where the seam sits over loose fill.
- Any lockstitch operation where a standard foot is crushing the material or causing top-layer drag.
Poor applications
- Very slippery coated fabrics. If the shell is a low-friction coated nylon or polyester, the rollers may not grip enough, and the top layer will still shift. A walking foot machine is the correct tool here.
- Highly variable thickness. Crossing a thick seam into a thin area repeatedly will make the foot rock and the feed will be uneven.
- Heavy leather or dense webbing. These need a different foot geometry entirely; the roller design offers no benefit and the rollers may be damaged.
- Operations requiring precise seam placement. The curved sole gives less visual reference than a flat foot with a guide edge.
It is also worth noting that this is a lockstitch-machine accessory. It is not used on overlock machines (sergers) or coverstitch machines, which have their own dedicated presser foot families and different feed geometry.
Troubleshooting: Symptom-to-Fix Reference Table
Most problems with a roller foot present as one of six symptoms. The table below maps each symptom to its likely causes in order of probability and to the specific corrective action. Work through the causes in the order listed — the first row in each group is the most common cause in practice.
| Symptom | Likely cause (in order) | Corrective action |
|---|---|---|
| Puckered seam, top layer rippled | Presser foot pressure too high | Reduce in quarter-turn steps; target 15–20 N on light wadding instead of the 35–50 N used for woven cotton |
| Rollers not turning | Rotate by hand; clean axle gap with soft brush and compressed air before adjusting anything else | |
| Stitch length too long for the material | Reduce from 4.0 mm to 3.0–3.5 mm and re-test | |
| Needle too coarse | Drop one needle size (e.g. from 90/14 to 80/12) if the material allows | |
| Top layer lags or shifts sideways | Machine speed too high | Reduce to 2,500–3,500 spm; above 4,000 spm the passive rollers cannot keep up |
| Insufficient pressure | Increase gradually in quarter-turn steps until the top layer tracks with the bottom | |
| Roller surface too smooth for the shell fabric | Switch to knurled or grooved rollers (0.5–1.0 mm knurl pitch) | |
| Feed dog worn or set too low | Inspect feed dog teeth and height relative to needle plate; replace or reset before further testing | |
| Irregular stitch spacing | Partially jammed roller | Clean axle gap; check rotation under light load, not just by free-spinning by hand |
| Foot loose on the presser bar | Tighten shank screw; replace if the screw hole is elongated beyond 0.2 mm | |
| Foot riding high | Re-check presser bar height; shank-to-shoulder gap should be 0.5–1.0 mm | |
| Feed timing drifted | Have a technician verify feed timing against the machine manual | |
| Visible track marks or flattening | Excessive pressure | Reduce until the mark disappears; this is a pressure problem far more often than a foot problem |
| Knurled rollers on soft fill | Switch to smooth rollers (Ra 0.4–0.8 µm) for down and fine wadding | |
| Roller edges damaged or burred | Inspect roller faces under good light; a burr presses a line on every revolution — replace the roller | |
| Roller diameter too large for the material | Move from 7–9 mm down to 5–6 mm rollers for very soft fill | |
| Skipped stitches or needle strikes | Wrong shank pattern or wrong foot height | Verify shank fit (6.35 mm low-shank vs 7.94 mm high-shank) and bar height before adjusting anything else |
| Foot contacting the needle | Check clearance with needle at lowest point; if touching, the foot is wrong for the machine or mounted off-centre | |
| Needle bent | Replace needle and re-check clearance | |
| Timing or hook clearance | If the foot fits correctly and the needle is straight, the fault is in the machine, not the accessory | |
| Roller seizes during a run | Fibre packed into the axle gap | Stop, clear the gap, confirm free rotation before restarting; check every 60–90 minutes on wadding work |
| Axle dry or corroded | Apply one drop of light machine oil at the axle and work in by hand | |
| Roller deformed by heat or impact | If out of round or axle bent, replace the foot | |
| Plating debris in the gap | Clear before first use on a new foot rather than after a failed run |
Common Mistakes and Maintenance Practice
Mistakes seen on the floor
- Running full pressure out of habit. The most frequent error. Operators set the foot the way they set every other foot, and the roller advantage is neutralised.
- Ignoring roller stiffness. A partially jammed roller is worse than a plain foot because it drags intermittently, producing irregular stitch spacing that is hard to diagnose.
- Using the foot to solve a feed dog problem. If the feed dog is worn, the stitch plate is grooved, or the feed timing is off, no presser foot will fix it. Correct the feed system first.
- Mixing shank standards. A foot that appears to fit but sits at the wrong height will cause skipped stitches or needle strikes.
- Scraping the plating during cleaning. Using a blade to remove lint from the axle gap removes the coating at the same time.
Maintenance routine
- Clean the roller gaps with a soft brush or compressed air every 60–90 minutes on high-loft work.
- Check roller rotation by hand at the start of each shift.
- Wipe the foot with a dry cloth; avoid solvent baths that can attack the plating at edges and scratches.
- Store spare feet in a dry location, individually wrapped or in a partitioned tray, to prevent plating damage from contact.
- Inspect the shank screw hole for elongation beyond 0.2 mm; a loose foot moves under load and will produce inconsistent seams.
- Log roller replacements by machine and material so that repeated seizures on one station point to a process problem rather than a parts problem.
Selection Tips for Parts Buyers
When specifying a twin-roller boat-shaped presser foot for a production line, the specification that matters most is the shank interface, not the appearance. Confirm the shank pattern against the actual machines on the floor before ordering, and treat "universal" claims with caution — presser bar dimensions vary more than catalogues suggest.
Beyond fit, the variables worth specifying are roller material, roller surface finish, and roller diameter. For down and fine wadding, smooth rollers in a hard plastic or polished steel (Ra 0.4–0.8 µm) are usually preferred to avoid marking. For slick shell fabrics, a lightly knurled steel roller (0.5–1.0 mm knurl pitch) gives better grip. For general quilting, a 6–7 mm smooth steel roller is the safe default.
Finally, buy in quantities that allow rotation. Roller feet are wear items, and having a clean spare on the shelf means a jammed roller costs minutes rather than a shift. As with all industrial sewing machine parts, the cost of the accessory is trivial next to the cost of the downtime it prevents — which is the real reason to keep the correct presser foot on hand.
Need this part for your workshop?
Get a Free Quote on WhatsApp: +86 137 3825 6697Browse the full catalog at pinseam.com · Free 2026 full catalog (PDF) · Related guide: presser foot
📢 New arrivals & factory updates on Telegram — join our channel
Edited by the technical team at PL (Professional Leader) — high-quality sewing machine accessories from China. About our factory | Catalog: pinseam.com | WhatsApp: +86 137 3825 6697 | Telegram: @plsewingparts
Explore Our Parts Guides
- multifunctional needle threader guide — how to use & choose
- jack multifunctional needle threader — one-second threading
- sewing machine accessories, needle threaders & thread guides
- industrial & magnetic seam guides
- presser foot guide: types & compatibility
- industrial presser feet for factory lines
- roller & rolled hemmer presser feet
- industrial sewing machine parts & spare parts
- wholesale sewing machine parts — PL (Professional Leader) factory direct
- about PL (Professional Leader) — Hangzhou Fubang, sewing parts brand since 2018
Questions about a specific part? Chat with us on WhatsApp +86 137 3825 6697 — factory direct, reply within hours.


Comments
Post a Comment