Three-Point Five-Thread Hemming Folder for Cylinder Bed Machines: Function, Structure, and Troubleshooting
This article explains the working principle, internal structure, and practical maintenance of the three-point five-thread hemming folder (model PL-542), a specialized sewing machine accessory designed for cylinder bed coverstitch machines. Readers will learn how this presser foot-adjacent device achieves automatic edge folding, how to diagnose and correct common production problems such as fabric jamming and uneven fold width, and how to establish a maintenance schedule that prevents downtime.
Related guide: magnetic seam guide — types, fitting and machine compatibility.
The Production Bottleneck That This Sewing Machine Part Eliminates
Hemming the bottom of a T-shirt, hoodie, or pair of sweatpants is a deceptively complex operation. The fabric edge must be folded inward to a precise width—typically between 6 mm and 12 mm depending on the garment spec—and then secured with a three-point five-thread coverstitch. When done by hand, the operator must fold, hold, and guide the fabric simultaneously. At production speeds of 4,000 to 5,000 stitches per minute, manual folding becomes the limiting factor.
Fatigue sets in quickly. Fold widths drift. Edges twist on stretchy knits. Rework rates climb. The three-point five-thread hemming folder addresses this directly: it replaces the operator's left hand as the folding mechanism. The operator only feeds fabric into the folder's mouth; the folder's internal channels fold the edge and present it to the needle plate at a consistent width, every cycle.
For garment factories running cylinder bed machines, this industrial sewing machine part is not an optional convenience—it is the difference between meeting daily output targets and falling short. It also standardizes quality across shifts, because the fold geometry is fixed by the tool, not by the operator's skill level.
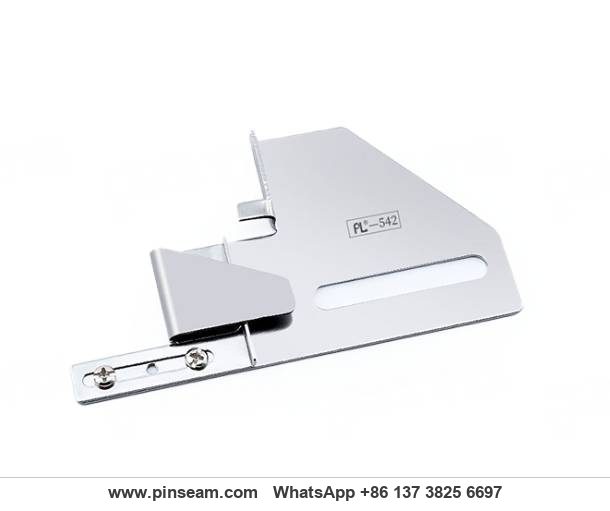
Defining the Three-Point Five-Thread Hemming Folder
Before examining the internal structure, it is worth clarifying terminology. The device belongs to the folder category—known in Chinese workshops as la tong—which are auxiliary guides that fold fabric before it reaches the sewing needles. The "three-point five-thread" designation refers to the stitch type produced by the host machine: three needle threads and two looper threads forming a 5-thread coverstitch, commonly used for hemming knit garments.
The folder is designed exclusively for cylinder bed machines, not flatbed coverstitch machines. This distinction matters. Cylinder bed machines have a narrow, tubular work surface that allows the operator to slip a garment body over the arm, making them ideal for hemming closed circular garments like T-shirt bottoms or pant legs. The folder's mounting geometry and exit dimensions are matched to this specific machine configuration.
Model PL-542 from PL, a manufacturer of sewing machine accessories including presser feet, feed dogs, and needle plates, is one such folder. Its function is straightforward: receive a flat fabric edge, fold it into the required configuration, and deliver it to the needle area in a controlled, repeatable manner.
Internal Structure: How the Folder Achieves Consistent Folding
The folder's effectiveness lies in its internal geometry—specifically the entry opening, the folding channel, and the exit slot. These three zones work together to transform a flat fabric strip into a neatly rolled hem without wrinkling or stretching the material.
Entry Zone: Guiding the Raw Fabric Edge
The entry opening is wider than the final fold width. This is a deliberate design choice. A wider mouth allows the operator to insert the fabric edge without precise alignment, reducing the skill required for consistent feeding. The entry edges are smoothly rounded to prevent snagging on knit loops or catching on fabric selvages.
For thin and medium-weight knits—cotton jersey, rib knit, lycra blends—the entry geometry also controls tension. If the entry is too narrow, the fabric bunches; if too wide, the edge can twist before entering the folding channel. PL-542's entry dimensions are calibrated for the typical fabric thickness range found in T-shirt and sportswear production.
Folding Channel: The Precision Core
The folding channel is where the actual hemming occurs. Inside this channel, the fabric edge is progressively folded through a series of bends formed by precision-bent stainless steel plates. The channel is designed to fold the fabric into either a 3-ply or 5-ply configuration, depending on the thread count and the desired hem appearance.
In a 3-ply fold, the raw edge is tucked under twice, creating a clean, enclosed edge. In a 5-ply fold, additional layers are incorporated, which is sometimes specified for heavier fabrics or when a more substantial hem is required. The channel's internal width determines the final fold width, and this dimension is held to tight tolerances during manufacturing.
The critical aspect of the folding channel is its cross-section transition. The fabric enters in a flat plane and exits in a folded configuration. This transition must occur gradually—not as a sharp step—otherwise the fabric will jam or fold unevenly. PL-542's channel uses a progressive spiral-like path that reorients the fabric edge smoothly over a distance of 30 to 50 mm.
Exit Slot: Alignment with Needles and Presser Foot
The exit slot is the folder's interface with the sewing machine's needle plate and presser foot. Its width is matched to the needle spacing of a three-point five-thread coverstitch machine, ensuring that the three needle threads straddle the folded hem symmetrically. If the exit slot width mismatches the needle gauge, the stitches will land off-center, producing a weak or cosmetically unacceptable hem.
The exit height is equally important. The folder's bottom surface must sit approximately 0.5 to 1.0 mm above the needle plate plane. This clearance prevents the folder from interfering with the feed dogs while still allowing the fabric to transfer smoothly from the folder to the presser foot.
Additionally, the exit slot is designed to hold the folded fabric in its folded state until the presser foot takes over. If the fabric springs open after exiting the folder, the entire folding operation is wasted. The exit geometry therefore includes a retaining lip that holds the fold closed for the final 5 to 8 mm before the needle penetration point.
Material Selection: Why Stainless Steel Is the Standard
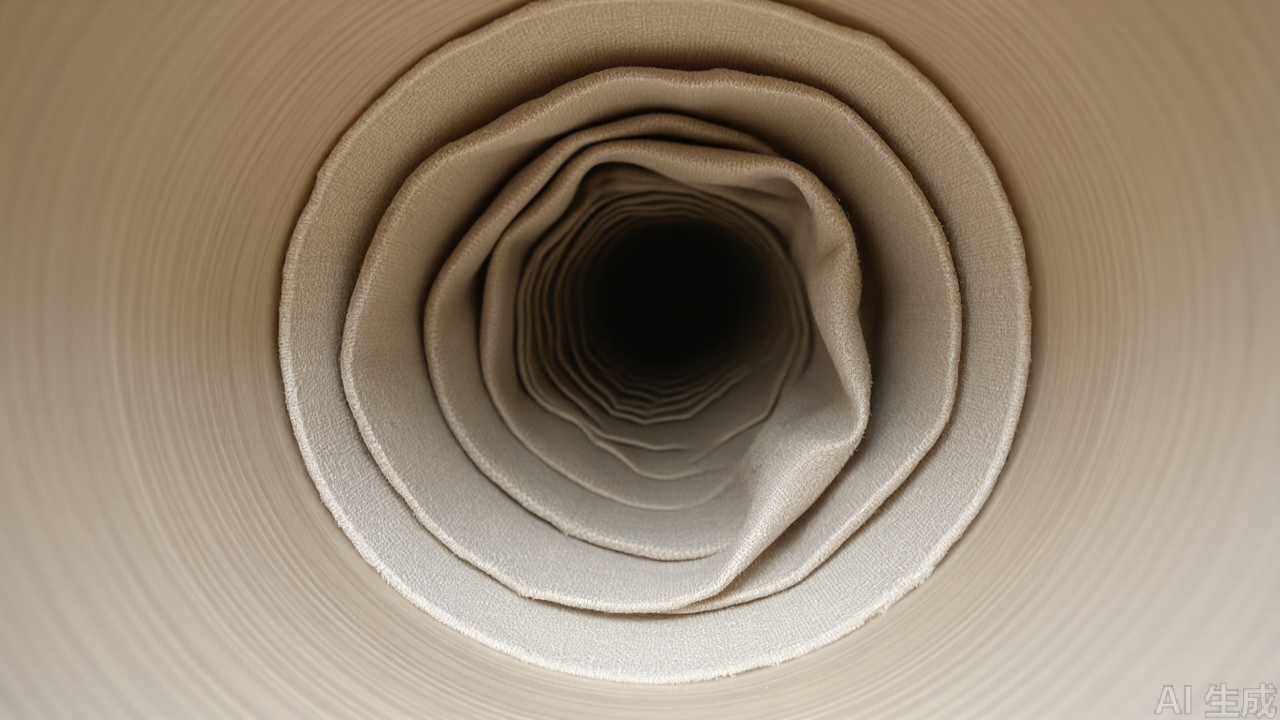
Industrial sewing machine parts operate in an environment that is hostile to most metals. Sewing machine oil, anti-rust sprays, fabric dyes, and moisture from the production floor all attack exposed surfaces. A hemming folder that corrodes will develop rough surfaces, which then snag delicate knit fabrics and disrupt the folding action.
PL-542 uses stainless steel as its primary material. The choice is not arbitrary. Stainless steel offers three properties that matter for this application:
- Corrosion resistance: The folder resists staining and pitting from oils, lubricants, and acidic or alkaline fabric treatments, maintaining a smooth surface over years of service.
- Low friction coefficient: When polished, stainless steel provides a slick surface that allows high-elasticity knit fabrics to slide through without dragging or catching. This is particularly important for lycra and spandex blends that generate significant friction against metal surfaces.
- Dimensional stability: Stainless steel does not warp or deform under the heat generated by high-speed sewing. A folder that flexes during operation will produce inconsistent fold widths.
The surface finish is as important as the base material. PL-542 undergoes precision polishing after forming, which removes microscopic burrs and irregularities from the folding channel. This polishing step is what prevents fabric scratching—a common complaint with poorly finished folders that marks light-colored knits with drag lines.
Precision Bending and Forming
The internal channel is not machined from a solid block but formed through precision bending of stainless steel sheet. This manufacturing method allows the creation of smooth, continuous curves that would be difficult or impossible to achieve through milling alone. The bending process requires specialized tooling and experienced operators to maintain consistent angles across production batches.
Each bend radius in the folding channel affects how the fabric behaves. A radius that is too tight will crease the fabric permanently; one that is too loose will allow the fabric to shift during folding. PL specifies the bend radii based on years of workshop testing with various knit fabric types, and the resulting geometry represents a practical compromise between fold security and fabric protection.
The folder's frame is reinforced at stress points—particularly the mounting bracket and the exit slot—to prevent flexing under the lateral forces exerted by fabric feed. A folder that flexes during operation will produce varying fold widths, defeating the purpose of using a mechanical guide in the first place.
Step-by-Step Installation and Setup
Correct installation is essential for the folder to perform as intended. The following procedure assumes the operator has basic familiarity with cylinder bed coverstitch machines and standard hand tools.
Mounting the Folder
The folder attaches to the machine head via a mounting bracket, typically located on the right side of the needle plate area. The bracket should be firmly secured using the provided screws or clamps. The folder body must be oriented so that its exit slot aligns with the needle centerline.
Alignment is checked by visual inspection. With the presser foot raised, look down at the needle plate. The folder's exit slot should appear centered between the outermost needles. If the slot is offset, the stitches will not land symmetrically on the folded hem, producing an unbalanced appearance.
Setting Height and Parallelism
The folder's bottom surface should be positioned 0.5 to 1.0 mm above the needle plate. This clearance prevents contact with the feed dogs during machine operation. To check this, slide a piece of thin paper between the folder bottom and the needle plate; it should pass through with light resistance.
Parallelism with the feed dogs is equally critical. If the folder slopes downward toward the exit, the fabric will be compressed against the needle plate, increasing friction and potentially causing feed problems. If it slopes upward, the fabric may lift and wander out of the folding channel. Use a small machinist's level or visual inspection with a known straight edge to verify parallel alignment.
Matching the Presser Foot
The presser foot must be compatible with the folder's exit width. A three-point five-thread machine typically uses a wide presser foot designed for coverstitch work. The foot's width should fully cover the folded hem exiting the folder. If the foot is narrower than the folded fabric, the edges will not be held down properly during stitching, resulting in skipped stitches or fabric tunneling.
For high-elasticity fabrics, a roller presser foot is sometimes preferred over a standard flat foot. The roller action reduces drag on the fabric as it exits the folder, which helps prevent stretching in the feed direction. However, roller feet require careful tension adjustment to avoid marking the fabric surface.
First Trial and Adjustment
Before starting production, run a trial seam on scrap fabric of the same type as the production material. Observe the following:
- Is the fold width consistent along the entire seam length?
- Do the needle threads land centered on the fold?
- Is the fabric feeding smoothly without wrinkling or stretching at the folder entry?
If the fold is uneven, check the adjusting screws on the folder—typically located near the entry or exit—and make small incremental changes. Adjusting screws alter the fold overlap by slightly changing the channel geometry. Turn each screw no more than a quarter turn at a time, then test again.
If the fabric wrinkles at the entry, the folder may be positioned too low, causing the fabric to bunch against the needle plate edge. Raise the folder slightly and test again. Wrinkling can also occur if the operator is pushing the fabric too aggressively; the folder works best when the operator provides steady, moderate feed pressure.

Troubleshooting: Symptoms, Causes, and Corrective Actions
Even a well-designed folder will produce defective hems when setup drifts or maintenance is neglected. The following troubleshooting guide addresses the most common problems reported in production environments. Each symptom is paired with its likely causes and the specific corrective actions to resolve it.
Symptom: Fabric Jamming at the Folder Entry
Symptom description: Fabric bunches and stops advancing at the folder mouth. The operator must stop the machine and manually clear the jam. This occurs intermittently or consistently, depending on the root cause.
Likely causes and corrective actions:
- Folder positioned too low: If the folder entry sits below the needle plate plane, the fabric edge catches on the plate edge. Loosen the mounting bracket screws, raise the folder by 0.3 to 0.5 mm, and retighten. Verify clearance with the paper test described earlier.
- Entry edges have developed burrs: Over time, fabric abrasion can create microscopic burrs on the entry edges. These catch on knit loops and stop fabric travel. Inspect the entry edges with a magnifying glass. If burrs are visible, remove them with 600-grit abrasive paper, then polish with a fine polishing compound to restore the smooth surface.
- Fabric strip wider than the entry opening: The operator may be feeding fabric that exceeds the folder's designed capacity. Measure the fabric strip width against the entry opening. Trim the fabric to width before feeding, or use a folder with a wider entry if the fabric spec cannot be changed.
- Excessive operator feed pressure: When the operator pushes fabric forcefully, it compresses at the entry and jams. Retrain the operator to use light, steady feed pressure. The machine's feed dogs should pull the fabric through the folder; the operator's role is guidance only.
Symptom: Uneven Fold Width Along the Seam
Symptom description: The folded hem measures wider at some points and narrower at others along a single seam. The variation may be gradual or abrupt.
Likely causes and corrective actions:
- Folder not parallel to the feed dogs: If the folder slopes downward or upward along its length, the fabric will not track consistently through the folding channel. Check parallelism with a straight edge placed across the folder bottom and the needle plate. Adjust the mounting bracket until the folder is level.
- Adjusting screws have drifted: Vibration can loosen the adjusting screws that set the fold overlap. Check the screws near the entry and exit. Tighten them to the original settings, then make small adjustments while running trial seams until the fold width is consistent.
- Inconsistent fabric tension during feeding: If the operator pulls or releases the fabric unevenly, the fold width will vary. This is a training issue. Emphasize steady, even feed pressure. For operators who struggle with consistency, consider adding a fabric guide or weight to maintain constant tension before the folder entry.
- Worn or deformed folding channel: If the folder has been dropped or struck, the internal channel may be bent. Compare the folder's performance on different fabric types. If the problem persists across all fabrics and after all adjustments, inspect the channel visually. A deformed channel requires folder replacement.
Symptom: Stitches Landing Off-Center on the Fold
Symptom description: The three needle threads do not straddle the folded hem symmetrically. The stitch line is shifted toward one edge of the fold, which weakens the hem and produces an unbalanced appearance.
Likely causes and corrective actions:
- Folder exit slot misaligned with needle centerline: Loosen the mounting bracket and shift the folder laterally until the exit slot is centered between the outermost needles. Retighten and run a trial seam to verify.
- Exit slot width mismatched to needle gauge: If the folder's exit slot is wider or narrower than the needle spacing, the fold cannot center under the needles. Measure the exit slot width and compare with the machine's needle gauge. If mismatched, the folder must be replaced with the correct model.
- Presser foot not covering the full fold width: If the presser foot is narrower than the folded hem, the fabric may shift laterally as it exits the folder. Replace the presser foot with a wider model that fully covers the fold.
Symptom: Fabric Stretching or Distorting During Folding
Symptom description: Knit fabric, particularly lycra or spandex blends, becomes wavy or stretched after passing through the folder. The hem does not lie flat, and the fabric edge may ripple.
Likely causes and corrective actions:
- Excessive tension on the fabric before the folder: If the operator pulls the fabric taut as it enters the folder, the fabric stretches before folding and retains that distortion. Instruct the operator to feed with minimal tension, letting the machine pull the fabric naturally.
- Folder channel too tight for the fabric thickness: A channel that is too narrow compresses the fabric, causing it to stretch or distort. If the problem occurs only with heavier fabrics, the folder may not be suitable for that material range. Use a folder with a wider channel for heavier knits.
- Differential feed settings on the machine: The coverstitch machine's differential feed may be set incorrectly, causing the fabric to stretch between the folder and the needles. Adjust the differential feed ratio according to the machine manual, typically reducing the differential for stretchy fabrics.
Symptom: Fabric Springs Open After Exiting the Folder
Symptom description: The fabric emerges from the folder with the fold partially or fully opened, so the needles do not catch the folded edge properly. This results in raw edges exposed or skipped stitches.
Likely causes and corrective actions:
- Exit slot retaining lip worn or damaged: The retaining lip holds the fold closed between the folder exit and the needle penetration point. If this lip is bent or worn, it cannot perform this function. Inspect the exit area for damage. If the lip is worn, the folder may need to be replaced or repaired.
- Folder exit too far from the needle penetration point: If the gap between the folder exit and the needles is excessive, the fabric has time to spring open before stitching. Adjust the folder position to bring the exit as close to the needles as possible without interfering with the presser foot or needle action.
- Fabric too stiff or heavy for the folder: Some fabrics with high recovery or stiffness will not hold a fold without assistance. For such materials, a folder with a longer retaining lip or a different folding geometry is required.
Symptom: Skipped Stitches or Needle Breakage
Symptom description: The machine skips stitches intermittently, or needles break during hemming operations. This is often misattributed to the machine itself when the folder is the root cause.
Likely causes and corrective actions:
- Folder exit interfering with needle descent: If the folder is positioned too low or too far forward, the needle may strike the folder's exit edge during penetration. Check the folder's clearance relative to the needle path. The folder must not extend into the needle's vertical travel zone.
- Presser foot not holding fabric firmly at the needle: If the presser foot is worn or the spring tension is insufficient, the fabric can lift slightly as the needle withdraws, causing skipped stitches. Check the presser foot condition and adjust the presser foot pressure according to the machine manual.
- Folder vibration causing fabric flutter: If the mounting bracket is loose, the folder vibrates during high-speed operation, causing the fabric to flutter at the exit. Tighten all mounting screws and verify the bracket is secure.
Maintenance and Cleaning Schedule
A hemming folder is a precision tool that requires regular attention to maintain its performance. The following schedule is based on typical single-shift production (8 hours per day). Adjust the frequency proportionally for multi-shift operations.
Daily Maintenance (End of Each Shift)
At the end of each shift, perform the following steps to prevent lint buildup and surface degradation:
- Remove the folder from the machine if accessible, or clean it in place if removal is impractical.
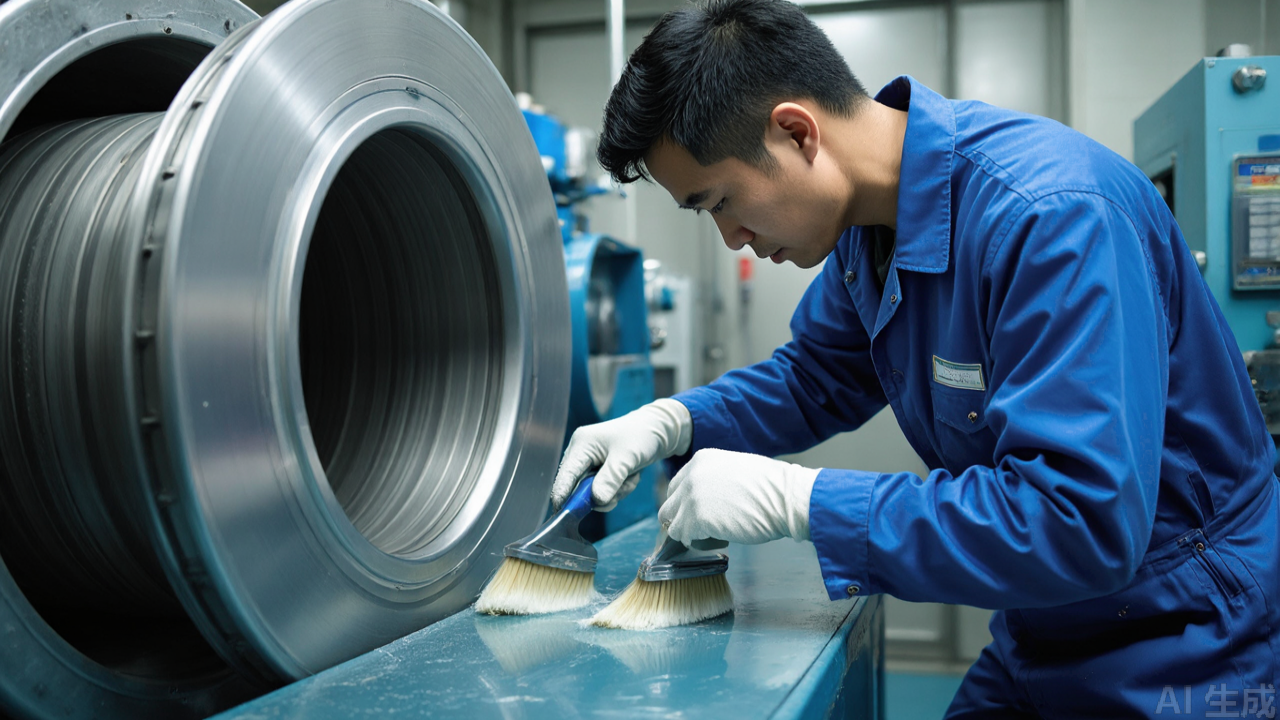
- Use a soft brush (e.g., a clean paintbrush or dedicated lint brush) to remove lint and fabric dust from the entry, folding channel, and exit slot. Pay particular attention to the internal channel, where lint accumulates invisibly.
- Wipe all external surfaces with a lint-free cloth. If oil residue is present, use a lightly oiled cloth to wipe the surface, then follow with a dry cloth to remove excess oil. Excess oil attracts lint and creates a sticky film inside the channel.
- Visually inspect the entry and exit edges for any new burrs or damage. If burrs are found, note them for weekly maintenance rather than attempting immediate repair during production hours.
Weekly Maintenance (End of the Week)
Weekly maintenance goes beyond surface cleaning to address issues that develop gradually:
- Remove the folder from the machine completely for a thorough cleaning.
- Soak the folder in a mild solvent or degreaser to dissolve accumulated oil and lint residue. Use a solvent appropriate for stainless steel—avoid acids or chlorinated cleaners that can damage the surface.
- Scrub the internal channel with a soft nylon brush. Do not use wire brushes or abrasive pads, which will scratch the polished surface.
- Rinse with clean solvent and dry thoroughly with a lint-free cloth.
- Inspect the mounting bracket screws for wear and tighten them to the specified torque. Loose screws cause misalignment and vibration.
- Check the adjusting screws for free movement. If they feel stiff or stripped, replace them before they fail during production.
- Apply a light coat of anti-rust spray to the folder's external surfaces if the machine will be idle over the weekend. Wipe off any excess before the next production shift.
Monthly Maintenance (First Working Day of the Month)
Monthly maintenance is a more thorough inspection that can prevent mid-production failures:
- Perform all weekly maintenance steps.
- Inspect the folding channel for wear using a magnifying glass. Look for areas where the metal has become polished thin, developing a bright, shiny appearance that differs from the surrounding surface. These are wear points that may eventually develop into holes or sharp edges.
- Measure the exit slot width with calipers and compare with the original specification. If the width has increased by more than 0.1 mm, the channel has worn and the folder's fold quality will degrade. Consider replacement.
- Check the folder for any signs of bending or deformation by placing it on a flat surface. The bottom surface should sit flat without rocking.
- Verify that the folder's alignment with the needle plate has not drifted. Recheck the height and parallelism settings using the procedures described in the installation section.
- If your factory uses multiple folders on different machines, rotate them if possible to equalize wear across the fleet.
Quarterly Maintenance (Every Three Months)
Quarterly maintenance addresses long-term wear and performance verification:
- Perform all monthly maintenance steps.
- Run a controlled test seam using a standard fabric type and measure the fold width at 10 points along a 1-meter seam. Compare the measurements. Variation should not exceed ±0.5 mm. If variation is greater, the folder may be worn or the machine alignment has drifted.
- Inspect the folder for any signs of corrosion, particularly if the factory environment is humid or if the folder has been exposed to chemicals. Surface discoloration that does not wipe off may indicate the beginning of corrosion.
- Document the folder's condition in a maintenance log. This record helps identify folders that are approaching the end of their service life and allows for planned replacement rather than emergency downtime.
Replacement Criteria
Even with excellent maintenance, folders eventually wear out. Replace the folder when any of the following conditions are present:
- The folding channel has worn through or developed a visible groove that catches fabric.
- The exit slot width has increased by more than 0.2 mm from the original specification.
- The folder has been bent or deformed, and attempts to straighten it have not restored proper alignment.
- Surface corrosion has created pitting that cannot be polished out.
- Consistent fold quality cannot be achieved even after all adjustments and maintenance steps have been performed.
Keeping a spare folder in stock is a practical recommendation for factories that rely heavily on this operation. The cost of a spare folder is far less than the cost of production downtime while waiting for a replacement part to be shipped.
Compatible Machines and Fabric Types
The PL-542 folder is designed for cylinder bed three-point five-thread coverstitch machines, commonly known in the industry as cylinder bed sergers or "cutting cars." These machines are distinct from flatbed coverstitch machines in that the work surface is a narrow cylinder over which the garment body is slipped.
Machine Compatibility
Typical compatible machines include cylinder bed models from Pegasus, Yamato, Jack, and similar manufacturers. The folder's mounting bracket is designed to fit standard cylinder bed machine heads, but the specific bracket configuration may vary between brands. When ordering this sewing machine spare part, confirm the machine brand and model with the supplier to ensure bracket compatibility.
It is important to note that this folder is not suitable for flatbed coverstitch machines. The mounting geometry and exit orientation are different between the two machine types. Attempting to adapt a cylinder bed folder to a flatbed machine will result in misalignment and poor stitch quality.
Fabric Suitability
The folder performs best with thin to medium-weight knit fabrics. Typical applications include:
- Cotton jersey (single jersey) for T-shirts
- Cotton-lycra blends for fitted sportswear
- Rib knit for cuffs and collars
- French terry and light fleece for sweatshirts
- Interlock knit for sleepwear
For high-elasticity fabrics, the folder's polished stainless steel channel reduces friction, which helps prevent the fabric from stretching as it is pulled through the folding zone. This is particularly important for lycra-containing fabrics that can distort permanently under tension.
Heavy fleece or thick outerwear fabrics are not recommended for this folder. The channel cross-section is calibrated for lighter materials; heavier fabrics will jam or produce bulky, uneven folds. For heavy fabrics, a folder with a wider channel and more gradual transition would be required.
Practical Selection Tips for Factories and Parts Buyers
Choosing the correct hemming folder for a specific production line requires attention to several factors beyond the basic machine type compatibility.
Confirm the Stitch Type and Needle Gauge
Three-point five-thread coverstitch machines are configured with specific needle spacings, typically 5.6 mm or 6.4 mm between the outer needles. The folder's exit slot width must match this spacing. If you are replacing an existing folder, measure the current folder's exit width and compare it with the new folder's specification. A mismatch will cause the stitches to land off-center on the folded hem.
Consider the Fabric Range in Your Production Mix
If your factory produces a wide range of fabric weights—from lightweight jersey to mid-weight fleece—you may need more than one folder with different channel cross-sections. A folder optimized for thin fabric will struggle with thicker materials, and vice versa. Discuss your typical fabric range with the parts supplier to determine whether a single folder can cover your needs or whether multiple folders are justified.
Verify Bracket Compatibility Before Ordering
As noted earlier, the mounting bracket must match the specific cylinder bed machine model. When ordering from a China sewing parts supplier, provide the machine brand and model number. Reputable suppliers—including PL, which manufactures presser feet, feed dogs, and other industrial sewing machine parts—will confirm compatibility before shipping.
Quality Indicators to Inspect on Delivery
When you receive a new folder, inspect the following before installation:
- Surface finish: The folding channel should be smooth and mirror-like, with no visible scratches, pits, or tool marks.
- Edge quality: The entry and exit edges should be rounded and burr-free. Run a cotton swab along the edges; it should slide without catching.
- Dimensional consistency: Measure the exit slot width at several points; it should be uniform within 0.1 mm.
- Rigidity: Hold the folder by its mounting bracket and apply light pressure to the exit slot. There should be minimal flex.
These checks take two minutes and can prevent hours of production downtime caused by a defective folder.
Cost Considerations
Quality folders are precision tools, and their price reflects the manufacturing tolerances and material quality. A folder that costs 20% more than a budget alternative but lasts three times longer and produces consistent folds is the more economical choice for a production environment. Factor in the cost of rework and downtime when evaluating folder prices.
However, it is also worth noting that the most expensive folder is not automatically the best for your application. The folder must match your machine, your fabric range, and your operators' skill level. A folder with too-tight tolerances may be difficult for less experienced operators to feed effectively, while a folder with more forgiving entry geometry might be more practical for a general-purpose production line.
Summary: The Folder as a Precision Production Tool
The three-point five-thread hemming folder is a deceptively simple-looking device with a precisely engineered internal structure. Its entry zone, folding channel, and exit slot each play a specific role in transforming a flat fabric edge into a consistent, ready-to-stitch hem. The stainless steel construction provides corrosion resistance, low friction, and dimensional stability—properties that are essential for high-speed, high-volume knitwear production.
For factories running cylinder bed coverstitch machines, this industrial sewing machine part directly impacts throughput and quality. Correct installation—with proper height, parallelism, and presser foot matching—is essential for achieving the folder's designed performance. When problems arise, the troubleshooting guide in this article provides a systematic approach to identifying and correcting the root cause, whether it is a setup issue, an operator technique problem, or a worn component.
Regular maintenance on a daily, weekly, monthly, and quarterly schedule prevents the gradual degradation that leads to fabric snagging, inconsistent folds, and unexpected downtime. By tracking folder condition and establishing clear replacement criteria, factory managers can plan for component replacement rather than reacting to failures.
When selecting a folder, match the exit width to your machine's needle gauge, consider the range of fabrics you produce, and verify bracket compatibility with your specific machine model. A quality folder from a reputable sewing machine parts manufacturer is an investment that pays back through reduced labor costs, consistent output, and fewer rework operations.
For parts buyers and factory managers, understanding the internal structure, troubleshooting procedures, and maintenance requirements of the hemming folder enables more informed purchasing decisions and more effective production management. The folder is not merely a passive guide—it is an active participant in the sewing process, and its condition and setup directly determine the quality of every hem that passes through it.
Need this part for your workshop?
Get a Free Quote on WhatsApp: +86 137 3825 6697Browse the full catalog at pinseam.com · Free 2026 full catalog (PDF) · Related guide: magnetic seam guide
PL (Professional Leader) supplies sewing machine parts for industrial lockstitch, overlock and interlock machines, including the industrial presser foot range, needle plates, feed dogs and related presser foot accessories.
Edited by the technical team at PL (Professional Leader) — high-quality sewing machine accessories from China. About our factory | Catalog: pinseam.com | WhatsApp: +86 137 3825 6697
📢 New arrivals & factory updates on Telegram — join our channel: t.me/plsewingparts
Explore Our Parts Guides
- sewing machine accessories, needle threaders & thread guides
- industrial & magnetic seam guides
- presser foot guide: types & compatibility
- industrial presser feet for factory lines
- roller & rolled hemmer presser feet
- industrial sewing machine parts & spare parts
- wholesale sewing machine parts, factory direct
- about PL (Professional Leader)
Questions about a specific part? Chat with us on WhatsApp +86 137 3825 6697 — factory direct, reply within hours.

Comments
Post a Comment