Sewing Machine Presser Foot for Collar Re-setting: 0.1/0.2 mm Seam Allowance Installation and Use
This article explains how to install, adjust, and run the PL (Professional Leader) 4K-grade high-low presser foot (item 1688-0591), a sewing machine accessory built for collar re-setting and topstitching at 0.1 mm and 0.2 mm seam allowances. You will find the working mechanism, material and tolerance details, a step-by-step installation sequence, pressure and stitch-length settings for thin and thick fabrics, and the mistakes that most often cause wavy topstitching or skipped stitches. The guidance applies to standard industrial lockstitch machines used in garment factories, sample rooms, and custom tailoring workshops.
Related guide: presser foot — types, fitting and machine compatibility.
Why the Presser Foot Matters on Collar Re-setting and Edge Topstitching
Collar re-setting is one of the least forgiving operations on a lockstitch machine. Two or three layers of fused interlining, shell fabric, and sometimes a separate under-collar piece are joined, then topstitched at a fixed distance from the folded edge. On a shirt collar that distance is typically 0.1 mm to 0.2 mm outside the seam line; on a suit lapel or a coat collar it may run to 0.5 mm or more. The eye reads that line as a quality signal. A variation of 0.3 mm across the length of a collar is visible on the rack.
The standard presser foot supplied with most lockstitch machines is a single-toe foot with a flat sole and a narrow slot. It presses the whole stack with one spring load. That works when the layers are the same thickness. It does not work when the collar edge is three layers thick and the collar roll is two layers, or when a thin voile facing meets a heavier fusible. The foot tips forward on the thick section, the thin section lifts, and the feed dog pulls the bottom ply faster than the top ply. The result is a shifted edge, a wavy line, or a pucker that cannot be pressed out.
A high-low presser foot addresses this mechanically rather than through operator skill. It is one of the more useful specialised sewing machine accessories for any factory running collar and placket work at volume, because it removes a variable that operators otherwise compensate for by hand.
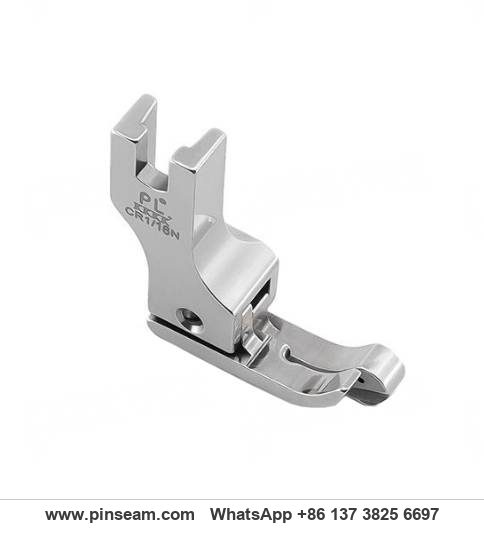
How the High-Low Presser Foot Works
Two sole heights, two pressure zones
The foot has two toes of different heights, or a single sole with a stepped underside, depending on the variant. The taller toe rides on the thicker part of the assembly; the shorter toe contacts the thinner part. Because both toes are rigidly connected to the same shank, the foot cannot rock. Each toe applies pressure proportional to its contact area, so the thin ply is held down instead of being dragged.
In practice this means the top and bottom plies advance at the same rate through the feed dog. Edge alignment is maintained without the operator steering the work.
The guide edge sets the seam allowance
The front of the foot carries a guide groove or a raised limiting edge. The folded collar edge runs against this guide. The distance from the guide to the needle centre is fixed at the factory, which is what produces a repeatable 0.1 mm or 0.2 mm seam allowance. The operator's job shifts from judging distance by eye to keeping the edge in contact with the guide.
Spring pressure and sole geometry handle the thickness change
Where the foot meets a step in the fabric — the point where the collar roll transitions to the collar point, for example — the spring-loaded shank allows the foot to rise slightly while maintaining contact. A rigid foot would lose contact entirely at that moment. The sole is also relieved at the front so the fabric can pass under without being trapped.
Specifications, Materials, and What "4K-Grade" Means in Practice
The term 4K-grade is a manufacturer's quality classification, not an international standard. In this context it refers to a tolerance band on the critical dimensions and a surface finish specification. Buyers evaluating any industrial sewing machine parts should ask for the actual numbers rather than the label.
- Seam allowance options: 0.1 mm and 0.2 mm from guide edge to needle centre. Confirm which variant you are ordering; they are not interchangeable by adjustment.
- Material: hardened alloy steel or wear-resistant alloy, depending on the variant. Hardness in the working range is typically cited at HRC 58–62 for the sole contact area.
- Surface finish: working faces ground and polished. A polished sole reduces friction against the fabric, which matters more on coated or tightly woven fabrics than on cotton.
- Mounting: standard screw-fixed shank, compatible with common industrial lockstitch machines including Juki, Brother, Standard, and Zoje pattern machines.
- Needle clearance: the needle slot is sized for standard DB×1 and DP×5 needles in common sizes. Very large needle sizes can contact the slot wall on some variants.
Two practical checks when a shipment arrives: measure the guide-to-needle distance with a feeler gauge or a calibrated rule under magnification, and run a fingernail along the sole to feel for burrs. A burr on the sole will mark fabric within the first few hundred pieces.
Installation: Step-by-Step
Before you touch the machine
Switch off the machine and, on a servo-driven head, wait for the position sensor to settle. Remove the needle to eliminate any chance of contact during fitting. Confirm that the replacement foot's shank profile matches the presser bar on your machine — most industrial lockstitch heads use a slotted bar with a single screw, but check before ordering in quantity.
Removing the existing foot
- Raise the presser bar to its top position using the hand lifter or the knee lifter.
- Loosen the presser foot screw with the correct driver size. A worn driver will round the screw head, which is a common problem on machines that have run for years without foot changes.
- Slide the old foot off the bar. Note the position of any spacer or washer.
Fitting the high-low foot
- Slide the new foot onto the presser bar from below, seating the shank slot over the bar.
- Tighten the screw finger-tight first, then check that the foot sits level relative to the needle plate. A foot that is visibly tilted will not produce a consistent seam allowance.
- Lower the presser bar slowly by hand and watch the gap between the sole and the needle plate. With the foot down and no fabric present, the sole should rest flat. A gap at the front indicates the shank needs to be pushed up slightly before final tightening.
- Tighten the screw firmly. Re-check level after tightening; the foot can shift as the screw seats.
Aligning the needle and feed dog
Reinstall the needle. Rotate the handwheel through one full cycle and watch the needle pass through the foot slot. It must clear both sides of the slot without contact. If the needle touches, the foot is not centred on the bar — loosen and reposition rather than bending anything.
Check the feed dog next. The feed dog should be centred in the foot slot and should not contact the sole at any point in its travel. On machines where the feed dog height has been adjusted for heavy fabric, the dog can strike a low-profile foot. Lower the feed dog slightly if there is contact.
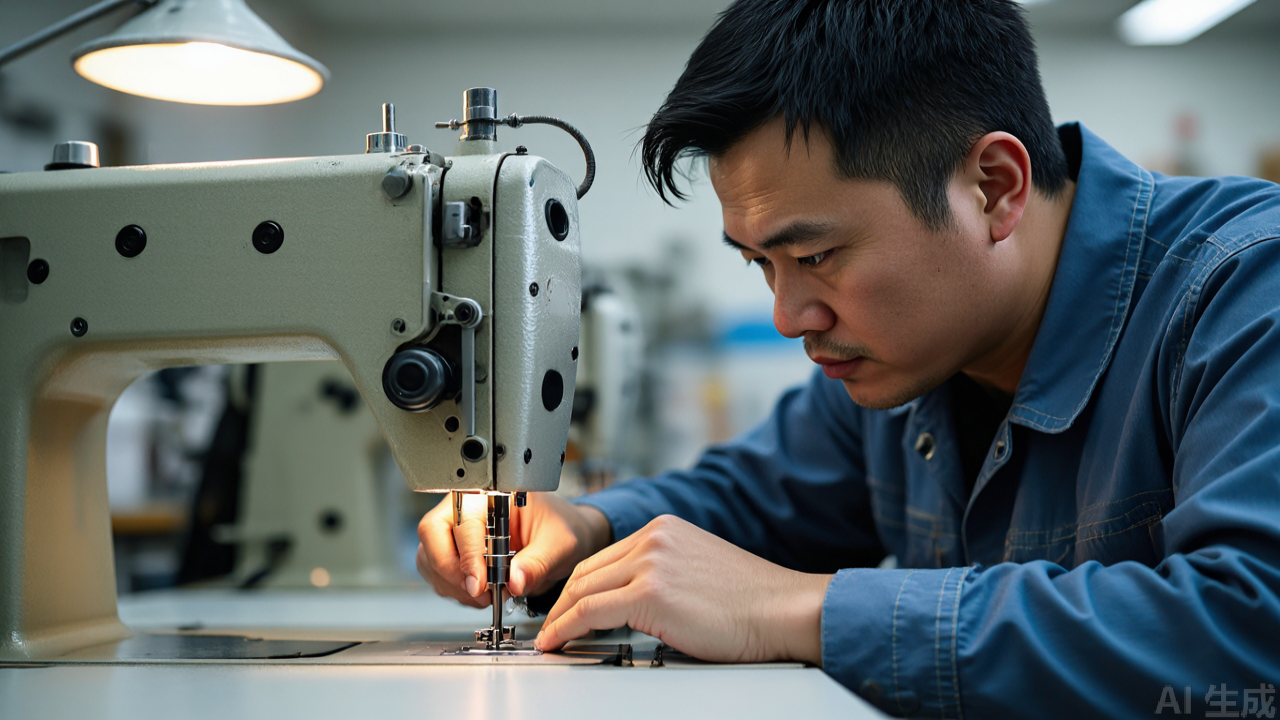
Setting Pressure, Stitch Length, and Thread Tension
Presser foot pressure
Start with the pressure at the low end of the machine's range for thin fabric and increase only as needed. Excessive pressure on voile, chiffon, or lightweight shirting causes the fabric to be compressed and then relax after stitching, producing a wavy seam. On the high-low foot, over-pressure also defeats the purpose of the two-height sole because both toes are pressed hard enough to flatten the thickness difference.
A useful test: place a strip of the actual fabric under the foot, lower it, and try to pull the strip out sideways. It should resist but move. If it will not move at all, the pressure is too high.
Stitch length
For topstitching at 0.1 mm to 0.2 mm seam allowance, a stitch length of 2.0 mm to 2.5 mm is typical on shirt collars. Shorter stitches on thin fabric tend to perforate and pucker; longer stitches look coarse on a fine edge. On coat and suit collars, 2.5 mm to 3.0 mm is common.
Thread tension
Set the bobbin tension first, then adjust the upper tension to bring the knot into the fabric. When switching from a thin to a thick assembly on the same machine, the upper tension usually needs a small reduction because the thicker stack requires more thread per stitch. Re-check on a scrap piece of the same construction, not on a single-layer offcut.
Which Machines and Fabrics This Foot Suits
The foot is designed for single-needle industrial lockstitch machines with a standard screw-fixed presser bar. It is not intended for overlock machines or coverstitch machines, and it will not fit walking-foot or unison-feed machines without a specific shank adaptation, because those machines have a different bar and foot drive arrangement.
On fabric, the high-low design is most valuable where thickness changes within a single seam. That includes:
- Shirt, blouse, and dress collars and collar stands
- Suit and coat lapels, including the notch and point
- Cuffs and plackets where a folded edge meets a flat panel
- Flap pockets and pocket mouths with interfacing
- Home textile and bag panels where thin lining meets heavy outer fabric
It is less useful on single-thickness flat seams, where a standard foot with a wider sole gives better control, and on very stretchy knits, where a walking foot or a differential feed machine is the better answer regardless of the foot fitted.
Common Mistakes and Maintenance
Mistakes seen in production
- Using the wrong variant for the job. A 0.1 mm foot cannot be adjusted to give 0.2 mm. If a style calls for both, you need both feet, or a machine change.
- Over-tightening the mounting screw. This distorts the shank and tilts the foot. Firm is enough.
- Ignoring the feed dog. A worn or misaligned feed dog will cause ply shift no matter how good the foot is. Check the dog teeth for wear at the same time.
- Running the guide edge dry on coated fabric. Some PU-coated and laminated fabrics grab the guide. A very small amount of silicone lubricant on the guide face — applied to the foot, not the fabric — reduces drag. Test first on scrap.
- Assuming the foot fixes tension problems. It does not. Ply shift from incorrect tension is a different failure from ply shift caused by foot geometry.
Maintenance routine
Clean the sole and the guide groove at every shift change on high-volume lines. Lint and thread fragments pack into the guide and effectively change the seam allowance by a few tenths of a millimetre, which is enough to fail inspection. Use a soft brush and compressed air; avoid metal scrapers, which will scratch the polished face.
Inspect the sole monthly under magnification for burrs, flat spots, and wear at the guide edge. A guide edge that has worn round will let the fabric ride up and out. Store spare feet in the original packaging or in a compartmented tray — a foot dropped on a concrete floor can be bent out of tolerance, and a bent foot is not repairable in the workshop.
Check the spring tension of the shank periodically. A fatigued spring lets the foot float on thick sections, which reintroduces the ply shift the foot was bought to eliminate.
Practical Selection Tips for Buyers
When specifying this type of foot for a production line, work from the operation backwards.
- Measure the required seam allowance on the actual sample. Do not specify from a tech pack alone. A 0.1 mm callout on a drawing often becomes 0.15 mm to 0.2 mm once the collar is turned and pressed.
- Confirm the machine interface before ordering. Presser bar profile, screw size, and bar diameter vary between brands and even between model generations of the same brand.
- Order the variant, not the family. State the seam allowance and the machine model on the purchase order. Mixed shipments of 0.1 mm and 0.2 mm feet that are not individually labelled cause line stoppages.
- Ask for dimensional data, not grade labels. A supplier who can provide a measured guide-to-needle dimension and a hardness figure is easier to audit than one who only offers a quality tier name.
- Buy a small quantity first and run a trial. Fit the foot, run 50 pieces of the actual style, and measure the seam allowance at the collar point, the roll, and the stand. Consistency across those three zones is the real test.
- Keep a spare per machine. Foot changes mid-shift cost more in downtime than the part costs to stock.
For factories running mixed orders, a practical approach is to standardise on one or two seam allowance variants across the collar line and adjust the pattern or the needle position for the rest, rather than stocking every variant. Fewer part numbers on the shelf means fewer wrong-foot errors at the machine.
As with any component in the sewing machine spare parts chain, the value of this presser foot is realised only when it is matched correctly to the machine, the fabric, and the operation. Fitted and set up properly, it removes a manual skill variable from collar re-setting and edge topstitching, which is exactly what a production line needs when the tolerance is measured in tenths of a millimetre. Buyers evaluating presser foot types for collar work should treat the high-low, guide-edged design as a process tool rather than a generic accessory, and specify it with the same care as a needle plate or feed dog.
PL (Professional Leader) supplies sewing machine parts for industrial lockstitch, overlock and interlock machines, including the industrial presser foot range, needle plates, feed dogs and related presser foot accessories. The full sewing machine parts and presser foot catalogue is listed at pinseam.com.
Need this part for your workshop?
Get a Free Quote on WhatsApp: +86 137 3825 6697Browse the full catalog at pinseam.com · Free 2026 full catalog (PDF) · Related guide: presser foot
📢 New arrivals & factory updates on Telegram — join our channel
Edited by the technical team at PL (Professional Leader) — high-quality sewing machine accessories from China. About our factory | Catalog: pinseam.com | WhatsApp: +86 137 3825 6697 | Telegram: @plsewingparts
Explore Our Parts Guides
- sewing machine accessories, needle threaders & thread guides
- industrial & magnetic seam guides
- presser foot guide: types & compatibility
- industrial presser feet for factory lines
- roller & rolled hemmer presser feet
- industrial sewing machine parts & spare parts
- wholesale sewing machine parts, factory direct
- about PL (Professional Leader)
Questions about a specific part? Chat with us on WhatsApp +86 137 3825 6697 — factory direct, reply within hours.


Comments
Post a Comment