Presser Foot for Zipper Seams: 0.3 Offset, Teflon Sole, F0/S1 Mounts
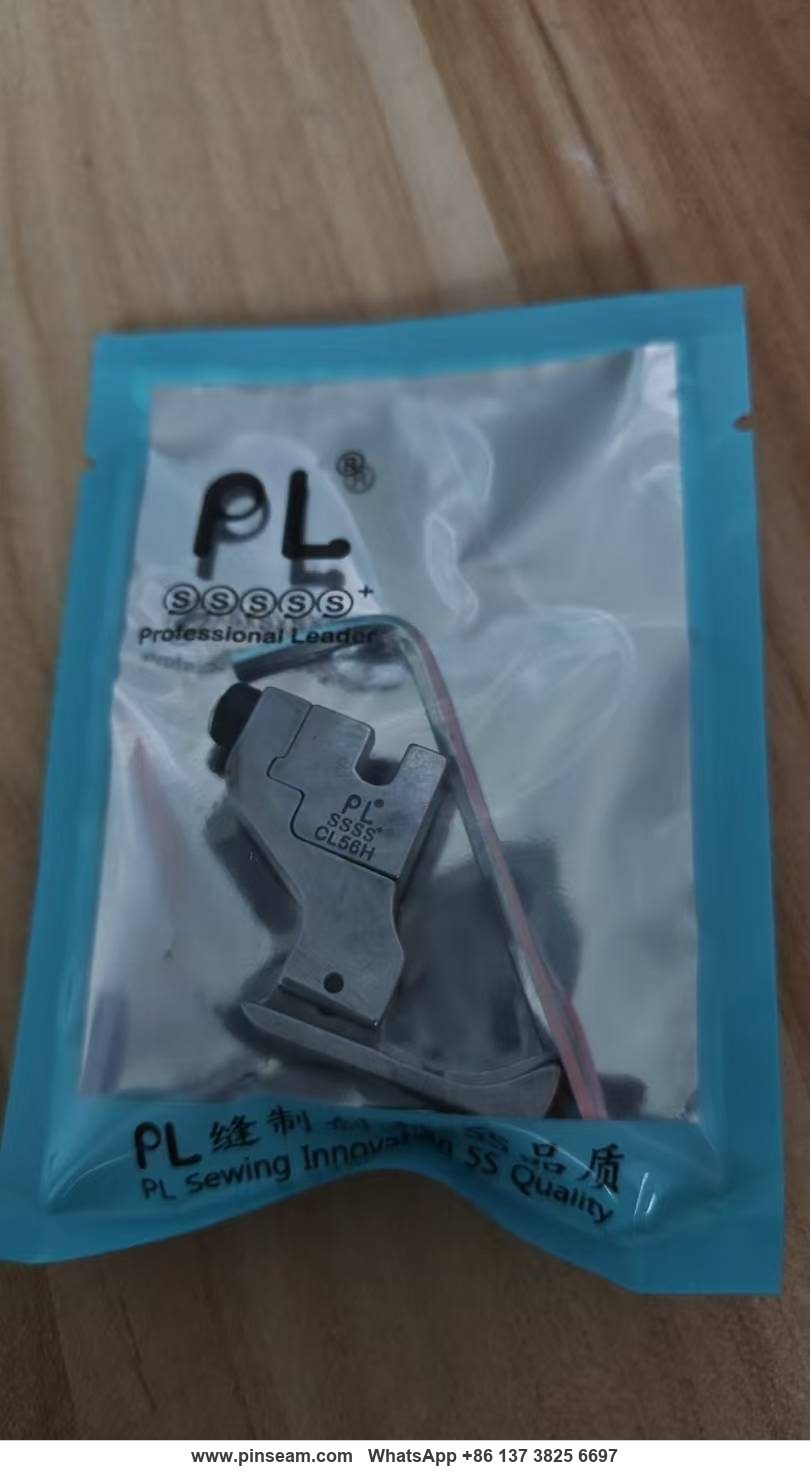
A 0.3 zipper presser foot is a specialised sewing machine accessory whose performance depends almost entirely on internal geometry — the offset between needle and foot edge, the friction behaviour of the sole, and the clearance left for raised material. This article explains how the PL 0.3 zipper presser foot (F0/S1 variants, Teflon-coated sole, side plastic roller) works, how to install and adjust it on industrial lockstitch machines, and how to diagnose the faults that appear when it is set up incorrectly. It also provides wear benchmarks and selection data for garment factory managers, sewing technicians, and parts buyers evaluating this presser foot type for production.
Related guide: presser foot — types, fitting and machine compatibility.
What a 0.3 Zipper Presser Foot Solves
On a standard lockstitch machine, the default presser foot has a wide, flat sole designed to hold fabric down across the full width of the stitch plate. It works for flat seams and fails in three specific situations that appear constantly in garment and bag production.
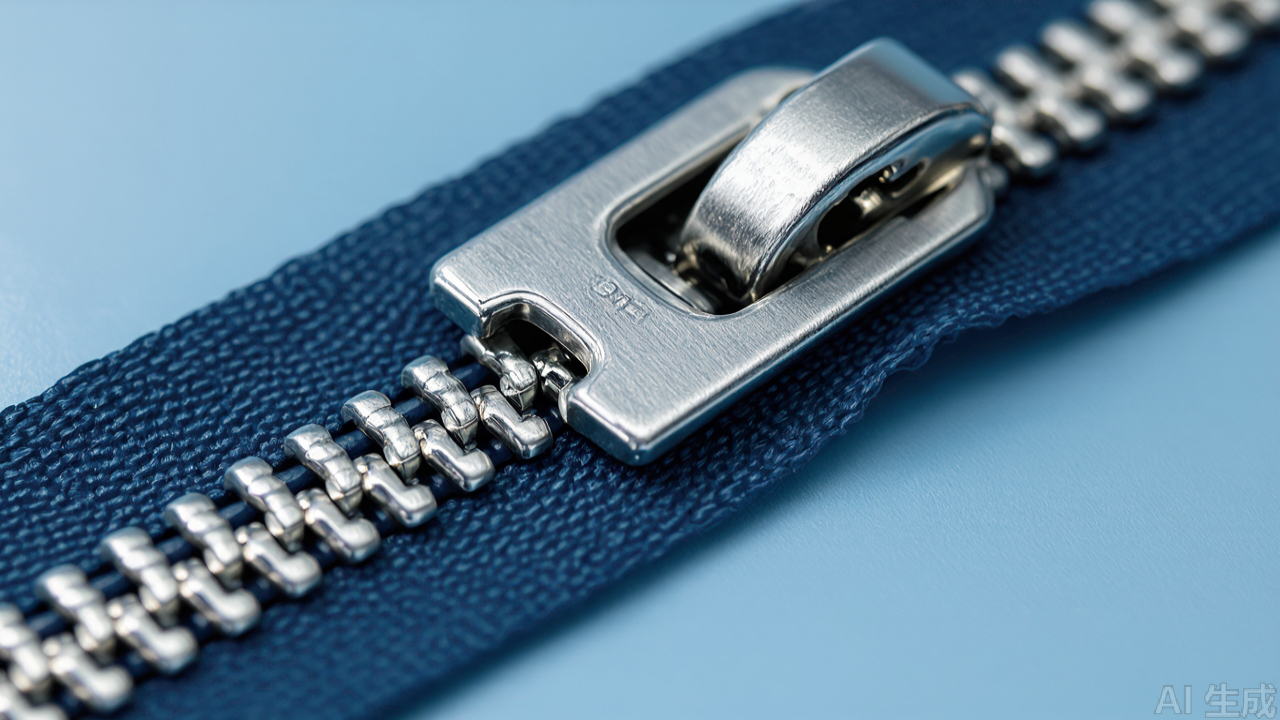
The first failure is zipper attachment. A zipper is not flat. The teeth form a raised ridge, and the tape on either side sits at a different height. A flat presser foot rides on top of the teeth and lifts the tape off the feed dog, so the fabric slips and the stitch line wanders away from the zipper edge. The 0.3 designation refers to the nominal offset between the needle drop point and the inner edge of the foot — approximately 0.3 mm of clearance — which lets the foot sit against the zipper teeth and guide the seam at a consistent distance.
The second failure is friction. Coated fabrics, PU leather, and laminated materials stick to a bare metal sole. The fabric drags, the feed dog cannot advance it evenly, and the result is uneven stitch length and puckering. This is where the Teflon coating on the sole matters.
The third failure is material bunching under the foot. When several layers of fabric, zipper tape, and piping pass under a low-clearance foot, the material jams. A wide-seam foot body leaves more vertical room for raised structures to pass through.
This presser foot addresses all three problems in one part. That is why it appears on machines running zipper insertion, bag openings, and heavy multi-layer seams rather than on general straight-seam stations.
How the Mechanism Works: Geometry, Coating, and Roller
The 0.3 Offset and Needle-to-Teeth Clearance
The defining dimension of a zipper foot is the distance from the needle drop point to the inner edge of the foot. On this 0.3 model, that distance is nominally 0.3 mm. In practice, the operator sets the zipper teeth to run along the inner edge of the foot, and the needle then stitches a fixed distance from the teeth. Because the foot edge physically contacts the teeth, the operator can feel and hear the zipper running against the foot — a mechanical feedback that a flat foot cannot provide.
This is the core principle: the presser foot for sewing machine zipper work functions as a lateral guide, not just a hold-down. The zipper itself becomes the reference edge. As long as the teeth stay against the foot edge, the seam stays parallel to the zipper. This removes the need for pre-marking or chalk lines on most zipper operations.
The 0.3 figure is not arbitrary. It is the practical clearance that allows the foot edge to ride against the zipper teeth without the needle striking the tooth coil, and without the foot edge riding up onto the teeth. Below roughly 0.2 mm, the needle risk rises sharply on coarse-tooth zippers. Above roughly 0.5 mm, the operator loses the tactile reference and the seam drifts. The 0.3 band is the working compromise for standard garment zippers.
Why the Sole Is Teflon-Coated
Teflon (PTFE) has one of the lowest friction coefficients of any solid coating used in sewing machine parts. When the sole slides over fabric, the resistance between foot and material drops sharply compared to bare steel or chrome.
This matters because the presser foot and the feed dog are in competition. The feed dog pushes the fabric forward from below; the presser foot holds it down from above. If the friction between foot and fabric is high, the foot drags backward against the feed motion, and the fabric stretches or the stitch length shortens. Lower friction on the sole means the feed dog wins more consistently, which produces even stitch length and less distortion on stretchy or coated materials.
The coating also resists adhesive buildup. Fabrics with fusible interlining, coated backings, or adhesive residues tend to deposit material on a bare metal sole. Over a shift, that buildup changes the effective height of the foot and the seam quality drifts. Teflon resists this accumulation, so the foot behaves the same at hour eight as it did at hour one.
The Side-Mounted Plastic Roller
The plastic roller sits on the side of the foot body, positioned so that it contacts the fabric or the zipper tape edge and rotates as material passes. Its function is to convert sliding friction into rolling friction at the point where the material is most likely to catch.
On zipper insertion, the point of highest resistance is usually the edge of the zipper tape or the transition where the tape meets the garment panel. A fixed foot edge scrapes against this transition. A roller rolls over it. The practical effect is smoother material flow at the exact point where jams and skipped stitches tend to start.
The roller also reduces the tendency of the foot to push the zipper tape sideways. Because the roller rotates rather than drags, lateral force on the tape is lower, and the tape stays aligned against the foot edge.
Wide-Seam Body Clearance
The foot body on this model is built with a wider opening beneath the sole than a standard zipper foot. This clearance allows raised structures — zipper teeth, piping cord, folded seam allowances, webbing — to pass under the foot without lifting it off the fabric.
When a foot lifts off the fabric, it loses contact with the feed dog's material path and the stitch quality degrades immediately. The wide-seam design keeps the sole in contact with the flat portions of the material while the raised portions pass through the opening.
Internal Structure and Materials
Understanding what the part is made of helps buyers judge service life and suitability. The construction breaks down into four elements.
- Sole plate: Steel base with a Teflon (PTFE) coating applied to the fabric-contact surface. The steel provides rigidity so the foot does not flex under pressure; the coating provides the low-friction surface.
- Roller: Plastic, side-mounted, rotating on a pin or axle integrated into the foot body. Plastic is used rather than metal because it is lighter, will not scratch the zipper tape or coated fabric, and does not rust.
- Body and shank: Machined steel, with the mounting interface cut to either F0 or S1 specification depending on the variant.
- Mounting screw interface: A slotted shank that fits over the presser bar and is locked with the machine's presser foot screw.
The Teflon coating is the wear-critical element. It is not a plating that can be re-applied in the workshop; once it is scratched through to the steel, the friction benefit at that spot is lost. This is why cleaning practice matters, and it is covered later in this article.
The plastic roller is the other wear item. It is a consumable in the sense that it will eventually develop flat spots or wear unevenly if it is allowed to run with thread lint packed around the axle. In most factory conditions, the roller outlasts the coating if it is kept clean.
F0 and S1: Choosing the Correct Mounting Specification
The two variants — F0 and S1 — exist because presser bar dimensions are not universal across lockstitch machine brands and generations. F0 and S1 refer to the shank geometry and the way the foot interfaces with the presser bar and the foot screw.
In practical terms, the difference affects:
- The width and shape of the shank slot that fits over the presser bar
- The position of the screw contact face
- Whether the foot sits at the correct height relative to the needle plate when the presser bar is at its normal working position
Fitting the wrong variant is not a subtle error. A foot with the wrong shank geometry will either not seat fully on the bar, sit at the wrong height, or tilt slightly. Any of these conditions changes the angle between the sole and the fabric, which changes feed behaviour and seam quality. On a zipper foot, where the whole function depends on the foot edge running parallel to the teeth, a tilted foot produces a seam that drifts.
Before ordering, technicians should confirm the machine model and, where possible, the presser bar specification from the machine manual or by measuring the existing foot shank. Buying by machine model alone is risky because the same model line can use different presser bar configurations across production years.
Installation: Step by Step
Preparation
- Switch off the machine and, on machines with a servo motor, confirm the motor is de-energised before working near the needle.
- Raise the presser bar to its highest position using the presser lever.
- Remove the needle to avoid injury and to give clearance for the foot.
- Remove the existing presser foot by loosening the presser foot screw.
Mounting the Foot
- Select the F0 or S1 variant that matches the machine's presser bar.
- Slide the foot shank onto the presser bar. Push it up until it seats fully — do not leave a partial engagement, because the screw will not hold it securely.
- Tighten the presser foot screw firmly. The foot should not rotate or shift when light hand pressure is applied.
- Reinstall the needle and check needle-to-foot clearance. The needle must pass through the needle slot without touching the foot at any point in the stitch cycle.
Initial Adjustment
- Turn the handwheel slowly by hand through a full stitch cycle. Watch the needle, the foot, and the feed dog. There must be no contact between the needle and the foot, and the foot must not collide with the needle plate or the feed dog.
- Lower the foot onto a piece of the actual production fabric. Check that the sole sits flat, with no gap at the front or back edge.
- Set presser foot pressure. For zipper work on medium fabric, moderate pressure is usually correct. Too much pressure increases drag and can flatten the zipper tape; too little allows the material to lift.
- Run a test seam on scrap material with the actual zipper. Check that the stitch line stays parallel to the teeth and that stitch length is even.
If the seam drifts toward or away from the zipper, the cause is usually one of three things: the foot is not seated fully on the bar, the foot is tilted because of a shank mismatch, or the operator is not maintaining contact between the zipper teeth and the foot edge. Check the mounting first, then the technique.
Machines and Materials This Presser Foot Suits
Machine Compatibility
This presser foot is designed for computer-controlled lockstitch machines (computerised flat-bed sewing machines) used in industrial production. It mounts with a screw-fastened presser bar connection, which is the standard interface on this class of machine. It is not intended for overlock machines or coverstitch machines, which use a completely different foot mounting system and a different sewing mechanism.
Within the lockstitch category, suitability depends on the presser bar specification rather than the machine's electronics. A machine being "computerised" affects motor control, stitch programming, and automatic functions — it does not change the mechanical presser bar interface. This is why F0 and S1 variants exist: to cover the mechanical differences between machines.
Fabric and Application Suitability
- Woven cotton and blends: Straightforward. The Teflon sole provides a modest benefit; the main value is the zipper guidance.
- Chemical fibre and synthetic fabrics: Good match. These materials generate more friction against metal and benefit more from the coating.
- Leather and PU leather: Strong match. Leather drags heavily on bare metal, and the Teflon sole plus roller makes a noticeable difference to feed consistency. The plastic roller also avoids marking the leather surface.
- Coated and laminated fabrics: Strong match. These are the materials most prone to sticking, and the coating's anti-adhesive property prevents buildup.
- Multi-layer and heavy seams: Suitable where the wide-seam clearance allows the raised section to pass. Very thick leather or heavy webbing may still require a dedicated heavy-duty foot with greater clearance.
Typical Production Applications
- Invisible and exposed zipper insertion on dresses, trousers, and jackets
- Bag and handbag zipper openings, including zipper windows
- Garment openings where a zipper meets a folded or piped edge
- Any seam where a raised structure must pass under the foot while the sole maintains contact with flat material
Fault Diagnosis: Symptom, Cause, Correction
Most problems attributed to a faulty presser foot are actually setup or technique problems. The table below maps the symptoms technicians report most often to their probable causes and the correction that resolves them.
- Seam drifts away from the zipper teeth. Cause: operator not maintaining contact between teeth and foot edge, or foot not seated fully on the presser bar. Correction: reseat the shank fully and tighten the screw; retrain the operator to feel the teeth against the foot edge and reduce sewing speed.
- Seam drifts toward the teeth, needle strikes the coil. Cause: offset too small for the zipper size in use, or lateral play in the presser bar. Correction: confirm the 0.3 specification suits the zipper; check presser bar for wear; consider a larger offset foot for coarse-tooth zippers.
- Uneven stitch length, fabric gathering behind the foot. Cause: excessive presser foot pressure, or Teflon coating worn through at the front edge. Correction: reduce pressure to the minimum that holds the material flat; inspect the sole under good light and replace the foot if the coating is breached.
- Material sticks and drags on the sole. Cause: adhesive residue or fusible interlining buildup on the coating. Correction: clean the sole with a soft cloth and a suitable solvent; do not scrape.
- Roller does not rotate. Cause: thread lint or dust packed around the axle. Correction: clear with a soft brush or compressed air; if the roller still binds, replace the foot.
- Roller rotates but material still catches at the tape edge. Cause: roller worn out of round, or roller positioned away from the contact point. Correction: check roller roundness with a finger; replace the foot if flat spots are present.
- Skipped stitches on zipper tape. Cause: foot lifting off the fabric as the tape passes, or needle-to-foot clearance too tight. Correction: verify the wide-seam opening clears the tape; check needle clearance by hand-cycling the machine.
- Foot will not sit flat on the fabric. Cause: wrong F0/S1 variant, or shank slot deformed by over-tightening. Correction: confirm the variant against the presser bar specification; replace a deformed foot.
- Foot loosens during operation. Cause: presser foot screw not tightened sufficiently, or screw thread worn. Correction: retighten; replace the screw if the thread no longer holds.
- Zipper tape pushed sideways during sewing. Cause: high sole friction from a worn coating, or excessive pressure. Correction: reduce pressure; replace the foot if the coating is worn.
The pattern in this table is consistent: drift and skipped stitches trace back to mounting and technique, while drag and sticking trace back to the coating and the roller. Diagnosing by symptom category narrows the cause quickly and avoids replacing a foot that only needs reseating.
Wear Benchmarks: Coating and Roller Life
Buyers frequently ask how long this type of presser foot lasts. There is no single answer, because life depends on fabric abrasiveness, stitch volume, pressure setting, and cleaning discipline. The figures below are practical planning benchmarks for production environments, not guarantees.
Teflon Coating
- Light duty (woven cotton and blends, moderate speed, daily cleaning): 6 to 12 months of single-shift operation before measurable friction loss.
- Medium duty (synthetics, light coated fabric, single shift): 3 to 6 months.
- Heavy duty (leather, PU, laminated fabric, abrasive coatings, double shift): 1 to 3 months.
- Failure mode: gradual wear at the front edge, where contact pressure is highest, progressing to visible steel through the coating. Performance degrades before the coating is fully breached, so inspection should be routine rather than reactive.
Plastic Roller
- With daily lint clearing: typically outlasts the coating; 6 to 18 months depending on load.
- Without cleaning: can fail in weeks. Lint packed around the axle stops rotation, and a stationary roller develops a flat spot under load.
- Failure mode: loss of rotation first, then flat spotting, then increased drag at the tape edge. A roller that no longer turns freely should be treated as failed even if it looks intact.
Planning Implications
On high-volume zipper lines, the practical approach is to treat the foot as a consumable with a replacement interval based on stitch volume rather than waiting for visible failure. A worn coating degrades seam quality gradually, which is harder to detect on the floor than a broken part. Keeping a small buffer stock of the correct variant avoids downtime when replacement is due.
Comparison: This Foot Against Alternatives
Buyers often weigh this foot against three alternatives. The comparison below is based on mechanism and application, not brand.
- Standard flat presser foot: No zipper guidance, no low-friction sole, no roller. Suitable for flat seams only. On zipper work it produces drift and drag. Cheaper, but not a substitute.
- Conventional metal zipper foot (no coating, no roller): Provides the offset guidance but not the friction reduction. Adequate on plain woven fabric at moderate speed. On leather, coated fabric, or high-speed zipper insertion, drag and sticking remain problems.
- Compensating (walking) presser foot: Uses a separate upper feed mechanism to move material from above and below simultaneously. Excellent for multi-layer, bulky, or slippery material and for preventing ply shift. More complex, more expensive, and requires a machine with the matching mechanism. It does not provide the zipper-edge guidance that a 0.3 offset foot does, so the two are complementary rather than alternatives.
- This 0.3 Teflon roller foot: Combines the offset guidance of a zipper foot with the friction reduction of a coated sole and the rolling contact of a side roller. Best fit where zipper insertion meets coated, leather, or multi-layer material. Over-specified for plain flat seams.
When Each Option Is the Right Choice
- Plain woven fabric, flat straight seams: standard flat foot.
- Zipper insertion on plain woven fabric, moderate speed: conventional metal zipper foot is adequate.
- Zipper insertion on leather, PU, coated, or laminated fabric: this 0.3 Teflon roller foot.
- Bulky multi-layer seams with ply-shift risk, regardless of zipper: compensating foot, with a zipper foot used for the zipper step where guidance is needed.
Common Mistakes and Maintenance
Installation Mistakes
Partial shank engagement. The most common error is sliding the foot onto the presser bar but not pushing it fully up before tightening the screw. The foot appears secure but sits slightly low, which changes the angle to the feed dog and causes erratic feed. Always seat the shank fully.
Wrong variant. Using an F0 foot on an S1 presser bar (or the reverse) usually results in a foot that either will not seat or seats at the wrong height. If the foot cannot be made to sit flat on the fabric with the presser bar in its normal position, the variant is probably wrong.
Over-tightening the presser foot screw. This can deform the shank slot and make the foot difficult to remove later. Firm contact is enough; the screw does not need to be forced.
Ignoring needle clearance. A foot that is correctly mounted but slightly offset can bring the needle into contact with the foot edge. Always check clearance by hand before running the machine under power.
Operating Mistakes
Running at full speed on zipper work. Zipper insertion benefits from reduced speed. At high speed, the operator has less control over keeping the teeth against the foot edge, and the material has less time to settle under the foot. Reducing speed on thick material and zipper operations improves both stitch quality and foot life.
Excessive presser foot pressure. More pressure does not mean better control. On zipper work it flattens the tape and increases drag against the feed. Set pressure to the minimum that holds the material flat.
Using the foot as a general-purpose foot. This foot is a specialised part. Running it on flat straight seams where a standard foot would do exposes the coating and roller to unnecessary wear and gives no benefit.
Maintenance Practice
- Clean the roller regularly. Thread lint and dust pack around the roller axle and eventually stop it rotating. A roller that does not rotate becomes a fixed edge and loses its function. Clear lint with a soft brush or compressed air at each shift change on high-volume lines.
- Do not scrape the Teflon sole. Never use a screwdriver, blade, or abrasive pad to remove material from the sole. Use a soft cloth. Adhesive residue can usually be removed with a cloth dampened with a suitable solvent, applied gently.
- Check the coating periodically. Inspect the sole under good light. If the coating is worn through at the front edge — the area of highest contact pressure — the friction benefit is reduced at that point and the foot should be replaced.
- Inspect the roller for flat spots. A roller that has stopped rotating under load can develop a flat spot. Run a finger over the roller surface; if it is no longer round, replace the foot.
- Store spare feet protected. The Teflon coating can be scratched by contact with other tools or parts in a drawer. Keep spare presser feet in their original packaging or in a dedicated compartment.
Practical Selection Tips for Buyers
When specifying this type of presser foot for a production line, the decisions that matter most are variant, quantity, and consumable planning.
- Confirm the presser bar specification before ordering. Do not order by machine model alone. Check the manual or measure the existing foot. If a factory runs machines from multiple brands or production years, expect to need both F0 and S1 variants.
- Buy as a consumable, not as a durable tool. The Teflon coating and the plastic roller are wear items. On high-volume zipper lines, plan for replacement based on stitch volume rather than waiting for visible failure.
- Standardise across similar stations. If several machines run the same zipper operation, standardising on one variant reduces the risk of a technician fitting the wrong foot during a changeover.
- Keep a small stock of both variants. Downtime on a zipper station is usually caused by not having the right foot on hand, not by the foot failing. A minimal buffer stock of F0 and S1 covers changeovers and replacements without a large inventory commitment.
- Evaluate against your actual fabric. The benefit of the Teflon sole and roller varies by material. On plain cotton the difference from a standard zipper foot is modest; on coated fabric, leather, or multi-layer bag construction it is substantial. Test on the specific material before committing a full line.
- Check the roller as a quality indicator. On incoming inspection, confirm the roller rotates freely and sits square to the foot body. A roller that binds out of the box indicates a manufacturing tolerance problem and will not improve in service.
For parts buyers sourcing from a China sewing parts supplier, the practical checklist is straightforward: verify the F0/S1 specification against the actual presser bar, confirm the Teflon coating is present and unmarked on arrival, and check roller rotation on a sample before accepting a batch. These three checks catch the majority of problems that would otherwise surface on the production floor.
Summary
The 0.3 zipper presser foot with F0/S1 mounting, Teflon-coated sole, and side plastic roller is a specialised part for a specific class of work: zipper insertion and wide-seam operations on industrial lockstitch machines. Its function depends on three mechanisms working together — the 0.3 mm offset that uses the zipper teeth as a lateral guide, the low-friction Teflon sole that keeps the feed dog in control of material advance, and the roller that converts sliding friction to rolling friction at the point where material is most likely to catch.
For technicians, the critical installation points are full shank engagement, correct variant selection, and hand-cycle clearance checks before running under power. Fault diagnosis should begin with symptom category: drift and skipped stitches point to mounting and technique, while drag and sticking point to coating and roller condition. For buyers, the critical points are specifying the right variant, treating the foot as a consumable with a planned replacement interval, and inspecting roller rotation and coating condition on receipt. Used within these parameters, this presser foot type delivers consistent zipper seams on materials where a standard foot produces drift, drag, and puckering.
Need this part for your workshop?
Get a Free Quote on WhatsApp: +86 137 3825 6697Browse the full catalog at pinseam.com · Free 2026 full catalog (PDF) · Related guide: presser foot
📢 New arrivals & factory updates on Telegram — join our channel
Edited by the technical team at PL (Professional Leader) — high-quality sewing machine accessories from China. About our factory | Catalog: pinseam.com | WhatsApp: +86 137 3825 6697 | Telegram: @plsewingparts
Explore Our Parts Guides
- multifunctional needle threader guide — how to use & choose
- jack multifunctional needle threader — one-second threading
- sewing machine accessories, needle threaders & thread guides
- industrial & magnetic seam guides
- presser foot guide: types & compatibility
- industrial presser feet for factory lines
- roller & rolled hemmer presser feet
- industrial sewing machine parts & spare parts
- wholesale sewing machine parts — PL (Professional Leader) factory direct
- about PL (Professional Leader) — Hangzhou Fubang, sewing parts brand since 2018
Questions about a specific part? Chat with us on WhatsApp +86 137 3825 6697 — factory direct, reply within hours.


Comments
Post a Comment