PL Overlock Double-Layer Collar Guide: Magnetic Seam Guide Mechanics and Setup
A double-layer collar guide on an overlock machine only performs as well as its setup. This article explains the internal mechanics of the PL overlock double-layer collar guide (item 1688-0746), then goes further than most accessory write-ups: it provides concrete adjustment parameters — channel spacing ranges, differential feed ratios, presser foot pressure values — and defect-specific troubleshooting fixes for edge fanning, puckering, and layer creep. A short comparison with a magnetic seam guide clarifies where each tool belongs in a sewing room.
Related guide: magnetic seam guide — types, fitting and machine compatibility.
Why Double-Layer Collar Feeding Fails on an Overlock Machine
Attaching a collar on a serger is one of the more demanding operations in garment assembly. Two fabric layers — often a rib knit and a self-fabric band, or two plies of the same material — must enter the differential feed zone simultaneously, aligned at the raw edge, and stitch without shifting. On a flatbed overlock machine, the operator's hands are already occupied guiding fabric, controlling speed, and watching the needle line.
The failure modes are predictable. The top layer creeps ahead of the bottom. Edges fan apart by 1–2 mm. The collar twists. On stretch fabrics, differential feed pulls one layer faster than the other and the seam puckers. Across a batch of 500 collars, these small errors become visible defects and rework.
Most factories absorb this with operator skill. A trained sewer develops muscle memory for feeding two layers evenly. But skill alone does not scale: at 5,000 stitches per minute, with shift changes and style changes, consistency drifts. A mechanical guide removes part of that variability — but only if it is dialed in correctly.
What the Double-Layer Collar Guide Actually Does
The guide is a positioning accessory mounted near the needle plate of an overlock machine. It creates a fixed entry channel for two fabric layers so they arrive at the stitch point already aligned. It does not feed the fabric — the differential feed dog and presser foot do that — but it constrains lateral and vertical movement before the layers reach the feed zone.
Think of it as a funnel. The operator presents the collar layers to the entry slot, and the guide's channels direct them into the stitch path at a consistent angle and spacing. The result is fewer misaligned edges, less operator fatigue, and more uniform output across a shift.
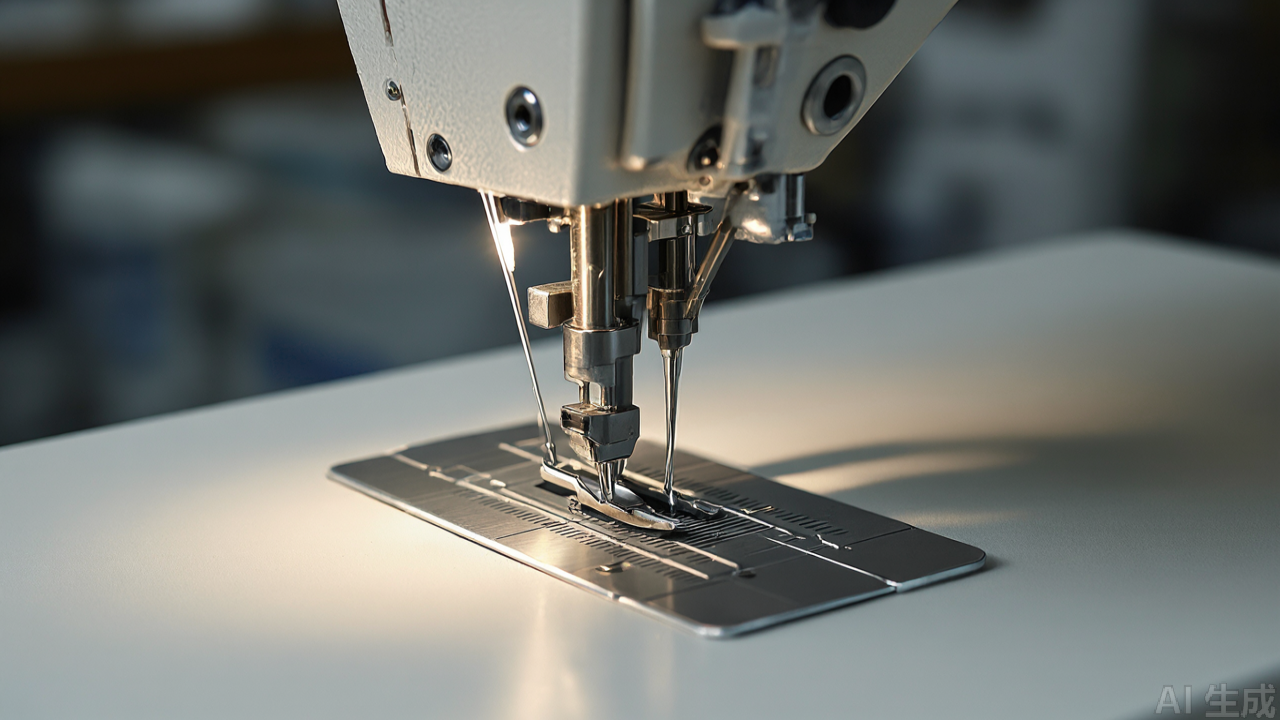
Internal Structure: How the Guide Channels Two Layers
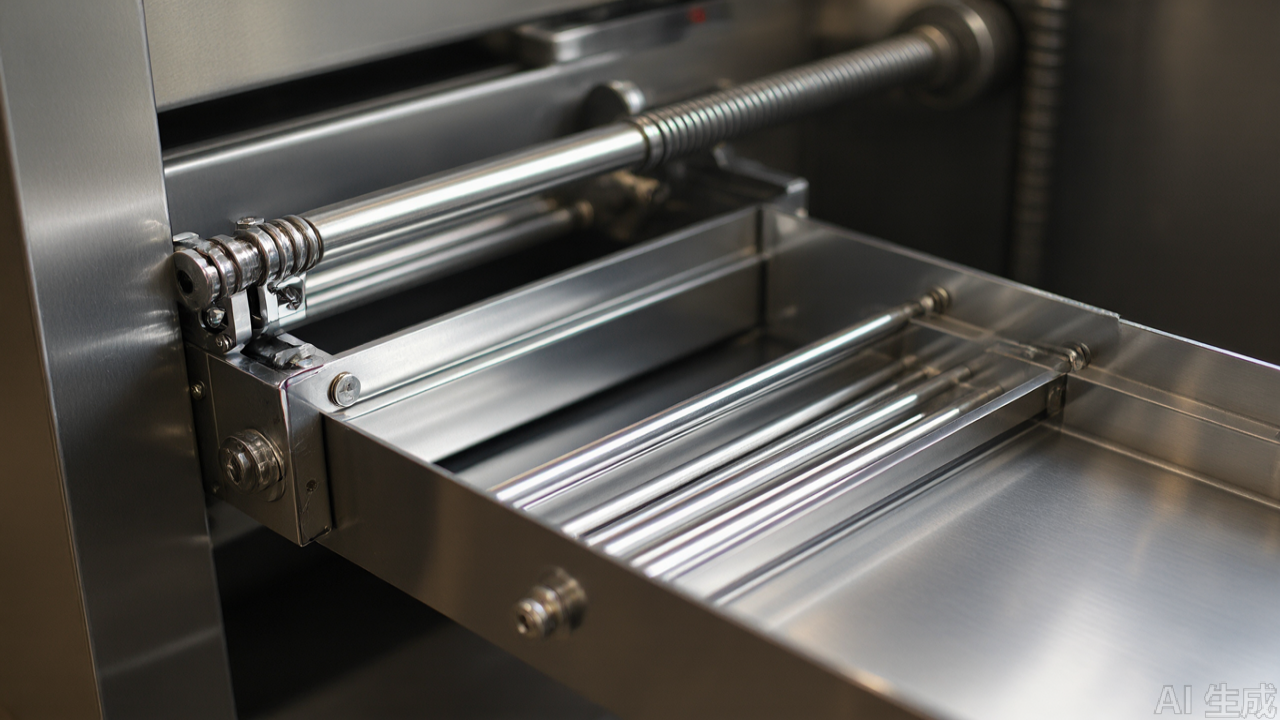
Dual Guide Channels
The core of the guide is a pair of parallel channels — one for the upper collar layer, one for the lower. These channels are formed by the base plate and a set of raised guide walls. Spacing is set at the factory but adjustable within a limited range, typically 2.0 mm to 6.0 mm per channel on standard units. The channels serve two functions: they physically separate the layers to prevent tangling, and they set the entry angle so the fabric enters the stitch zone parallel to the feed direction.
The Hinged Flap (Boka Design)
The most distinctive feature is the hinged flap — described in Chinese as, or "openable design." The flap is a movable metal plate that swings outward to expose the guide channels.
Why does this matter? In a fixed guide, threading a new collar piece means fishing fabric through a closed channel — slow and frustrating with thick or stiff material. With a hinged flap, the operator opens the channel, lays the fabric in place, closes the flap, and starts sewing. The saving per piece is small, perhaps 2–3 seconds, but over 800 collars per shift it accumulates. The flap also simplifies cleaning: lint and thread tails that collect in the channels can be wiped out in seconds instead of chased with compressed air.
Mounting Base and Screw Fixation
The base plate sits flush against the needle plate or presser foot area and is secured with screws through slotted holes. Slotted holes allow fore-and-aft and lateral adjustment — critical for aligning the guide with the needle line. Base plate thickness is typically 1.5–2.0 mm. Too thick, and the plate lifts fabric off the needle plate and interferes with feed dog grip. Too thin, and it flexes under pressure and loses alignment.
Materials: Why Stainless Steel Matters
The guide is made from stainless steel selected for corrosion and wear resistance. On a sewing floor, this matters for three reasons.
- Corrosion resistance: Sewing floors are humid, and lubricants, fabric finishes, and cleaning agents all attack ordinary carbon steel. Stainless resists pitting and rust.
- Wear resistance: Fabric passing through the channels creates friction. Over millions of cycles, softer metals develop burrs that snag fabric. Stainless maintains its surface finish.
- Low friction: Polished stainless has a low coefficient of friction against most fabrics, so material slides through without the drag that would force the differential feed to work harder and distort the stitch.
Surface finish matters as much as alloy. A microscopically rough surface can catch fine knits or delicate wovens. The polished finish minimizes this risk, though very delicate fabrics such as silk chiffon still require reduced presser foot pressure and careful handling.
How It Works in the Stitch Cycle
To understand the guide's role, trace the fabric path through the overlock stitch cycle.
- Presentation: The operator aligns the two collar layers and presents them to the guide's entry slot.
- Channeling: The guide separates the layers and directs them toward the needle plate at a fixed angle.
- Feed dog engagement: The differential feed dog grips the layers and advances them toward the needle.
- Stitch formation: Needle, loopers, and thread cones form the overlock stitch, trimming the raw edge and securing the seam simultaneously.
- Exit: The stitched collar exits the presser foot area and is pulled away by the operator or a puller attachment.
The guide's influence is concentrated in steps 1 and 2. Once the fabric reaches the feed dog, the guide's job is done. This is why its position relative to the needle plate is so critical: too far from the needle, and the fabric has room to shift after leaving the guide; too close, and it interferes with the presser foot or trimming mechanism.
Adjustment Parameters: Dialing In the Guide
The following values are starting points for common collar operations. They are not universal — fabric weight, elasticity, and machine model all shift the optimum — but they give a technician a defensible baseline from which to tune.
Channel Spacing by Fabric Weight
- Light knit (single jersey, 120–160 g/m²): 2.0–2.5 mm per channel
- Medium knit (interlock, rib, 160–240 g/m²): 2.5–3.5 mm per channel
- Heavy knit (French terry, fleece, 240–400 g/m²): 3.5–5.0 mm per channel
- Woven shirting (100–150 g/m²): 2.0–3.0 mm per channel
- Woven bottom-weight (200–350 g/m²): 3.0–4.5 mm per channel
The hand test is the final arbiter. Feed a scrap piece through the channel by hand. It should slide with light resistance — not freely, not with force. If it requires force, widen the channel. If it slides without any resistance, narrow it.
Differential Feed Ratios
Differential feed controls how much the front feed dog moves relative to the rear. On knits, the correct ratio prevents wavy seams and stretched collars. Typical starting points:
- Rib knit collar on jersey body: 1.3:1 to 1.5:1 (front faster, gathering the fuller layer)
- Self-fabric collar on jersey body: 1.1:1 to 1.3:1
- Interlock collar, stable knit: 1.0:1 to 1.2:1
- Woven collar, no stretch: 1.0:1 (neutral) or slightly negative, 0.8:1 to 1.0:1, if the fabric tends to stretch under the needle
Rule of thumb: the more elastic the fabric, the higher the differential ratio, up to the point where the seam begins to ripple. Back off one notch from the ripple point.
Presser Foot Pressure
Presser foot pressure is often ignored, but it directly affects how the guide performs. Too much pressure flattens the fabric and creates drag; too little lets the fabric lift and skew.
- Light knits: 15–25 N (or 2–3 on a typical 0–6 dial)
- Medium knits: 25–35 N (3–4 on the dial)
- Heavy knits and wovens: 35–45 N (4–5 on the dial)
Adjust in small increments and re-test with scrap. If the collar edge curls after stitching, pressure is too high. If the fabric wanders laterally despite the guide, pressure is too low.
Needle and Stitch Density
For collar attaching on knits, a ballpoint needle in size 75/11 or 80/12 is standard. Stitch density of 3.5–4.0 mm (about 6–7 stitches per inch) balances seam strength and elasticity. Denser stitching on knits reduces stretch and can cause the collar to crack when worn.
Troubleshooting Specific Defects
Edge Fanning (Layers Separate at the Raw Edge)
Edge fanning is the most common complaint with collar guides, and it usually has one of three causes.
- Channel spacing too wide: The layers have room to separate laterally. Reduce spacing by 0.5 mm and re-test.
- Guide misaligned to feed direction: If the channel is not parallel to the feed dog path, the fabric enters at an angle and spreads. Loosen the mounting screws and rotate the guide until the channel axis matches the feed direction. A steel ruler laid along the channel and extended toward the needle helps verify.
- Insufficient presser foot pressure: If pressure is too low, the top layer lifts slightly as it exits the guide and fans away from the bottom. Increase pressure by one dial step.
If fanning persists after all three checks, the fabric itself may be the issue — some very slick synthetics resist any mechanical constraint and require a puller or a different attachment.
Puckering Along the Seam
Puckering on knits is usually a differential feed problem, not a guide problem.
- Differential ratio too low: The fabric is being stretched as it feeds. Increase the ratio in 0.1 steps until the ripple disappears.
- Presser foot pressure too high: Excessive pressure compresses the fabric ahead of the needle and it rebounds after stitching. Reduce pressure by one dial step.
- Stitch density too high: More than 8 stitches per inch on a knit leaves too little room for the yarn to recover. Reduce density to 6–7 stitches per inch.
- Thread tension too tight: Looper and needle tensions that are correct for woven fabric will pucker knits. Reduce needle thread tension slightly and check that the looper threads lie flat, not buried.
Layer Creep (Top Layer Advances Ahead of Bottom)
Creep is different from fanning: the layers stay aligned laterally but the top one slides forward.
- Check the guide's vertical position: If the top channel is higher than the bottom, gravity and feed direction can favor the top layer. Adjust the guide so both channels sit at the same height relative to the needle plate.
- Check the flap closure: A hinged flap that does not close flush leaves a gap that the top layer can slip through. Inspect the flap contact surface for lint or burrs and clean or polish as needed.
- Reduce differential feed if it is too aggressive: A very high ratio can pull the top layer ahead if the bottom layer has more surface contact with the feed dog. Balance the ratio to the fabric pair.
Twisted or Spiraled Collar
A twisted collar usually indicates that the two layers entered the guide at different angles.
- Check entry alignment: The operator should present both layers square to the guide slot, not at an angle.
- Check guide parallelism: Verify the channel axis is parallel to the feed direction. A 2-degree misalignment is enough to cause visible twist over a 40 cm collar.
- Check for fabric distortion before entry: If one layer was stretched during cutting or handling, it will twist regardless of the guide. Pre-relax the fabric if possible.
Stitch Skipping at the Collar Edge
Skipped stitches at the collar edge are rarely a guide problem, but they can be triggered by guide-induced fabric lift.
- Guide too close to the needle: If the guide lifts the fabric slightly as it exits, the needle may not fully penetrate. Move the guide 1–2 mm away from the needle.
- Needle too small for the fabric: On heavy knits, a 75/11 needle may deflect. Step up to 80/12 or 90/14.
- Presser foot not seated flat: If the guide's base plate interferes with the presser foot, the foot tilts and the needle misses the stitch line. Check clearance.
Magnetic Seam Guide vs. Mechanical Collar Guide
Readers familiar with sewing machine accessories often ask how this guide compares to a magnetic seam guide. Both are positioning aids, but they operate on different principles.
A magnetic seam guide is a small metal block with a magnetized base. It attaches to the needle plate of a lockstitch or overlock machine and provides a physical fence for the fabric edge. The operator runs the edge along the guide, maintaining a consistent seam allowance. Magnetic guides are versatile, reposition quickly, and need no screws or tools.
The double-layer collar guide is a fixed, screw-mounted accessory designed for one operation: feeding two collar layers simultaneously. It does not rely on the operator pressing fabric against a fence. Instead, it constrains the layers within channels so alignment is maintained automatically.
The trade-off is flexibility versus consistency. A magnetic seam guide moves in seconds and suits many operations. The collar guide is dedicated to one operation but delivers higher consistency for that operation. In a factory running the same collar style for weeks, the dedicated guide wins. In a sample room where operations change hourly, the magnetic guide is more practical. Both belong in a well-equipped sewing room.
Specifications and Compatibility
Machine Compatibility
The guide is designed for industrial overlock machines (sergers) and is compatible with 3-thread, 4-thread, and 5-thread safety stitch machines. Compatibility depends on the mounting hole pattern on the needle plate or presser foot area. Most industrial overlock machines from Juki, Pegasus, Siruba, Brother, and Jack have standard mounting points that accept this type of guide. The exact mounting position varies by model — check the machine's parts diagram before ordering.
Fabric Suitability
The guide suits cotton jersey and rib knit, French terry and fleece, interlock and ponte knit, woven shirting, and most blends. Very thick fabrics (heavy denim, canvas) may require a larger guide or modified setup, as standard channel spacing may be too narrow. Very thin or delicate fabrics (chiffon, fine silk) require reduced presser foot pressure and careful tension adjustment.
Installation: Step by Step
- Power off. Turn off the machine and unplug it. Never install accessories with the machine running.
- Identify the mounting point. Locate the accessory mounting holes on the needle plate or presser foot area. Consult the machine manual if unsure.
- Position the guide. Place the base plate against the mounting surface. The guide channels should be parallel to the feed direction.
- Secure with screws. Use the original machine screws or the supplied screws. Tighten finger-tight first, then snug with a screwdriver. Do not overtighten — this strips threads or distorts the base plate.
- Check alignment. With the machine off, rotate the handwheel and observe the needle path. The channels should align with the needle line. Adjust if not.
- Set channel spacing. Using the fabric weight table above as a starting point, set the channel spacing and verify with the hand test.
- Test with scrap fabric. Before running production, test with scrap pieces of the actual collar fabric. Check alignment, puckering, and stitch quality. Adjust guide position, differential feed, and presser foot pressure as needed.
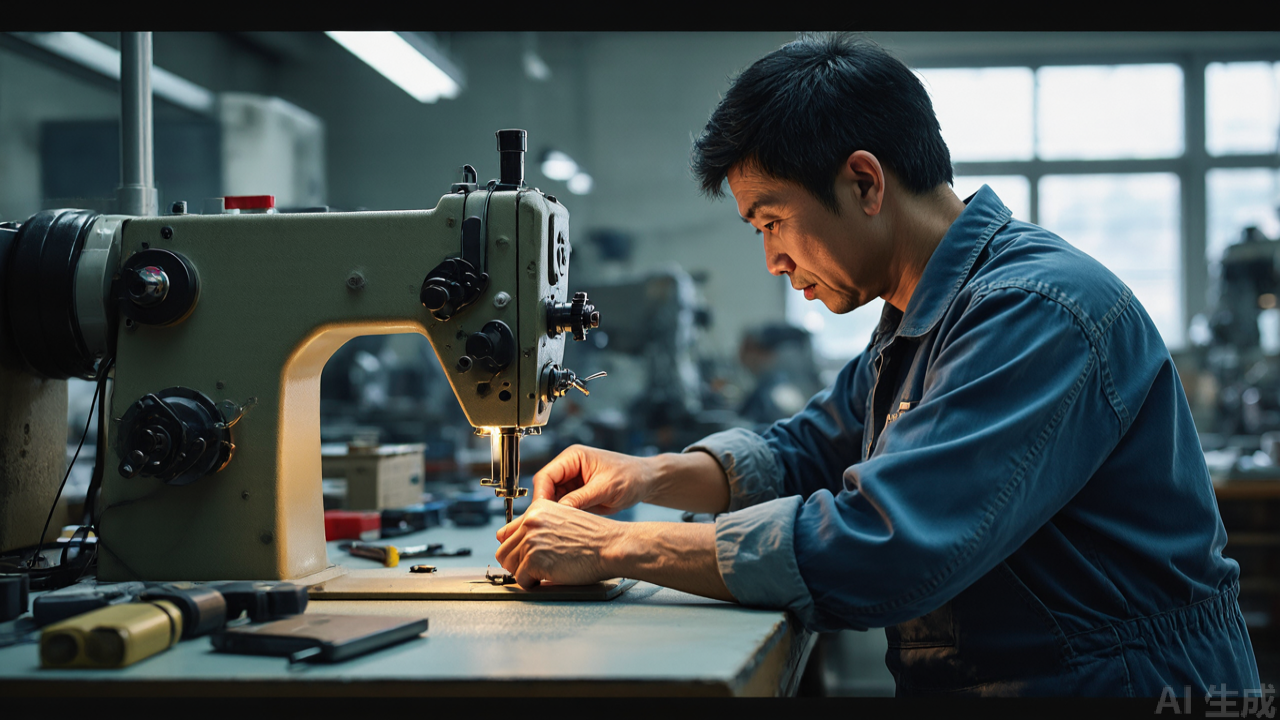
Using the Guide in Production
Threading the Fabric
With the hinged flap, threading is quick. Open the flap, lay the two collar layers into their respective channels, close the flap, and begin sewing. The flap holds the fabric until the feed dog takes over. For the first few pieces of a new batch, sew slowly and check alignment after each piece. Once the setup is confirmed, increase speed.
Working with Curved Collars
Curved collars such as round necklines require a slightly different technique. The operator feeds the fabric into the guide at a slight angle, following the curve. The channels maintain layer alignment; the operator controls the curve. With practice, this becomes a smooth continuous motion. For very tight curves (necklines under 12 cm radius), reduce machine speed to 3,000–3,500 stitches per minute to maintain control.
Suitable Machines and Fabrics: A Practical Summary
| Machine Type | Suitability | Notes |
|---|---|---|
| 3-thread overlock | Yes | Check mounting hole pattern |
| 4-thread overlock | Yes | Most common setup for collar attaching |
| 5-thread safety stitch | Yes | Check clearance with trimming mechanism |
| Coverstitch machine | No | Different feed mechanism; guide not designed for this |
| Lockstitch machine | No | Use a magnetic seam guide instead |
Common Mistakes and How to Avoid Them
Mounting the Guide Too Far from the Needle
If the guide is too far from the needle, fabric has room to shift after leaving the channels. Mount the guide as close to the needle as the machine's geometry allows, without interfering with the presser foot or trimming mechanism. A gap of 3–5 mm between the guide exit and the needle entry is a reasonable target on most machines.
Overtightening the Screws
Overtightening strips mounting holes or distorts the base plate. Tighten snugly, not forcefully. If the guide shifts during operation, use a slightly larger screw or a washer rather than overtightening.
Ignoring Differential Feed Settings
The guide controls alignment, not stretch. On knits, the differential feed determines whether the seam stretches or puckers. Adjust differential according to the fabric's elasticity. Guide and differential work together; neither compensates for the other.
Neglecting Cleaning
Lint and thread debris accumulate in the channels. Uncleaned debris causes skew and loss of alignment. Clean the channels at the start of each shift, or more often with lint-heavy fabrics.
Using the Wrong Guide for the Operation
The double-layer collar guide is designed for collar attaching. It can serve cuffs and hems if dimensions allow, but it is not universal. For seam allowance control, topstitching, or edge stitching, use the appropriate accessory — a magnetic seam guide, a seam gauge, or a specialized presser foot.
Maintenance and Longevity
- Daily: Brush or blow out lint from the guide channels.
- Weekly: Wipe with a soft cloth and mild cleaning agent. Avoid abrasives that scratch the surface.
- Monthly: Check screw tightness and flap operation. Apply a drop of light machine oil to the hinge if it becomes stiff.
- As needed: If the surface becomes scratched or burred, polish with a fine abrasive pad. Deep scratches may require replacement.
Stainless steel is durable, but dropping the guide on a hard floor can bend the base plate or misalign the channels. Handle it carefully during installation and removal.
Selection Tips: Choosing the Right Guide for Your Operation
Channel Width and Spacing
Match channel width to fabric thickness. Adjustable spacing is more versatile than fixed spacing. If you run multiple collar styles with different fabric weights, an adjustable guide reduces the number of accessories you need to stock.
Mounting Compatibility
Check the mounting hole pattern on your overlock machine. Most guides use a standard two-screw pattern, but some machines have proprietary mounting systems. Measure the distance between mounting holes and compare with the guide's specifications.
Material Quality
Stainless steel is the preferred material for sewing machine spare parts that contact fabric. Avoid plated carbon steel, which chips or rusts over time. The cost premium is offset by longer service life and fewer fabric defects.
Hinged vs. Fixed Design
The hinged flap saves time during threading and cleaning. For high-volume production, this saving justifies the slightly higher cost. For low-volume or sample work, a fixed guide may suffice.
Brand and Support
Parts buyers should consider the supplier's ability to provide technical support and replacement parts. A guide from a manufacturer specializing in sewing machine accessories — such as PL presser foot and guide components — is more likely to have consistent quality and available spares than a generic product from an unknown source.
Comparing the Double-Layer Guide with Other Sewing Attachments
- Magnetic seam guide: A versatile, repositionable fence for seam allowance control. Best for lockstitch machines and general-purpose sewing.
- Double-layer collar guide: A dedicated channel guide for feeding two collar layers into an overlock machine. Best for high-volume collar attaching.
- Hemming guide: A folded metal guide that turns the fabric edge under as it feeds. Used for hems on flatbed machines.
- Binder attachment: A guide that folds and feeds binding tape. Used for edge binding on knits and wovens.
- Gathering foot: A presser foot with a built-in gathering mechanism. Used for attaching gathered skirts to bodices and similar operations.
Each attachment solves a specific problem. The key is to match the attachment to the operation, the machine, and the fabric. A guide that works well for one operation may be useless for another.
Frequently Asked Questions
Can this guide be used on a lockstitch machine?
No. The guide is designed for overlock machines. Mounting points and fabric path differ on a lockstitch machine. For lockstitch applications, use a magnetic seam guide or a specialized presser foot.
Does the guide work with all overlock machine brands?
It works with most industrial overlock machines that have standard accessory mounting holes. Some machines have proprietary mounting systems — check your parts diagram before ordering.
Can I use this guide for cuffs and hems?
Yes, with limitations. The guide is designed for collar attaching, but it can serve cuffs and hems if fabric layers and channel spacing are compatible. Test with scrap fabric before running production.
How do I clean the guide?
Open the hinged flap and brush or blow out lint and thread debris. Wipe the stainless surface with a soft cloth. Do not use abrasive cleaners or tools that could scratch the surface.
What if the fabric skews even with the guide?
Check four things: (1) Is the guide aligned parallel to the feed direction? (2) Is channel spacing correct for the fabric thickness? (3) Are differential feed settings appropriate for the fabric? (4) Is presser foot pressure correct? If all four are correct, the fabric itself may be the issue — some slick synthetics resist mechanical constraint and require a puller or alternate attachment.
Conclusion
The PL overlock double-layer collar guide (item 1688-0746) is a practical solution for a common production problem: feeding two collar layers evenly into an overlock machine. Its stainless steel construction resists corrosion and wear, its hinged flap simplifies threading and cleaning, and its dual-channel design maintains layer alignment through the stitch cycle. With the adjustment parameters and troubleshooting fixes above — channel spacing by fabric weight, differential feed ratios, presser foot pressure values, and defect-specific corrections — a technician can dial the guide in rather than guess. For factories running high-volume collar attaching, that setup discipline reduces operator fatigue and improves consistency. For buyers comparing options, it is worth noting that a magnetic seam guide serves a different purpose and should be considered a complementary tool, not a substitute. When selecting sewing machine parts for collar operations, match the guide to your machine's mounting pattern, your fabric weight, and your production volume — and keep a magnetic seam guide on hand for the operations this guide cannot cover.
Need this part for your workshop?
Get a Free Quote on WhatsApp: +86 137 3825 6697Browse the full catalog at pinseam.com · Free 2026 full catalog (PDF) · Related guide: magnetic seam guide
📢 New arrivals & factory updates on Telegram — join our channel
Edited by the technical team at PL (Professional Leader) — high-quality sewing machine accessories from China. About our factory | Catalog: pinseam.com | WhatsApp: +86 137 3825 6697 | Telegram: @plsewingparts
Explore Our Parts Guides
- multifunctional needle threader guide — how to use & choose
- jack multifunctional needle threader — one-second threading
- sewing machine accessories, needle threaders & thread guides
- industrial & magnetic seam guides
- presser foot guide: types & compatibility
- industrial presser feet for factory lines
- roller & rolled hemmer presser feet
- industrial sewing machine parts & spare parts
- wholesale sewing machine parts — PL (Professional Leader) factory direct
- about PL (Professional Leader)
Questions about a specific part? Chat with us on WhatsApp +86 137 3825 6697 — factory direct, reply within hours.


Comments
Post a Comment