How to Use an Industrial Presser Foot Elastic Inserter on Waistbands
Feeding wide flat elastic through a waistband casing is one of the slowest manual operations on a garment floor, and it is also one of the easiest places to lose money through rework. This article explains how a dedicated elastic inserter tool works alongside the industrial presser foot workflow, what separates a good clamp from a poor one, and how to install, run, and troubleshoot the tool so that waistband threading stops being a bottleneck. It is written for line supervisors, sewing technicians, and parts buyers who need to evaluate the tool on technical grounds rather than on catalogue photos.
Related guide: industrial presser foot — types, fitting and machine compatibility.
Why Waistband Elastic Insertion Is a Cost Centre
Most factories still thread elastic with a safety pin, a bodkin, or a length of stiff wire. Each of those methods has the same weakness: the pulling force is transferred through a thin metal loop or a bent pin, and the elastic is bunched rather than guided. On a 2.5 cm to 4 cm wide flat elastic, the bunched fabric creates friction against the inside of the casing, and the operator compensates by pulling harder. The result is stretched elastic, snapped pins, and waistbands that sit at the wrong finished length.
The problem scales with elastic width. A narrow 6 mm elastic will follow a pin through almost any casing. A wide flat elastic used on tracksuit bottoms, loungewear, children's wear, or mattress covers behaves very differently. It has a large surface area in contact with the casing, it resists folding, and it tends to roll into a tube as it is pulled. Once it rolls, the width increases in one axis and the elastic jams.
There is also a labour-cost dimension that is often underestimated. In a time study of a simple elastic waistband, the threading step can account for a disproportionate share of the total operation time, even though the actual stitching is fast. Threading is not machine-paced, it is operator-paced, and it is highly variable. Reducing that variability is usually more valuable than reducing the average time.
Putting Numbers on the Problem
Take a mid-size line running 1,200 elasticated waistbands per shift across six workstations. On a straight cotton casing with a safety pin, a typical operator threads one waistband in 25 to 40 seconds, including the time to open the pin, insert the elastic, close the pin, and feed the assembly through. That is roughly 10 to 13 minutes per 100 pieces, or 2 to 2.6 hours of threading time per shift across the line.
With a properly specified inserter and correct technique, the same operation typically drops to 8 to 15 seconds per waistband. Over 1,200 pieces that is a saving of about 3.5 to 5.5 operator-hours per shift. At a fully loaded labour cost of USD 3 to 6 per hour in a typical Asian production region, that is USD 10 to 33 per shift, or roughly USD 260 to 860 per month on a single line. The tool itself costs a fraction of one shift's saving, which is why the payback period is usually measured in days rather than months.
The rework figure is often larger than the labour figure. A pin that opens mid-pass, or an elastic that rolls and has to be pulled back and re-threaded, adds a second attempt. If 8 percent of pieces need a re-thread at 30 seconds each, that is another 48 minutes per shift. Removing most of that rework is where the real return sits.
Where the Traditional Methods Fail
- Safety pins: open under load, puncture the casing, and leave a hole in the finished garment if the fabric is fine.
- Bodkins: effective on cord and narrow elastic, but the eye is too small for wide flat elastic and the point can catch on overlocked seam allowances.
- Stiff wire loops: cheap, but they deform after repeated use and the loop opens, releasing the elastic mid-pass.
- Taping elastic to a rod: the tape joint fails under tension, and adhesive residue can contaminate the casing.
None of these are tool problems in the engineering sense. They are clamping problems. The elastic needs to be held across its full width with enough friction that the pulling force is distributed, not concentrated at a single point.
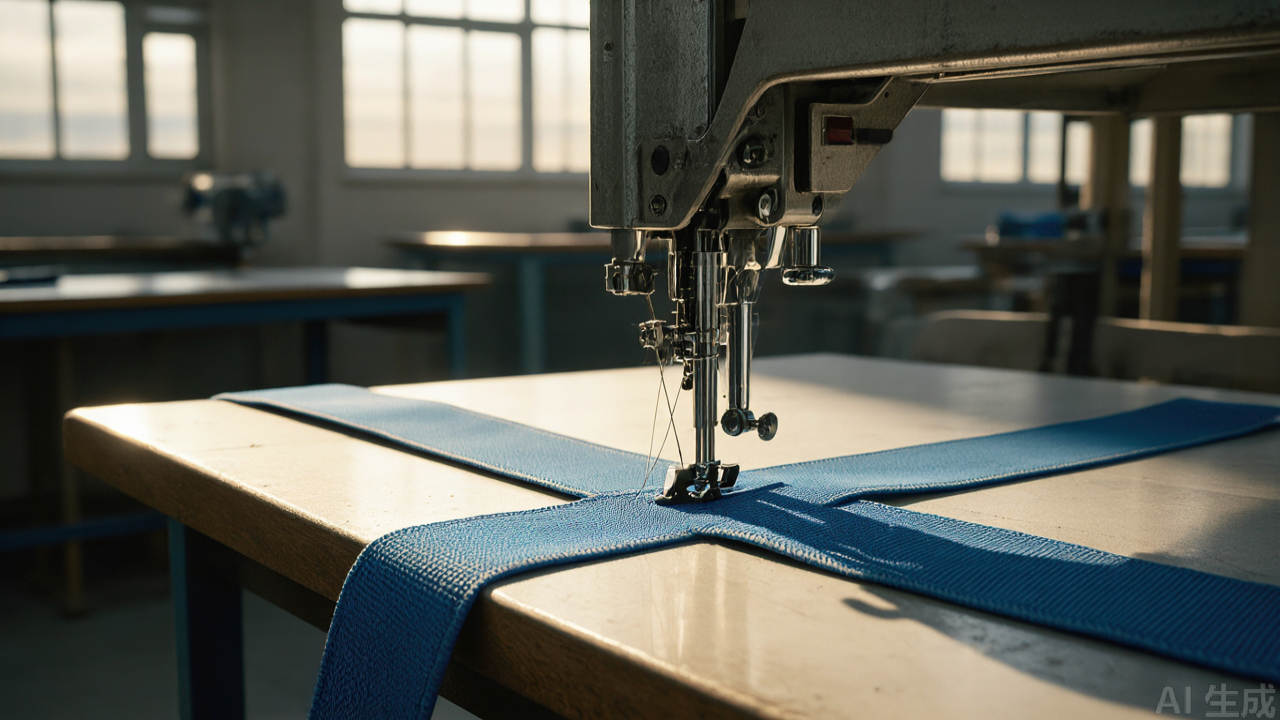
How the Elastic Inserter Tool Works
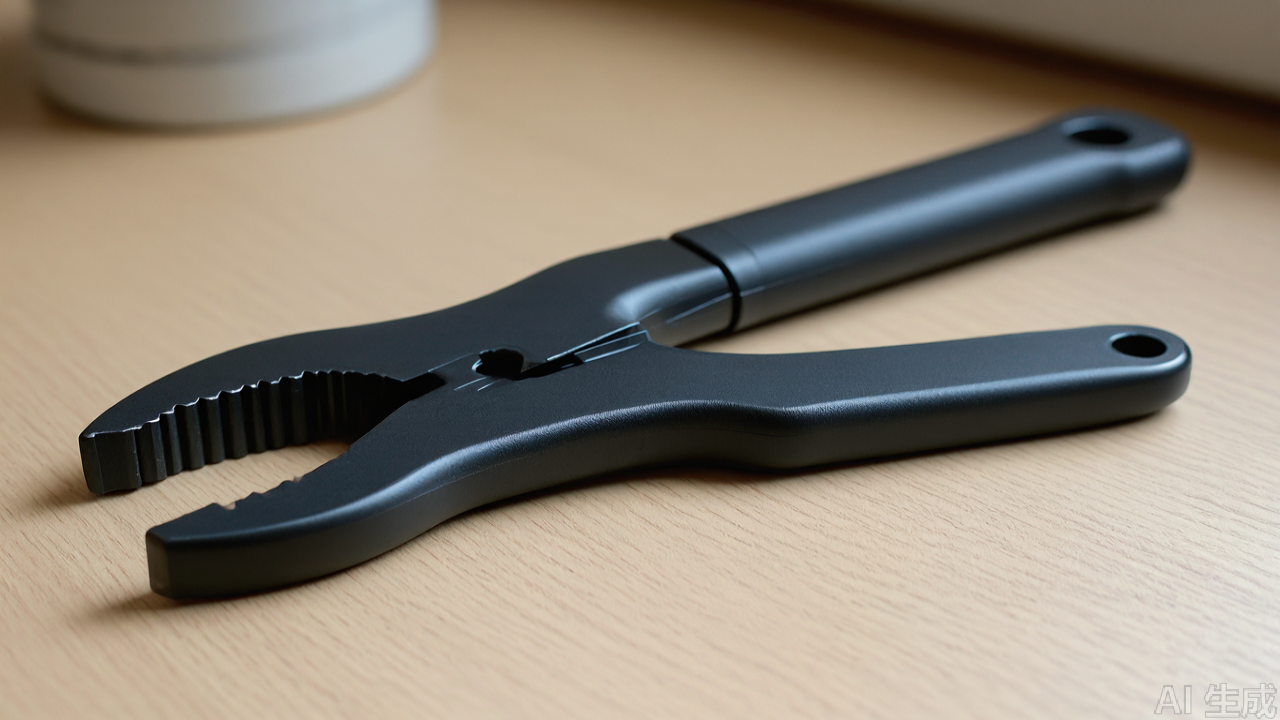
The tool is a hand-held clamp with a rounded or tapered nose. The operator opens the jaws, inserts the end of the elastic, closes the jaws, and pushes the nose through the waistband casing from one opening to the other. Because the clamp holds the elastic flat and the nose is smooth, the assembly passes through the casing with far less resistance than a bunched elastic pulled by a pin.
The Clamping Mechanism
The clamping face is the part that determines whether the tool works or not. There are two common designs:
- Serrated metal jaws: fine teeth bite into the elastic surface. High grip, but the teeth can abrade the elastic over a long pass and leave visible marks on light-coloured elastic.
- Silicone or rubber pads: grip by friction rather than penetration. Gentler on the material, but the pads wear and must be replaced periodically.
Some tools combine both, with a shallow serration under a silicone pad. In practice, a well-formed silicone pad is the better choice for wide flat elastic because it grips across the full width without creating stress concentrations. A serrated jaw concentrates grip at the tooth tips, which is exactly where the elastic will tear if the pull force is too high.
The Nose Geometry
The nose must be rounded in all three planes, not just in profile. A nose that is rounded when viewed from the side but square when viewed from above will catch on the corner where the casing meets the side seam. This is the single most common cause of jamming, and it is a geometry issue that cannot be fixed by operator technique.
A tapered nose is preferable for tight casings because it gradually opens the fabric channel rather than forcing it. A fully rounded nose is better for casings that have already been pressed flat, because it slides rather than wedges.
The Tail Eyelet
Many versions of this tool include a small eyelet or slot at the tail end. This allows the same tool to be used for drawcords, waist strings, and narrow round cord. The cord is tied or looped through the eyelet and pulled through, while the clamp jaws handle wide flat elastic. This dual function is useful in a factory that runs both elasticated and drawstring waistbands on the same line, because it reduces the number of tools at each workstation.
One caution: the tail eyelet should not be used to pull wide elastic. The eyelet is a secondary feature and is not designed for the tension that a wide elastic pass generates. Use the jaws for elastic and the eyelet for cord.
Specifications and Materials to Check Before Buying
Buyers evaluating this category of sewing machine accessories should ask for specific dimensions rather than relying on the product name. The Chinese trade name translates roughly to "wide elastic threading clamp", but the actual jaw width varies considerably between suppliers, and a tool sold as "wide" may only open to 30 mm.
Key Dimensions
- Jaw opening width: should exceed the widest elastic used on the line, typically 40 mm to 50 mm for a tool intended for wide flat elastic.
- Clamping length: the depth of the grip along the elastic. A 20 mm to 30 mm clamping length is a reasonable compromise between grip and drag.
- Overall length: 150 mm to 200 mm is typical. Too short and the operator cannot reach through a long casing; too long and the tool is awkward at a narrow waistband opening.
- Nose diameter: should be small enough to pass through the smallest casing on the line, which is often the children's wear size range.
Material Options
Metal-bodied tools are usually stainless steel or carbon steel with a plated finish. They resist bending and hold their jaw alignment over thousands of cycles. The trade-off is weight and cost, and the plating can chip if the tool is dropped on a concrete floor, after which the exposed carbon steel will rust.
Engineering plastic tools are typically reinforced nylon or POM (polyoxymethylene, also known as acetal). They are lighter, cheaper, and non-marking, which matters when working with white or pale elastic. They are also less likely to damage a needle plate or feed dog if dropped onto the machine bed. The trade-off is that plastic jaws can deform under sustained load, particularly if the operator uses the tool as a lever rather than a guide.
For a line running wide flat elastic all day, a metal body with silicone pads is usually the more durable choice. For a sample room or a small workshop running mixed materials, a reinforced plastic tool is often sufficient and easier on delicate fabrics.
Spring and Pivot Quality
This is the specification that buyers most often overlook. The clamp must open and close thousands of times per shift. A weak spring causes the jaws to close incompletely, which reduces grip. A poorly formed pivot allows the jaws to skew, so the grip is uneven across the width and the elastic rolls to one side.
Ask the supplier for the spring material and the pivot construction. A stainless spring and a riveted or screwed pivot are the durable options. A pressed-in plastic pivot is acceptable on a light-duty tool but will develop play.
Installation and Step-by-Step Usage
This section covers the practical procedure. It assumes the waistband casing has already been stitched and the openings are ready. Note that the tool is a hand tool, not a machine attachment, so there is no presser foot replacement involved. However, the quality of the casing produced by the presser foot on the lockstitch machine directly affects how easily the tool passes through.
Step 1: Prepare the Casing
Before threading, inspect the casing from the inside. Trim any loose thread tails, and check that the overlocked seam allowances are flat. A single thread loop caught in the casing can stop the tool and force the operator to reverse out, which wastes more time than the inspection would have taken.
Press the casing if the fabric allows. A pressed casing has a clear internal channel and the tool will pass through with minimal resistance. An unpressed casing with twisted seam allowances will cause jams regardless of tool quality.
Step 2: Prepare the Elastic
Cut the elastic to the required finished length plus seam allowance. Cut the end square, not at an angle. An angled cut causes the elastic to feed unevenly into the jaws and can lead to the corner folding over during the pass.
If the elastic has a tendency to curl, lay it flat for a few minutes before threading. Elastic stored on a roll will retain curvature, and that curvature will encourage rolling inside the casing.
Step 3: Load the Elastic into the Jaws
Open the jaws and insert the elastic end squarely. The clamped length should be about 10 mm to 20 mm. This is a critical range:
- Too short (under 10 mm): the elastic pulls out under load, usually halfway through the casing.
- Too long (over 20 mm): the clamped portion becomes stiff and the assembly has difficulty negotiating curves and side seams.
Close the jaws firmly and give the elastic a test tug. If it moves, reload it. A two-second test is cheaper than a failed pass.
Step 4: Insert the Nose into the Casing
Locate the casing opening. On a typical waistband, this is either a gap left in the stitching at the centre back or a side opening. Insert the nose at a shallow angle and feed it in until the jaws are just inside the opening.
Do not force the nose. If it does not enter easily, the opening is too small or there is a seam allowance blocking it. Recheck before pushing harder.
Step 5: Advance Through the Casing
Push the tool through the casing in a steady motion. The operator's other hand should gather the fabric ahead of the tool, bunching the casing onto the tool rather than pulling the tool through a flat casing. This is the standard technique for threading any casing and it is significantly faster than pulling.
At curves and side seams, slow down and reduce the push force. The tool should follow the channel, not force it open. If resistance increases sharply, stop and check for a blockage rather than pushing through it.
Step 6: Exit and Release
When the nose exits the far opening, grip the elastic just behind the jaws with the free hand before opening the clamp. This prevents the elastic from retracting into the casing. Open the jaws, withdraw the tool, and the elastic end is now accessible at both openings.
Step 7: Secure and Finish
Overlap the elastic ends, stitch them securely, and distribute the elastic evenly through the casing by working it around the waistband with the hands. Then complete the closing stitch on the lockstitch machine or coverstitch machine as required by the garment specification.

Troubleshooting: Jams, Rolled Elastic, and Mid-Pass Release
Three faults account for the large majority of threading problems. Each has a specific cause and a specific fix. Working through them methodically is faster than replacing the tool or changing the operator.
Fault 1: The Tool Will Not Advance Past a Point in the Casing
Symptom: the tool moves freely for part of the casing, then stops. Additional push force produces no movement or causes the fabric to distort.
Diagnosis and fix, in order of likelihood:
- Seam allowance folded into the channel. The most common cause. Withdraw the tool, turn the casing inside out at that point, and flatten the overlocked seam allowance. If the seam allowance is bulky, trim it or increase the casing width in the pattern.
- Thread tail or lint ball caught in the channel. Withdraw and inspect with a light. Clear the obstruction with tweezers rather than pushing through it.
- Nose profile catching on a side seam corner. If the tool catches at the same point on every piece, the nose is not fully rounded in the horizontal plane. This is a tool geometry fault, not an operator fault. Replace the tool or dress the nose with fine abrasive paper.
- Casing narrower than the elastic plus clearance. Check the pattern allowance. A casing that is less than about 3 mm wider than the elastic will resist any tool. This is a construction problem and no tool will solve it.
- Tool nose too large for the casing. If the nose diameter is close to the casing width, there is no clearance for the fabric to fold around the nose. Use a smaller-nosed tool for that garment size.
What not to do: do not increase push force. Forcing a jammed tool bends the jaws, skews the pivot, and permanently reduces grip. A bent tool will then fail on every subsequent piece, turning a one-piece problem into a line-wide problem.
Fault 2: The Elastic Rolls into a Tube Inside the Casing
Symptom: the elastic enters flat but exits twisted or folded, or the tool becomes progressively harder to push and the elastic emerges rolled.
Diagnosis and fix:
- Elastic loaded off-square. If the cut end is angled or the elastic is loaded at an angle to the jaw axis, it will rotate as it is pushed. Reload with a square cut, aligned with the jaw axis. This is the single most common cause of rolling.
- Clamped length too short. Under 10 mm, the elastic has insufficient support and can rotate within the jaws. Increase to 15 mm and retest.
- Elastic retains roll curvature from storage. Unroll the elastic and lay it flat for several minutes, or reverse-roll it lightly before threading. Elastic taken straight from a tight roll is far more prone to rolling.
- Jaw grip uneven across the width. If one side of the jaw grips harder than the other, the elastic rotates. Check the pivot for play and the pads for uneven wear. Replace worn pads.
- Casing too tight. If the casing clearance is minimal, the elastic has no room to correct a small roll and the roll propagates. Increase casing width or reduce elastic width.
Recovery: if the elastic has already rolled and jammed, do not pull it back through the casing, as this stretches the elastic and distorts the casing. Withdraw the tool, then work the elastic back by hand from the exit end, feeding it in reverse. If the roll is severe, cut the elastic at the exit and re-thread with a fresh end.
Fault 3: The Elastic Releases from the Jaws Mid-Pass
Symptom: the tool continues through the casing but the elastic stays behind, usually about halfway along.
Diagnosis and fix:
- Clamped length under 10 mm. Increase to 15 to 20 mm.
- Jaws not fully closed. Check the spring tension. A weak spring prevents full closure. Replace the spring.
- Worn or glazed silicone pads. Pads that have become shiny or compressed lose friction. Replace them. This is the most common cause on a tool that has been in service for several months.
- Elastic surface contamination. Talc, silicone spray, or fabric softener residue on the elastic reduces friction. Wipe the elastic end with a clean cloth before loading.
- Excessive pull force at a tight point. If the operator is pulling hard to clear a tight section, the grip will fail before the obstruction does. Address the obstruction instead of the grip.
Preventive Checks That Reduce All Three Faults
- Inspect the casing internally before threading, not after a failure.
- Test-tug every loaded elastic before inserting the nose.
- Replace pads on a fixed interval based on cycle count, not on visible failure.
- Keep one spare tool per workstation so a faulty tool is swapped immediately rather than forced.
- Record which fault occurs and where. A pattern of jams at the same point on the same style points to a construction issue, not a tool issue.
Machines and Fabrics This Tool Suits
The tool is machine-agnostic. It is used after the casing has been constructed, so the upstream machine choice does not change the tool's function. What matters is the casing construction and the fabric behaviour.
Upstream Machine Considerations
- Lockstitch machine: the most common casing construction. The presser foot and feed dog settings determine stitch quality and, indirectly, how flat the casing lies. A casing with uneven feed marks will be harder to thread.
- Overlock machine (serger): used to finish seam allowances inside the casing. Bulky overlocked seams are the main obstacle to smooth threading, so keep the stitch width consistent.
- Coverstitch machine: used for the final topstitching on many elasticated waistbands. The tool is withdrawn before this stage.
In all three cases, the casing internal clearance is what governs threading difficulty. A casing that is too tight relative to the elastic width will resist any tool. This is a pattern and construction issue, not a tool issue, and it is worth checking the pattern allowance before blaming the inserter.
Fabric Types
The tool works well on most woven and knit casings, but performance varies:
- Cotton and cotton blends: good internal friction, easy to gather, generally trouble-free.
- Polyester and nylon wovens: lower friction, which helps the tool pass but also makes the elastic more likely to slip inside the casing during wear. Ensure the elastic is properly secured.
- Jersey and interlock knits: the casing can stretch and distort during threading. Gather gently and avoid over-extending the fabric.
- Fleece and brushed back fabrics: high friction, and the brushed surface can catch on the tool nose. A smooth, well-polished nose is essential here.
- Laminated and coated fabrics: the coating can be marked by metal jaws. Use a plastic-bodied tool or silicone pads.
Common Mistakes and Maintenance
Beyond the three faults above, most remaining problems fall into a small number of categories. Recognising them early saves both tool life and production time.
Operator Mistakes
- Pulling instead of pushing: pulling a flat casing over a stationary tool is slower and increases the chance of the elastic rolling.
- Using the tool as a lever: prying the casing open with the tool damages both the tool and the fabric.
- Threading over a pin or clip left in the casing: always check the casing is clear before starting.
- Sharing one tool across several operators: this hides tool faults and creates waiting time that rarely appears in cost accounting.
Tool Maintenance
- Clean the jaws after each shift. Fibre and lint accumulate on silicone pads and reduce grip. A soft brush is sufficient; avoid solvents that degrade the pad material.
- Inspect the pads weekly. Replace when the surface becomes glazed or compressed. Worn pads are the second most common cause of elastic release after under-clamping.
- Check the spring tension. If the jaws no longer close firmly, replace the spring rather than bending it.
- Inspect metal bodies for plating damage. Any exposed carbon steel should be lightly oiled to prevent rust, or the tool should be retired if the damage is at the jaw face.
- Store plastic tools away from heat and direct sunlight. Prolonged UV exposure embrittles nylon and POM.
- Do not store tools loose in a drawer with other metal parts. Impact damage to the nose geometry is the most common cause of premature failure.
Practical Selection Tips for Buyers
When specifying this tool for a production line, work from the material backwards rather than from the catalogue forwards.
- Measure the widest elastic on the line first. The jaw opening must exceed it with margin. A tool that just fits the widest elastic will be difficult to load and will release under load.
- Match the jaw material to the elastic colour and finish. Serrated metal jaws mark pale elastic. Silicone pads do not.
- Check the nose profile against the smallest casing on the line. The tool must pass the tightest specification, not the average one.
- Buy a sample quantity and run a timed trial. Measure threading time per waistband over a few hundred pieces with the new tool and with the existing method. The difference is the business case.
- Confirm spare pad availability. A tool with replaceable pads has a much longer service life than a sealed unit.
- Standardise across workstations. Mixing tool types on one line creates inconsistent technique and makes training harder.
For buyers sourcing from a China sewing parts supplier, the practical step is to request dimensional drawings rather than photographs, and to specify the jaw opening, clamping length, and pad material in the purchase order. These three parameters determine whether the tool will work on your specific elastic, and they are the parameters most often left unspecified.
It is also worth noting that this tool sits alongside the more familiar industrial sewing machine parts in the spare parts budget, but it is not a machine component and does not wear in the same way. Its life is governed by spring cycles and pad condition, not by stitch count. That makes it easy to forecast: a line running a known number of waistbands per shift can estimate pad replacement intervals from the cycle count.
Where This Tool Fits in the Workflow
To put the tool in context, consider a typical elasticated waistband operation on a lockstitch machine with an overlock machine for seam finishing and a coverstitch machine for the final topstitch. The sequence is: join the side seams, overlock the seam allowances, fold and stitch the casing, thread the elastic, secure the elastic ends, close the casing opening, and topstitch.
The threading step sits between two machine operations. It is the only step in the sequence that is entirely manual and entirely operator-paced. That is precisely why it is worth tooling properly. A machine-paced step can be improved by adjusting the machine. A manual step can only be improved by improving the tool and the technique.
From a parts-management perspective, the elastic inserter is a low-cost, high-turnover item that should be stocked in multiples per line rather than as a single shared tool. When one tool is shared across a line, operators wait, and the waiting time is invisible in most cost accounting. Issuing one tool per workstation removes that hidden cost and also makes it obvious when a tool needs replacement.
Summary
Threading wide flat elastic through a waistband casing is a small operation with an outsized effect on line efficiency and rework rates. A properly specified elastic inserter, used with correct technique, replaces the safety pin and the bodkin with a controlled, repeatable pass. The critical specifications are jaw opening width, clamping length, jaw material, nose geometry, and spring quality. The critical techniques are square-cut elastic, a 10 mm to 20 mm clamped length, pushing rather than pulling, and stopping rather than forcing at a blockage.
For technicians and buyers, the practical takeaway is to evaluate the tool against the widest elastic and the tightest casing on the line, to trial it with a timed measurement rather than a subjective impression, and to treat it as a consumable with a defined replacement interval. The industrial presser foot and the other machine-side components set the quality of the casing; the inserter determines how quickly and consistently the elastic goes in. Both matter, and both are worth specifying properly. A tool of this type, such as the PL (Professional Leader) wide elastic inserter (item code 1688-0606), is one example of the category, but the selection criteria above apply to any equivalent product on the market.
Need this part for your workshop?
Get a Free Quote on WhatsApp: +86 137 3825 6697Browse the full catalog at pinseam.com · Free 2026 full catalog (PDF) · Related guide: industrial presser foot
📢 New arrivals & factory updates on Telegram — join our channel
Edited by the technical team at PL (Professional Leader) — high-quality sewing machine accessories from China. About our factory | Catalog: pinseam.com | WhatsApp: +86 137 3825 6697 | Telegram: @plsewingparts
Explore Our Parts Guides
- sewing machine accessories, needle threaders & thread guides
- industrial & magnetic seam guides
- presser foot guide: types & compatibility
- industrial presser feet for factory lines
- roller & rolled hemmer presser feet
- industrial sewing machine parts & spare parts
- wholesale sewing machine parts, factory direct
- about PL (Professional Leader)
Questions about a specific part? Chat with us on WhatsApp +86 137 3825 6697 — factory direct, reply within hours.


Comments
Post a Comment