How to Install a High-Low Roller Presser Foot on Industrial Lockstitch Machines
A high-low narrow roller presser foot is one of the few sewing machine accessories that changes how thick and thin materials behave under the needle at the same time. This article explains what the part does, how the rolling mechanism interacts with the feed dog, and gives a step-by-step installation and adjustment procedure for industrial lockstitch machines. It also covers pressure settings, speed control at thickness transitions, and the maintenance habits that keep the roller turning freely.
Related guide: presser foot — types, fitting and machine compatibility.
Why Standard Presser Feet Struggle With Leather and Down Jackets
Most industrial lockstitch machines ship with a standard flat presser foot. That foot works well on uniform woven fabric, where thickness changes gradually and the material slides predictably under the sole. Leather and down-filled shells break both of those assumptions.
Leather has a high coefficient of friction against metal and almost no stretch. When a flat foot presses down on it, the foot tends to grip rather than glide, and the feed dog has to overcome that grip to advance the material. The result is short, uneven stitches, skipped stitches at curves, and a top ply that creeps ahead of the bottom ply.
Down jackets create a different problem. The shell is thin and slippery, but the seams, baffles, and corded edges are thick and bulky. A presser foot that is set correctly for the thin shell will ride up over the bulky section, and a foot set for the bulky section will crush the shell and leave pressure marks. Operators often compensate by lifting the foot slightly at each transition, which is slow and inconsistent.
A roller presser foot addresses both cases because the contact point rolls instead of sliding. The friction that resists forward motion is converted into rotation, so the foot follows the material rather than fighting it.
How the High-Low Roller Mechanism Works
Rolling contact replaces sliding friction
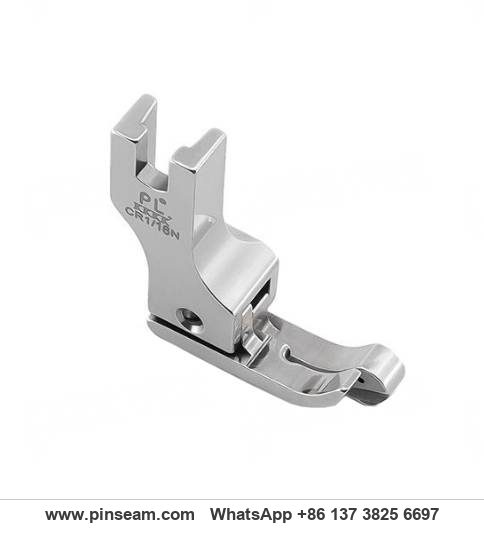
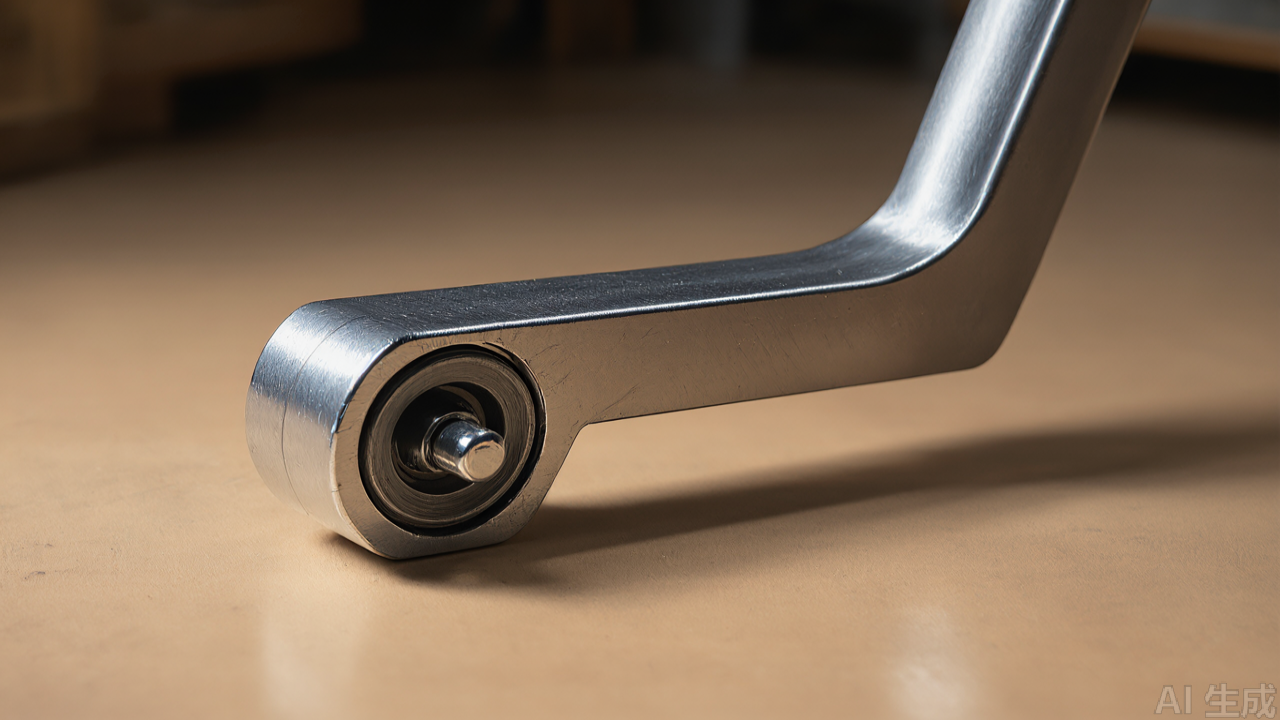
The defining feature of this presser foot type is a small metal roller mounted at the front of the sole. Instead of a fixed surface dragging across the top ply, the roller rotates as the feed dog advances the material. This reduces the resistance the feed dog has to overcome, which is why thick leather and coated fabrics feed more smoothly with a roller foot than with a flat one.
The roller also acts as a light hold-down at the leading edge of the foot. On materials that tend to lift or curl, such as thin leather and laminated foam, that forward contact helps keep the ply flat as it approaches the needle.
What "high-low" means in practice
High-low refers to the height difference between the front section of the foot and the rear section that contacts the needle plate area. The front is set higher and narrower, which lets the operator bring the foot close to raised features such as zipper teeth, piping, and folded edges without the sole riding up on them.
The narrow front profile matters as much as the height difference. A wide foot cannot get close to a zipper coil or a corded seam because the sole hits the raised feature before the needle reaches the stitch line. A narrow front passes alongside the raised feature and keeps the needle on the intended line.
Interaction with the feed dog
The feed dog still does the actual feeding. The roller foot only reduces the opposing friction. This distinction matters when troubleshooting: if the feed dog is worn, set too low, or mismatched to the material, a roller foot will not fix the problem. It will feed better than a flat foot under the same conditions, but it cannot compensate for a feed dog that has lost its teeth.
For very thick multi-layer work, the combination of a roller foot and a properly set feed dog is what produces consistent stitch length. Operators who switch to a roller foot often find they can reduce presser foot pressure slightly, which in turn reduces marks on the top ply.
Specifications and Materials to Check Before Buying
Not all roller feet are interchangeable, even when they look similar. The following points determine whether a given unit will fit and perform on a specific machine.
- Shank type and mounting interface: Most industrial lockstitch machines use a clamp screw on a vertical presser bar. The foot must match the bar diameter and the screw position. Some machines use a slotted or grooved bar, which requires a matching slot on the foot shank.
- Overall height and needle clearance: The foot must clear the needle plate at the bottom of the stroke and must not interfere with the needle bar at the top. Check the height against the machine's specification before installation.
- Roller diameter and material: Smaller rollers navigate tight curves and narrow features better. Larger rollers distribute pressure over a wider area, which suits heavy leather. Roller material ranges from hardened steel to coated steel; hardened steel lasts longer on abrasive leather, while a smoother surface is gentler on coated fabrics.
- Body material and surface finish: A high-hardness metal body with polished surfaces resists wear and reduces the chance of snagging. Look for a smooth finish on the sole and the inner faces of the shank, since rough edges can abrade thread and fabric.
- Corrosion treatment: Leather processing residues and humidity in some workshops accelerate rust. A plated or otherwise treated surface extends service life, particularly in tropical production environments.
- Compatibility with the machine class: Roller feet of this type are generally made for standard high-speed lockstitch machines. Machines with automatic thread trimming, needle positioning, or specialized feed systems may require a different foot design because the foot interacts with the trimmer or the needle guard.
The PL presser foot line, including item 1688-0837, is produced to these dimensional and material tolerances, but the same checks apply to any brand. Measure the presser bar, confirm the shank style, and verify needle clearance before ordering in volume.
Step-by-Step Installation on an Industrial Lockstitch Machine
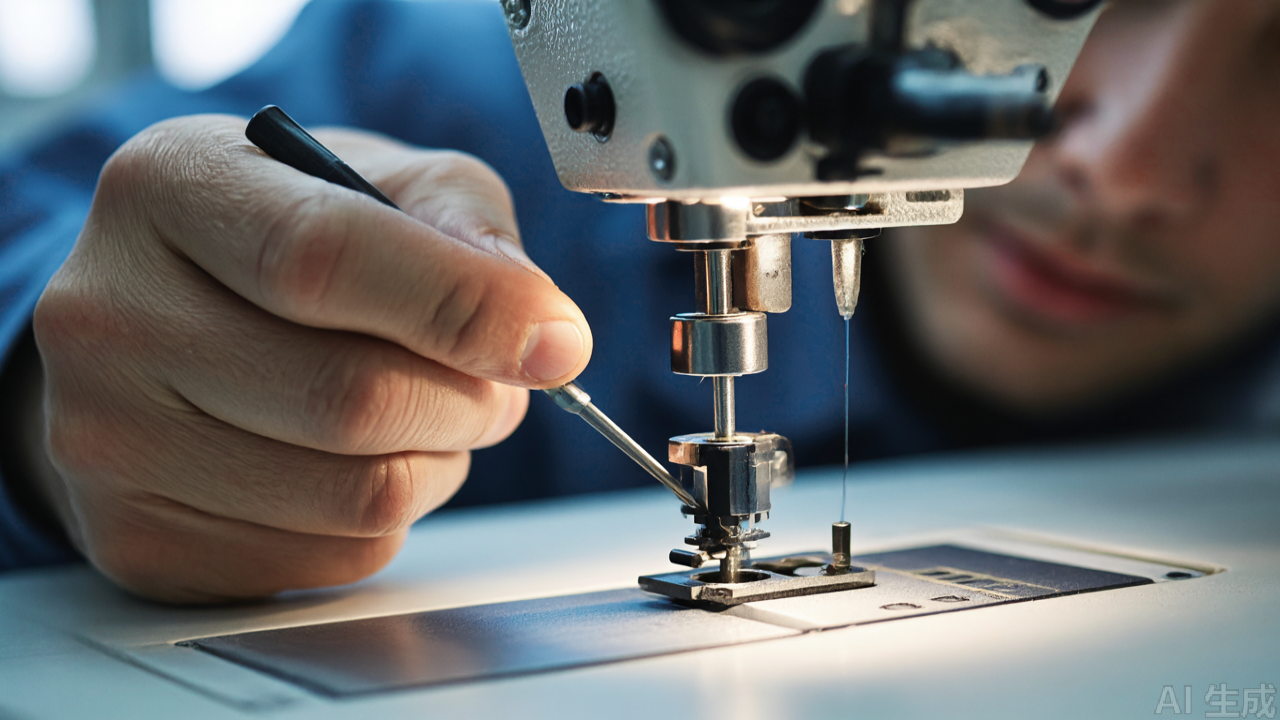
The procedure below applies to a standard single-needle lockstitch machine. The same sequence works on most direct-drive and belt-driven models. Always disconnect the machine from power before starting.
Step 1: Prepare the machine
- Turn off the power and unplug the machine, or lock out the main switch if the workshop uses a lockout procedure.
- Raise the presser foot lever to lift the existing foot off the needle plate.
- Remove the needle to avoid injury and to give yourself clearance.
- Remove the bobbin case and bobbin if the foot replacement requires access below the needle plate.
Step 2: Remove the existing presser foot
- Loosen the presser foot clamp screw with the correct screwdriver size. A screwdriver that is too small will damage the screw slot.
- Slide the old foot down and off the presser bar. If it is stuck, do not pry it with a screwdriver against the needle plate; loosen the screw further and twist gently.
- Wipe the presser bar with a clean cloth to remove oil and metal dust. A contaminated bar can prevent the new foot from seating fully.
Step 3: Fit the new roller foot
- Slide the new foot onto the presser bar from below, pushing it up as far as it will go.
- Check that the flat or groove on the shank aligns with the clamp screw. If the foot sits at an angle, the roller will not track parallel to the feed direction.
- Tighten the clamp screw firmly but not excessively. Over-tightening can distort the shank and make future removal difficult.
- Lower the presser foot lever and confirm the foot rests flat on the needle plate with the roller clear of the plate surface.
Step 4: Check needle clearance and alignment
- Reinstall the needle and rotate the handwheel slowly through one full cycle.
- Watch the needle as it passes the foot. It should pass through the needle slot without touching either side.
- Check that the roller does not contact the needle plate or the feed dog at any point in the cycle.
- If the needle touches the foot, stop and recheck the shank seating. Do not run the machine and hope it clears.
Step 5: Set presser foot pressure
- Locate the pressure regulating screw, usually on the top of the machine head.
- Start with a moderate setting and test on a scrap of the actual production material.
- For thick leather or multi-layer composites, increase pressure until the material feeds without slipping. Excessive pressure flattens the leather grain and increases roller drag.
- For thin down jacket shell, reduce pressure until the foot just holds the material against the feed dog. Too little pressure causes skipped stitches and poor stitch formation.
- Recheck the setting after every material change. This is the single most important adjustment when switching between thick and thin work.
Step 6: Test run and fine-tune
- Turn the handwheel by hand for the first few stitches to confirm the roller rotates freely and the material advances smoothly.
- Run a test seam at low speed. Check stitch length consistency, top and bottom ply alignment, and whether the roller leaves marks.
- If the material pulls to one side, check that the foot is square to the feed direction and that the roller axis is perpendicular to the seam line.
- If stitches are irregular, revisit the feed dog height and the pressure setting before adjusting anything else.
Operating Technique for Thick-to-Thin Transitions
Installation is only half the job. How the operator handles thickness transitions determines whether the roller foot delivers its advantage.
Reduce speed at the transition
When the foot moves from a thick section to a thin one, or the reverse, the sudden change in resistance can cause the material to shift. Reduce machine speed as the foot approaches the transition and let the roller ease over the step. On a servo motor machine, this is a matter of pedal control; on a clutch motor, it requires more anticipation.
Assist with the handwheel when necessary
For very thick steps, such as a leather seam crossing a folded edge, a light touch on the handwheel helps the feed dog pull the material through without stalling. This is not a substitute for correct pressure settings, but it prevents needle deflection and skipped stitches at the hardest point of the seam.
Keep the front of the foot against the guide
The narrow front of a high-low foot is designed to run against a raised feature. Use that: keep the front edge in contact with the zipper coil, piping, or folded edge, and the seam line stays consistent without marking the guide line. This technique is common in bag and footwear production, where the foot follows a cord or edge for the entire seam.
Watch for roller lift on thick steps
If the step is taller than the roller can climb, the foot will lift and the material will stop feeding. In that case, stop, raise the foot, reposition the material, and resume. Forcing the machine through a step that the foot cannot climb is the most common cause of broken needles in thick-material work.
Suitable Machines and Materials
Machines
- Single-needle lockstitch machines: The primary application. Standard high-speed models from the major Japanese and Chinese manufacturers accept this foot type, provided the shank matches.
- Direct-drive and belt-driven lockstitch machines: Both work, but direct-drive machines with electronic needle positioning require a foot that does not interfere with the positioning sensor or the trimmer mechanism.
- Walking foot machines: Not the intended application. Walking foot machines already have a separate feeding mechanism, and a roller foot may conflict with the alternating presser motion.
- Overlock and coverstitch machines: Different foot mounting systems. A lockstitch roller foot will not fit these machines.
Materials
- Leather and synthetic leather: The roller reduces drag on grained and smooth surfaces, and the narrow front reaches into curves on bags, shoes, and garment panels.
- Down and padded jackets: The pressure adjustment range covers both the thin shell and the bulky baffle seams, reducing the need to change feet mid-assembly.
- Laminated and coated fabrics: Rolling contact is gentler on coatings than a sliding foot, which reduces scuffing and delamination at the stitch line.
- Upholstery and automotive interior composites: Multi-layer foam and fabric stacks feed more consistently with a roller foot, provided the machine has enough pressure range and the feed dog is in good condition.
- Standard woven apparel: The foot works, but it offers no advantage over a flat foot on uniform light fabric, and the narrow front can be less stable on long straight seams at high speed.
Common Installation and Usage Mistakes
- Wrong shank fit: Forcing a foot onto a mismatched presser bar distorts the shank and misaligns the roller. Measure before installing.
- Over-tightening the clamp screw: This deforms the shank and can crack the mounting slot. Firm contact is enough.
- Ignoring needle clearance: A foot that looks installed correctly can still be high or low enough to contact the needle. Always rotate the handwheel by hand before running.
- Leaving pressure at the previous setting: The most common cause of poor results after installation. Reset pressure for the material in use.
- Running at full speed immediately: Test at low speed first. Thick-material problems show up at low speed, where they are easier to diagnose.
- Using a worn feed dog: A roller foot cannot compensate for a feed dog that no longer grips. Replace worn feed dogs before evaluating the foot.
- Skipping the roller check: A roller that does not spin freely, or that has thread wound around its axle, will drag and cause irregular feeding.
- Mixing up feet between machines: A foot set up for one machine may not be correct for another, even of the same model, if the presser bar height has been adjusted.
Maintenance Routine for Roller Presser Feet
Roller feet last a long time if kept clean, and fail early if they are not. The maintenance routine is short.
- Daily: Brush lint, thread fragments, and fabric dust from the roller and the sole. Compressed air works but can drive debris into the roller axle, so a brush is safer.
- Weekly: Check roller rotation by hand. If it feels rough or does not spin freely, remove the foot and clean the axle area. Do not lubricate the roller with oil unless the manufacturer specifies it; oil attracts lint and can stain leather.
- Monthly: Inspect the sole and the shank for wear, cracks, or deformation. Check the clamp screw for thread damage.
- As needed: Replace the foot if the roller develops flat spots, if the shank no longer seats firmly, or if the sole shows grooves that mark the material.
- After abrasive materials: Clean thoroughly after sewing abrasive leather or coated fabric, since dust from these materials accelerates wear on the roller surface.
Keep a spare foot set for each machine class in the workshop. A foot that fails mid-production costs more in downtime than the part itself, and swapping a spare in takes less than a minute.
Practical Selection Tips for Parts Buyers
- Match the foot to the machine class, not the brand name. Shank dimensions and needle clearance matter more than the label on the box.
- Buy by application, not by appearance. A narrow high-low roller foot for leather work and a wider roller foot for upholstery are not interchangeable in practice, even if they look similar.
- Confirm roller material for the fabric. Hardened steel rollers last longer on abrasive leather; smoother rollers are safer on coated and laminated fabrics.
- Check the pressure range of the machine. A foot that needs more pressure than the machine can deliver will not perform on thick work.
- Order a sample before a volume order. Fit and finish vary between production batches, even from the same supplier. Test one unit on the actual production material.
- Standardize across similar machines. If several machines in a line run the same material, using the same foot type simplifies training and spare parts stocking.
- Keep records of what works. Note the foot model, machine model, material, and pressure setting for each successful setup. This shortens changeover time on repeat orders.
Frequently Asked Questions
Can a roller presser foot be used on a walking foot machine?
Generally no. Walking foot machines use a separate alternating presser mechanism, and the roller foot is designed for the standard presser bar on a lockstitch machine. Using the wrong foot can interfere with the walking motion and cause feeding problems.
Does the roller foot eliminate the need to adjust pressure?
No. It reduces friction, but pressure still controls how firmly the material is held against the feed dog. Correct pressure setting is still required for consistent stitch formation.
Why does the material still slip after installing a roller foot?
Check the feed dog first. If the teeth are worn or the feed dog height is incorrect, the material will slip regardless of the foot. Then check pressure and confirm the roller spins freely.
Will the roller leave marks on leather?
A smooth, correctly adjusted roller generally leaves less marking than a flat foot, because it does not drag. Excessive pressure can still leave a line, so set pressure to the minimum that feeds reliably.
How often should the foot be replaced?
There is no fixed interval. Replace it when the roller develops flat spots, the shank no longer seats firmly, or the sole shows wear that affects stitch quality. In heavy leather production, inspect monthly.
Conclusion
A high-low narrow roller presser foot is a targeted solution for a specific problem: feeding thick and thin materials through the same lockstitch machine without constant readjustment or foot changes. The installation procedure is straightforward, but the results depend on three things done correctly: matching the shank to the presser bar, setting needle clearance before running, and adjusting pressure for each material. Operators who also reduce speed at thickness transitions and keep the roller clean will get consistent stitch quality across leather, down jackets, and composite materials. For parts buyers, the practical takeaway is to specify by machine class and application, test a sample on production material, and keep a spare presser foot on hand for each machine in the line.
Need this part for your workshop?
Get a Free Quote on WhatsApp: +86 137 3825 6697Browse the full catalog at pinseam.com · Free 2026 full catalog (PDF) · Related guide: presser foot
📢 New arrivals & factory updates on Telegram — join our channel
Edited by the technical team at PL (Professional Leader) — high-quality sewing machine accessories from China. About our factory | Catalog: pinseam.com | WhatsApp: +86 137 3825 6697 | Telegram: @plsewingparts
Explore Our Parts Guides
- multifunctional needle threader guide — how to use & choose
- jack multifunctional needle threader — one-second threading
- sewing machine accessories, needle threaders & thread guides
- industrial & magnetic seam guides
- presser foot guide: types & compatibility
- industrial presser feet for factory lines
- roller & rolled hemmer presser feet
- industrial sewing machine parts & spare parts
- wholesale sewing machine parts — PL (Professional Leader) factory direct
- about PL (Professional Leader) — Hangzhou Fubang, sewing parts brand since 2018
Questions about a specific part? Chat with us on WhatsApp +86 137 3825 6697 — factory direct, reply within hours.


Comments
Post a Comment