How the Industrial Presser Foot Folding Hem Guide Works
This article explains the mechanism, internal structure, and practical use of a folding hem guide attachment for lockstitch machines — the type used for sleeve cuffs and waistband hems. It covers how the spring-steel blade and folding guide interact with the feed dog, how to set blade tension and clearance, and where the tool works well and where it does not. A quick-reference parameter card and a symptom-to-fix troubleshooting table are included so technicians can set up and diagnose the tool without working from prose.
Related guide: industrial presser foot — types, fitting and machine compatibility.
What Problem This Attachment Solves
On a standard lockstitch machine, folding a hem before stitching is a manual operation. The operator folds the fabric edge with their fingers, holds it against the needle, and starts sewing. On a sleeve cuff or a waistband, that fold has to stay consistent for the full length of the seam — often 60 to 100 cm per piece — and it has to be identical on every piece in the run.
This is where the fold drifts. The fold width opens or closes by a millimetre or two, the raw edge creeps out from under the fold, or the operator's fingers obstruct the view of the needle entry point. In a factory running several hundred pieces per shift, those small variations show up as visible waviness along the hem line, uneven topstitching distance, and rework.
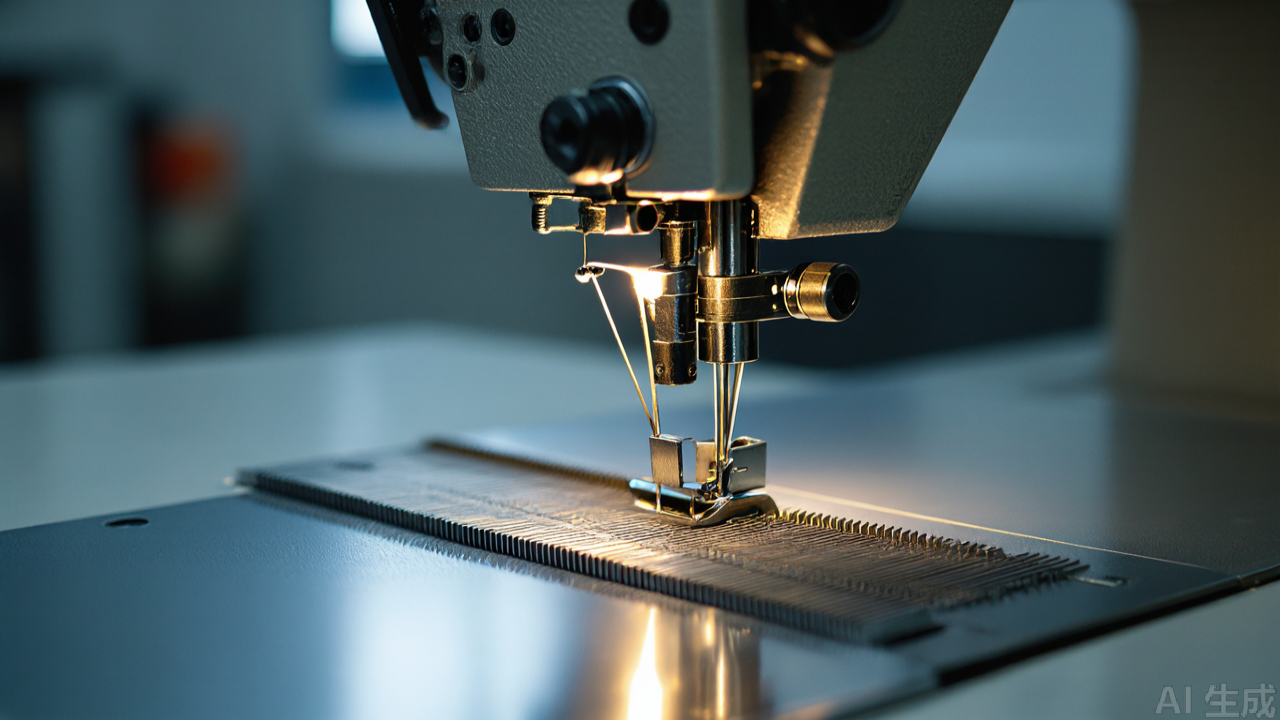
A folding hem guide — sometimes called a hemmer foot, a folder, or in this specific form a folding lower-hem stop blade — is a mechanical answer to that problem. It is a small spring-steel attachment that mounts on the needle plate and presents a fixed folding edge to the fabric. The operator no longer decides the fold width; the blade does. The industrial presser foot area of the machine becomes a controlled folding zone rather than a free-hand operation.
The distinction matters for parts buyers: this is not a presser foot in the conventional sense. It does not replace the presser foot, and it does not sit under the presser foot. It mounts to the needle plate, forward of the needle, and works alongside the existing presser foot and feed dog. Understanding that mounting position is the key to understanding everything else about how it functions.
Internal Structure: Blade, Guide, and Mounting Base
The Three Functional Elements
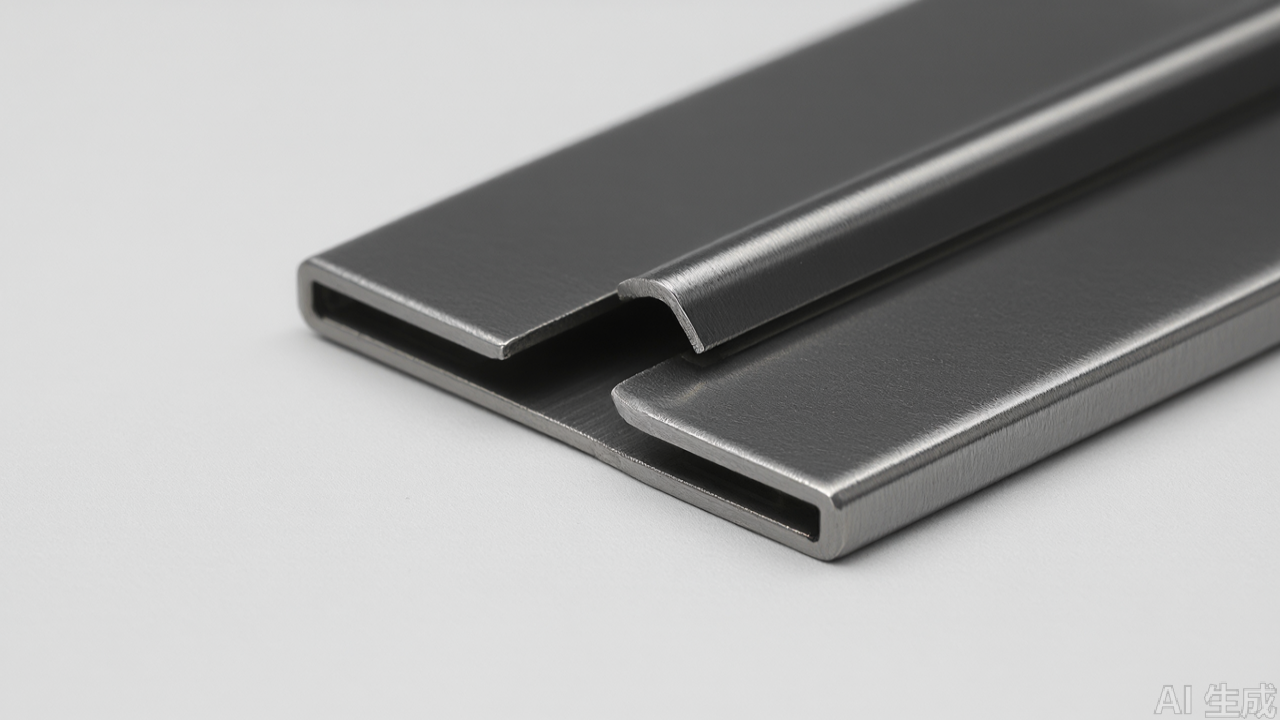
The tool is mechanically simple, which is part of why it holds up in production. It consists of three functional elements:
- The stop blade — a thin spring-steel plate, typically 0.3–0.5 mm thick, bent into a shallow curve. This is the surface the fabric edge rides against. Its spring properties let it flex slightly as fabric passes, which prevents the edge from jamming.
- The folding guide — a channel or ramp formed into the front of the blade. As fabric is pushed forward, the guide rolls the raw edge inward and downward, creating the fold before the fabric reaches the needle.
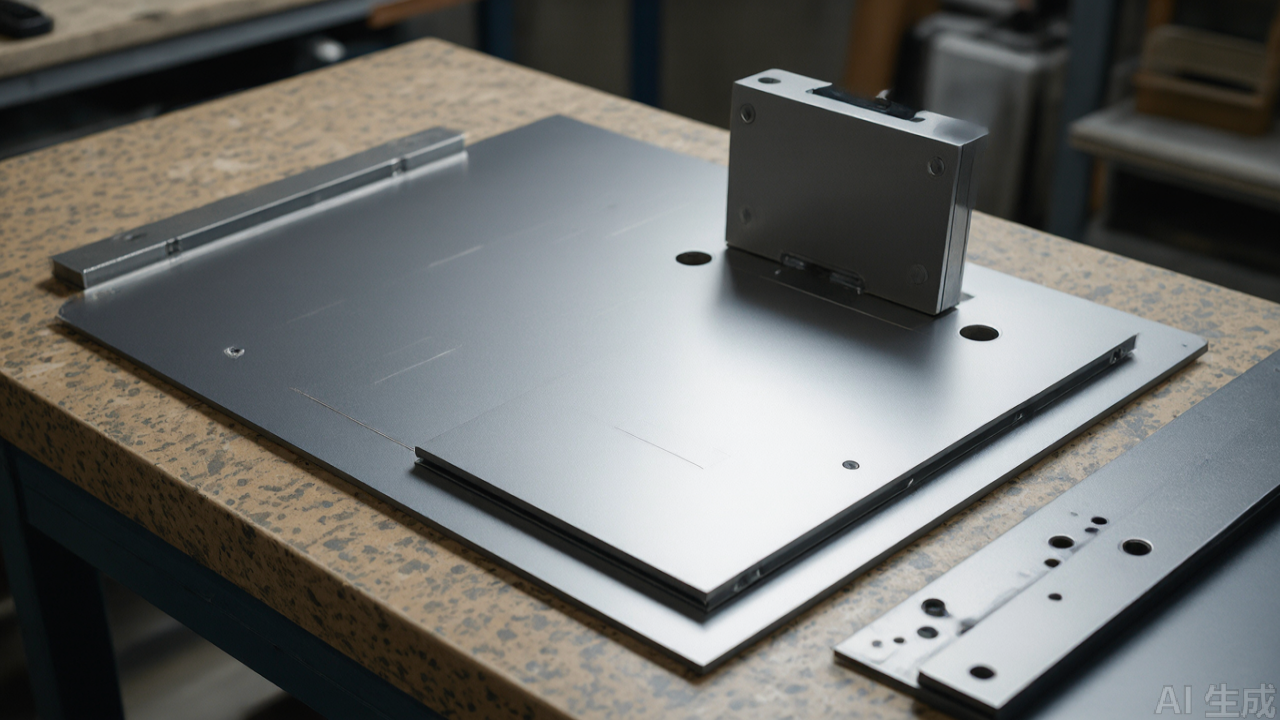
- The mounting base — a slotted foot that matches the needle plate screw pattern. The slot allows fore-aft adjustment, which is how the operator tunes the fold position relative to the needle.
On the PL folding lower-hem stop blade (item 1688-0728), the blade and guide are formed from a single piece of polished spring steel. There is no hinge, no screw joint, and no moving part. That is a deliberate design choice: fewer joints means fewer places for lint to accumulate and fewer failure points.
Why Spring Steel, Not Rigid Steel
A rigid blade would fold fabric consistently but would also jam the moment a seam crossing, a thicker section, or a slight operator error pushed fabric sideways. The blade would have nowhere to give, and the fabric would either stop feeding or ride up over the blade.
Spring steel behaves differently. Under normal load it holds its shape and defines the fold line. Under a sudden lateral load — a thick seam, a fabric bunch, a misaligned start — it deflects a small amount and then returns. In practice this means the operator can recover from a bad start without stopping the machine, and the tool survives thousands of cycles without permanent deformation.
The trade-off is that spring steel is sensitive to heat and corrosion. A blade that has been overheated during polishing, or one that has sat in a humid warehouse for a year, will lose some of its spring. This is the main quality differentiator between a good blade and a cheap one, and it is not visible in a photograph. It shows up in how the blade feels when you flex it by hand — a good blade returns crisply; a degraded one feels soft or takes a set.
Surface Finish and Friction
The blade surface is polished rather than coated. Polishing does two things: it reduces friction so fabric slides along the blade without dragging, and it removes the microscopic burrs left by stamping. A burr on the folding edge will catch on fine fabrics and pull threads, which is why an unpolished blade is unusable on lightweight material.
Polished carbon spring steel will rust if left unprotected. The manufacturer applies a light oil film, but that film wears off in use. In a humid factory, or in a warehouse in a coastal region, the blade needs periodic re-oiling. This is covered in the maintenance section below.
How the Mechanism Works at the Needle
The Folding Sequence
The folding action happens in three stages, all within roughly 15–25 mm of travel before the needle:
- Entry. The operator places the fabric edge against the inside face of the blade, with the raw edge pointing toward the machine body. The blade's front ramp begins to lift and turn the edge.
- Rolling. As the feed dog pulls the fabric forward, the guide channel rolls the raw edge under itself. The fold width is set by the distance between the blade's folding edge and the guide's inner wall — a fixed dimension.
- Delivery. The folded edge emerges from the guide aligned with the needle. The presser foot holds it flat, and the needle stitches through the fold.
The critical point is that the fold is formed by geometry, not by operator skill. Once the blade is set correctly, the fold width is the same on piece one and piece five hundred. That is the entire value proposition of the tool, and it is why factories use it on cuff and waistband operations where the hem line is visible on the finished garment.
The Role of the Feed Dog and Presser Foot
This attachment does not feed fabric. The feed dog does that, and it does it from below the needle plate. The folding guide only shapes the edge; it relies on the machine's existing feed system to move material through.
This has two practical consequences. First, the attachment is passive — it has no adjustment for stitch length, feed timing, or presser foot pressure. Those remain machine settings. Second, the feed dog must be in good condition. A worn feed dog with rounded teeth will slip on the folded edge, and the operator will blame the guide. In practice, most "the guide doesn't work" complaints trace back to feed dog wear or incorrect presser foot pressure, not to the guide itself.
The presser foot also matters. A standard presser foot with a narrow sole can let the folded edge ride up as it passes the needle. A foot with a wider sole, or a specific hemming foot with a raised toe, holds the fold flatter. This is worth checking before installing the guide — if the existing presser foot is worn or has an unusual sole shape, the fold may not stay closed even with the guide set correctly.
Clearance Between Blade and Needle Plate
The gap between the blade's lower edge and the needle plate surface is the single most important adjustment. Fabric passes through this gap. If the gap is too small, thin fabric jams and the feed stalls. If it is too large, the fabric rides up the blade instead of folding under it, and the fold opens. The parameter card below gives starting figures by fabric class.
Quick-Reference Parameter Card
Use this card as a setup starting point. Every machine and fabric combination needs a test strip before production; treat the numbers as a baseline, not a specification.
- Blade-to-plate clearance, light shirting cotton: 0.5–0.8 mm
- Blade-to-plate clearance, medium twill / poly-cotton suiting: 0.8–1.2 mm
- Blade-to-plate clearance, heavier woven: 1.2–1.5 mm
- Blade folding edge position ahead of needle: 8–12 mm (starting point)
- Blade thickness (nominal): 0.3–0.5 mm
- Acceptable blade thickness variation across part: ≤ 0.05 mm
- Presser foot pressure: reduce below normal on light fabric; increase only if the fold lifts
- Blade parallelism to needle plate: zero taper along the fold — verify with a straightedge
- Recommended fabric range: light to medium woven, up to roughly 12 oz
- Lint cleaning interval: every shift
- Protective oil film: weekly wipe-down
- Replacement trigger: visible groove on folding edge or loss of spring return
Installation: Step by Step
Preparation
Installation takes a few minutes and requires no drilling or modification to the machine. Before starting:
- Switch off the machine and, on a servo-driven lockstitch, confirm the needle is down and the machine is isolated.
- Remove the needle plate screws at the front of the plate. Keep them — you will reuse them.
- Clean the needle plate surface and the screw holes. Lint and thread fragments under the mounting base will tilt the guide and throw off the fold line.
Mounting
- Place the mounting base over the front needle plate screw holes.
- Insert the screws and tighten them finger-tight only. You need the base to slide fore-aft for adjustment.
- Set the blade so its folding edge sits roughly 8–12 mm in front of the needle. This is the starting position; final position depends on fabric and fold width.
- Confirm the blade is parallel to the needle plate. A tilted blade produces a tapered fold — wider at one end of the seam than the other.
Adjustment and Test
- Set the blade-to-plate clearance for the fabric (see the parameter card above).
- Tighten the screws fully.
- Run a test strip of the actual production fabric. Start the seam by hand, feeding the edge into the guide, then let the feed dog take over.
- Check the fold width at three points along the test strip. If it varies, the blade is not parallel to the plate or the clearance is wrong.
- Check the topstitch distance from the fold edge. If it drifts, the blade is too far forward or too far back relative to the needle.
Expect to run two or three test strips before the setting is right. Once set, the position is stable — the screws hold, and the blade does not move in normal use.
Suitable Machines and Fabrics
Machine Compatibility
This is a needle-plate-mounted accessory for single-needle lockstitch machines. It fits standard industrial lockstitch machines — computer-controlled flat-bed machines and high-speed lockstitch machines — where the needle plate has the standard two-screw front mounting pattern.
It does not fit overlock machines (sergers) or coverstitch machines. Those machines have different needle plate geometry and no equivalent front screw position. It also does not fit post-bed or cylinder-bed machines without a specific adapter, because the needle plate mounting differs.
Before ordering, the parts buyer should confirm the needle plate screw spacing on the target machine model. "Universal" in this category means "fits the common standard pattern," not "fits everything." A 2 mm difference in screw spacing makes the tool unusable without modification.
Fabric Suitability
The tool works best on woven fabrics of light to medium weight:
- Good fit: cotton shirting, polyester-cotton poplin, cotton twill, medium-weight suiting, workwear fabrics.
- Workable with adjustment: lightweight synthetics, lining fabrics, some stretch wovens (with reduced presser foot pressure).
- Poor fit: heavy denim and canvas above roughly 12 oz, coated or laminated fabrics, very slippery fabrics such as satin, and knits.
Knits are a poor fit because the fold geometry assumes a stable edge. A knit edge curls and stretches as it enters the guide, and the fold width becomes unpredictable. For knit cuffs and waistbands, a different class of attachment — typically a folder designed for the specific operation — is more appropriate.
Troubleshooting Table: Symptom, Cause, Fix
Work through the causes in the order listed. In each group, the first row is the most common cause in practice.
| Symptom | Likely Cause | Fix |
|---|---|---|
| Fold opens along the seam | Blade-to-plate clearance too large — fabric rides up the blade instead of folding under it | Reduce clearance in small steps (0.1–0.2 mm) and re-test |
| Fold opens along the seam | Blade not parallel to the needle plate | Loosen screws, align blade with a straightedge, retighten |
| Fold opens along the seam | Presser foot pressure too low — fold lifts as it passes the needle | Increase presser foot pressure gradually until the fold stays closed |
| Fold opens along the seam | Worn presser foot sole (narrow or grooved) | Replace the presser foot with one having a wider, flatter sole |
| Raw edge creeps out from under the fold | Blade set too far forward — edge has not fully rolled before the needle engages | Move the blade 1–2 mm closer to the needle and re-test |
| Raw edge creeps out from under the fold | Fabric entered the guide at an angle (operator error at seam start) | Retrain entry technique: edge flat against blade inside face, straight push, no side pressure |
| Raw edge creeps out from under the fold | Blade spring has weakened — blade no longer holds edge against guide wall | Replace the blade (consumable wear item) |
| Raw edge creeps out from under the fold | Lint buildup in the guide channel — effective fold width has changed | Clean the guide channel and re-test |
| Fabric jams / feed stalls | Blade-to-plate clearance too small — thin fabric pinched between blade and plate | Increase clearance in small steps |
| Fabric jams / feed stalls | Burr on the folding edge — fabric catches on a rough spot | Inspect under good light; replace blade if burr cannot be dressed out with fine abrasive |
| Fabric jams / feed stalls | Fabric weight outside tool range (heavy denim, canvas) | Use a different attachment class for heavy fabric |
| Fabric jams / feed stalls | Feed dog worn or set too high — dog pushes fabric into the blade rather than through it | Inspect feed dog; replace if teeth are rounded, and check feed dog height against the needle plate |
| Fold width varies along the seam | Blade tilted relative to the plate — produces a taper end to end | Re-align blade with a straightedge and retighten |
| Fold width varies along the seam | Mounting screws loose — blade drifts under load | Retighten; if screws keep loosening, replace them or add a light thread-locking compound |
| Fold width varies along the seam | Inconsistent operator feed at the start (first 20–30 mm is hand-fed) | Standardise the entry motion; consider a start guide for high-volume operations |
| Fold line wanders away from the needle | Blade in the wrong fore-aft position | Adjust fore-aft until topstitch distance is consistent |
| Fold line wanders away from the needle | Needle plate screw holes elongated — base cannot hold position | Replace the needle plate |
| Fold line wanders away from the needle | Presser foot worn on one side — foot tracks off-centre | Replace the presser foot |
| Rust or discolouration on the blade | Protective oil film has worn off (normal in use) | Wipe with a lightly oiled cloth; remove excess before sewing light fabric |
| Rust or discolouration on the blade | Humid storage | Store flat with a rust-preventive coating; do not store bent or under load |
| Rust or discolouration on the blade | Caustic or acidic fabric finish accelerating corrosion | Clean and re-oil more frequently on those runs |
Common Mistakes and Maintenance
Mistakes That Cause Most Problems
- Wrong clearance. Too tight jams the feed; too loose opens the fold. This accounts for the majority of setup complaints.
- Blade not parallel to the plate. Produces a tapered fold. Check with a straightedge before tightening.
- Worn feed dog. The guide shapes the edge, but the feed dog moves it. A worn dog causes slip that looks like a guide fault.
- Excessive presser foot pressure. Flattens the fold and can cause the fabric to ride over the blade. Reduce pressure on light fabrics.
- Starting the seam with the fabric already under the needle. The fold must be formed in the guide before the needle engages. Start with the fabric at the guide entry.
- Using the tool on fabric outside its range. Heavy denim and knits will not fold reliably regardless of adjustment.
Maintenance Routine
The tool has no lubrication points and no wearing parts other than the blade itself. Maintenance is mostly cleaning and protection:
- Per shift: blow or brush lint and thread fragments from the guide channel. Accumulated lint changes the effective fold width.
- Weekly: wipe the blade with a lightly oiled cloth to maintain the anti-rust film. Wipe off excess — oil on the folding edge will stain light fabric.
- On fabric change: recheck blade-to-plate clearance and re-run a test strip. A setting that works for poplin will not work for twill.
- On long storage: coat the blade with rust-preventive oil and store it flat, not bent. A blade stored under load will take a set and lose spring.
Inspect the folding edge monthly under good light. A visible groove or a polished-through spot where the steel has worn thin means the blade is near the end of its life. Replace it before it starts producing inconsistent folds — a worn blade fails gradually, and the first sign is usually a rise in rework rather than an obvious defect.
Practical Selection Tips for Buyers
When specifying this class of factory sewing parts, three questions decide whether the tool will work in your line:
- What is the needle plate screw pattern on the target machine? Confirm the spacing before ordering. This is the most common reason a guide is returned.
- What is the fabric weight range? If the line runs both light shirting and heavy workwear, one blade setting will not cover both. Either accept the changeover time or specify two tools.
- What is the fold width required? The blade geometry sets a fixed fold width. If the operation needs several widths, several blades are needed. Confirm the available widths match your size range.
It is also worth checking whether the existing presser foot and feed dog are in good condition before installing the guide. A guide cannot compensate for a worn feed system, and a technician who installs a new guide on a machine with a rounded feed dog will conclude the guide is faulty. The guide is one part of a system that includes the presser foot, feed dog, and needle plate — all four need to be in working order for the fold to come out clean.
For operations running cuffs and waistbands at volume, the folding hem guide removes a manual skill variable from the seam. That is its function, and it is a narrow one. It does not improve stitch quality, it does not replace the presser foot, and it does not work on every fabric. Used within its range — light to medium woven fabric, standard lockstitch machine, consistent fold width — it delivers repeatable hem folding with no operator judgement required. Used outside that range, it will frustrate the operator and the technician alike. The industrial presser foot ecosystem has a tool for most operations, but matching the tool to the operation is the buyer's job, and this one has a clearly defined place.
Need this part for your workshop?
Get a Free Quote on WhatsApp: +86 137 3825 6697Browse the full catalog at pinseam.com · Free 2026 full catalog (PDF) · Related guide: industrial presser foot
📢 New arrivals & factory updates on Telegram — join our channel
Edited by the technical team at PL (Professional Leader) — high-quality sewing machine accessories from China. About our factory | Catalog: pinseam.com | WhatsApp: +86 137 3825 6697 | Telegram: @plsewingparts
Explore Our Parts Guides
- multifunctional needle threader guide — how to use & choose
- jack multifunctional needle threader — one-second threading
- sewing machine accessories, needle threaders & thread guides
- industrial & magnetic seam guides
- presser foot guide: types & compatibility
- industrial presser feet for factory lines
- roller & rolled hemmer presser feet
- industrial sewing machine parts & spare parts
- wholesale sewing machine parts — PL (Professional Leader) factory direct
- about PL (Professional Leader)
Questions about a specific part? Chat with us on WhatsApp +86 137 3825 6697 — factory direct, reply within hours.


Comments
Post a Comment