Adjustable-Height Binding Tape Tray: Industrial Sewing Machine Parts Explained
A binding tape tray mounted on the machine head column keeps pre-folded binding, piping, and webbing feeding smoothly into the needle area without twisting or dragging on the table. This article explains how an adjustable-height ABS tray works, how its internal structure manages tape tension, and how to install, adjust, and maintain it on a standard lockstitch machine. It is written for garment factory managers, sewing technicians, and parts buyers who specify industrial sewing machine parts for binding and edge-finishing operations.
Related guide: industrial sewing machine parts — types, fitting and machine compatibility.
Why Tape Supply Is a Hidden Bottleneck in Binding Operations
Most binding problems are blamed on the binder attachment, the folder, or the operator. In practice, a large share of them start upstream — at the point where the tape is stored before it reaches the folder.
On a typical lockstitch machine used for collar, cuff, or hem binding, the operator holds the binding tape in a loose pile on the table, hangs it from a hook, or drops it into a plastic bin beside the machine. Each of these methods introduces a variable the folder cannot compensate for:
- Inconsistent unwinding tension. A tape coil that is pulled from the outside drags against itself. Tension rises as the coil tightens and drops suddenly when a layer releases, so the tape enters the folder at a fluctuating rate.
- Twisting and folding back. Tape that is not guided along a controlled path can flip over before it reaches the binder mouth, producing an inverted or double-folded edge.
- Contamination. Tape stored on the table picks up lint, dust, and machine oil, which then travels through the folder and into the seam.
- Floor space consumption. Loose tape piles occupy table area that the operator needs for handling the garment panel.
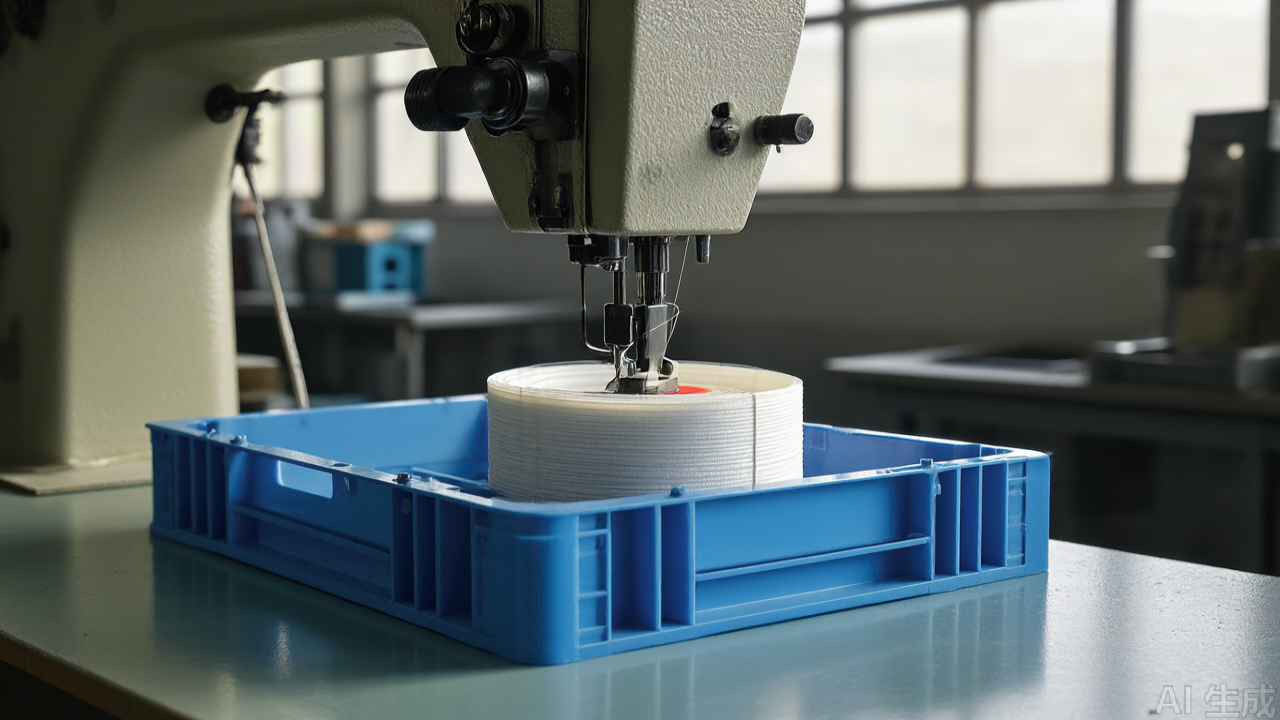
A machine-head-column tray addresses all four issues by giving the tape a fixed, elevated, self-feeding position directly above the work zone. The tape leaves the tray, drops through a short vertical path, and enters the binder at a consistent angle. Because the tray sits on the machine head column rather than the table, it consumes no working surface.
How the Adjustable-Height Tray Works: Mechanism and Internal Structure
The tray is a passive component — it has no motor, no sensor, and no moving feed mechanism. Its function depends entirely on geometry: the shape of the bowl, the position of the mounting column, and the height at which the tray sits relative to the binder inlet.
The Bowl Geometry Controls Tape Path
The tray body is a shallow bowl with a raised, curved rim. This is not a cosmetic detail. The rim radius determines how the tape behaves as it unwinds:
- Curved rim as a guide. As the tape coil unwinds, the outer layer presses gently against the curved rim. The rim redirects the tape upward and inward instead of letting it fall over the edge.
- Bowl depth limits coil height. A deeper bowl holds more tape but increases the distance the tape must travel to clear the rim. A shallow bowl keeps the exit path short but requires more frequent reloading.
- Smooth interior surface. The injection-moulded ABS interior has no seams, sprue marks, or sharp corners. Tape slides across it without snagging, which matters most with narrow, lightweight binding.
The Adjustable Column Sets the Exit Angle
The mounting column connects the tray to the machine head. Its height adjustment is the single most important setup variable, because it determines the angle at which tape leaves the bowl and approaches the binder.
If the tray is too low, the tape exits nearly horizontally and tends to sag, then gets pulled taut in jerks as the operator sews. If the tray is too high, the tape falls in a long loop that can swing and twist before entering the folder. The correct height produces a short, gently curved path with no slack and no tension spike — typically a drop of roughly 150 to 250 mm from tray rim to binder mouth, depending on machine geometry and tape width.
The adjustment mechanism itself is a sliding collar on the column, locked by a screw or clamp. Loosening the lock allows the tray to slide vertically; tightening it fixes the position. The critical requirement is that the tray remains horizontal after locking. A tilted tray causes the coil to migrate to one side, which reintroduces exactly the uneven tension the tray is meant to eliminate.
Mounting Interface and Load Path
Mechanically, the tray is a cantilever. The full weight of the tape coil plus the dynamic load of unwinding is carried by the clamp on the machine head column. This has two practical consequences:
- Clamp fit matters more than tray strength. A loose clamp lets the whole assembly rotate or slide during sewing, which changes the tape path mid-seam. The clamp must match the column diameter closely.
- Coil weight should be reasonable. A tray loaded with a very large, heavy tape roll puts continuous stress on the clamp and the ABS mounting boss. For heavy webbing or wide binding, reload smaller quantities more often rather than filling the bowl to the rim.
Materials and Specifications
The tray body is injection-moulded ABS engineering plastic. This choice is deliberate and worth understanding, because it defines both the strengths and the limits of the part.
Why ABS Rather Than Metal or Polypropylene
- Toughness and impact resistance. ABS resists the repeated small impacts of a workshop environment — bumping against the machine, being knocked during cleaning, and handling during tape changes.
- Dimensional stability. Under normal workshop temperatures, ABS holds its moulded shape, so the bowl geometry and rim radius stay consistent over time.
- Smooth, low-friction surface. Tape slides cleanly, and the surface does not snag fine knits or lightweight woven binding.
- No rust, no oil retention. Unlike unfinished steel, ABS does not corrode in humid sewing rooms and does not hold oil film that could transfer to the tape.
The trade-off is heat sensitivity. ABS softens and eventually becomes brittle if exposed to sustained high temperatures or prolonged direct sunlight. On a machine, this means keeping the tray clear of the motor housing, lamp housings, and any heat-generating component. It also means not storing spare trays on a sun-exposed windowsill.
Specification Points to Confirm Before Ordering
Because tray dimensions vary between models, buyers should confirm the following against the machine before committing to a batch:
- Tray diameter. Determines maximum coil size and how much tape can be loaded at once. Larger diameters suit wide binding and long production runs.
- Adjustment stroke. The total vertical travel of the column. A longer stroke covers a wider range of machine head heights and operator preferences.
- Mounting column diameter compatibility. The clamp or fixing hole must match the actual machine head column diameter. This is the most common source of returns.
- Fixing method. Some units clamp onto the column; others use screws into an existing boss or bracket. Confirm which your machine accepts.
- Column material and finish. Metal columns resist overtightening better than plastic ones; plastic columns are lighter and less likely to mark the machine paint.
These are standard considerations when sourcing sewing machine spare parts from any supplier. Requesting a physical sample and test-fitting it on the target machine before a bulk order is the most reliable way to avoid mismatch.
Installation and Setup, Step by Step
Step 1: Verify Fit Before Tightening Anything
With the machine powered off, offer the clamp up to the machine head column and check the fit by hand. The clamp should seat around the column without force. If it requires significant pressure to close, the diameter is wrong — do not tighten it down and hope. Forcing an oversized or undersized clamp is the fastest way to crack the ABS mounting boss.
Step 2: Mount the Column and Tray Loosely
Attach the mounting column to the machine head, then fit the tray to the column with the height lock only finger-tight. At this stage the assembly should still slide freely so you can set the height by eye.
Step 3: Set the Height Against the Binder Inlet
Thread a length of the actual production tape through the binder and hold the tray at various heights. Look for the position where the tape falls in a short, gentle curve with no slack and no visible tension. Mark or hold that position, then tighten the height lock firmly.
Step 4: Confirm the Tray Is Level
After locking, check the tray in two directions. A spirit level is ideal, but a visual check against the machine bed is usually sufficient. If the tray tilts, loosen, correct, and re-lock. Do not compensate for a tilted tray by adjusting the binder — you will simply move the problem into the seam.
Step 5: Load the Tape Correctly
Place the tape coil in the bowl so it unwinds from the inside or lies in loose, overlapping loops — not as a tight, tensioned coil. The bowl is a reservoir, not a tension device. Overfilling to the rim is a common error: it increases drag and defeats the purpose of the tray.

Step 6: Run a Test Seam and Observe the Tape Path
Sew a short test run on scrap fabric of the same weight as production. Watch the tape between the tray rim and the binder mouth. It should travel smoothly with a slight, consistent curve. Any jerking, swinging, or twisting indicates the height or the loading method needs correction.
Suitable Machines, Tapes, and Fabrics
Machine Compatibility
- Standard lockstitch machines with an accessible machine head column — the primary application.
- Compound feed and walking foot machines used for binding heavier materials, provided the head column accepts a clamp or bracket.
- Machines with limited table space, where an on-table tape stand would interfere with panel handling.
The tray is not intended for overlock machines or coverstitch machines in their standard configuration, because the head geometry and tape entry path differ. Binding on a serger uses a different feed arrangement and is normally handled with a dedicated tape guide rather than a head-column tray.
Tape Types
- Pre-folded binding tape and bias binding
- Piping and corded edge trim
- Narrow woven webbing and ribbon
- Knitted and woven edge tape for knitwear and woven garments
Fabric Considerations
The tray itself is fabric-agnostic, but the correct setup differs by material. On lightweight knits and fine wovens, tape tension must be minimal, so the tray should sit slightly lower with a shorter drop and a lightly loaded bowl. On heavier wovens, canvas, and bag or footwear materials, the tape is stiffer and heavier, so a higher tray position with a longer, straighter drop reduces drag. Non-woven and interlining tapes tend to be low-friction and light; they need a level tray and a loosely loaded bowl to avoid static-driven tangling.
Common Mistakes and Maintenance
Mistakes That Cause Most Complaints
- Overtightening the clamp. Cracks the ABS mounting boss. Tighten until the assembly stops moving, no further.
- Loading the tray to the rim. Increases drag and causes the outer layers to press against the rim, producing jerky feed.
- Setting height by appearance rather than by tape path. A tray that looks right can still feed badly. Judge by how the tape travels.
- Ignoring a tilted tray. Leads to coil migration and uneven tension that shows up as wavy binding in the finished seam.
- Using the tray as a tension device. It is not one. Tape tension should be controlled by the binder and the folder, not by the reservoir.
- Mounting near heat sources. Accelerates ABS ageing and brittleness.
Routine Maintenance
Maintenance is minimal but not zero. Lint, dust, and fibre from tape edges accumulate in the bowl and along the rim, gradually raising friction. Wipe the interior and rim with a dry cloth or a soft brush at each shift change or at least daily in high-lint environments.
Check the clamp and height lock weekly. Vibration gradually loosens threaded fasteners, and a clamp that has shifted slightly changes the tape path. Re-check the tray level at the same time.
Inspect the rim and mounting boss for cracks or stress whitening, which appears as a pale, cloudy mark in the ABS. Stress whitening indicates the part has been overloaded or overtightened and is a warning sign before an actual crack appears. Replace the tray if cracking is visible — a broken tray can drop tape into the needle area mid-seam and damage the seam or the machine.
Practical Selection Tips for Buyers
When specifying this type of tray alongside other industrial sewing machine parts, a few practical checks reduce returns and downtime:
- Measure the machine head column first. Diameter and available mounting space determine whether a clamp-on or screw-fix version will work. Measure on the actual production machines, not on a sample unit.
- Match tray diameter to tape width and run length. Narrow tape in a large bowl tangles less but wastes space; wide binding in a small bowl requires frequent reloading and increases handling time per garment.
- Confirm adjustment stroke covers your machine range. If you run several machine models on the same line, choose a tray whose stroke covers the tallest and shortest head configurations.
- Order one sample per machine model before bulk purchasing. Fit is the dominant failure mode for these accessories, and it cannot be confirmed from a specification sheet alone.
- Standardise where possible. If two or three tray variants cover your whole floor, spare-part management and operator training both get simpler.
- Check ABS quality by feel and finish. A well-moulded tray has uniform wall thickness, a smooth interior, and no visible weld lines or sink marks at the mounting boss. These details predict how the part will hold up in daily use.
For factories running continuous binding operations, the tray is a low-cost component with an outsized effect on seam consistency. It does not replace correct binder setup or operator skill, but it removes a recurring source of tape tension variation that is otherwise difficult to diagnose at the machine.
Among the range of industrial sewing machine parts available for binding workstations, an adjustable-height tape tray is one of the few items that pays back through reduced rework rather than through speed. Get the fit and the height right, load it sensibly, and keep it clean, and it will quietly do its job for the life of the machine. A PL (Professional Leader) tray of this type follows the same principle: the part should disappear into the workflow rather than demand attention.
PL (Professional Leader) supplies sewing machine parts for industrial lockstitch, overlock and interlock machines, including the industrial presser foot range, needle plates, feed dogs and related presser foot accessories. The full sewing machine parts and presser foot catalogue is listed at pinseam.com.
Need this part for your workshop?
Get a Free Quote on WhatsApp: +86 137 3825 6697Browse the full catalog at pinseam.com · Free 2026 full catalog (PDF) · Related guide: industrial sewing machine parts
📢 New arrivals & factory updates on Telegram — join our channel
Edited by the technical team at PL (Professional Leader) — high-quality sewing machine accessories from China. About our factory | Catalog: pinseam.com | WhatsApp: +86 137 3825 6697 | Telegram: @plsewingparts
Explore Our Parts Guides
- sewing machine accessories, needle threaders & thread guides
- industrial & magnetic seam guides
- presser foot guide: types & compatibility
- industrial presser feet for factory lines
- roller & rolled hemmer presser feet
- industrial sewing machine parts & spare parts
- wholesale sewing machine parts, factory direct
- about PL (Professional Leader)
Questions about a specific part? Chat with us on WhatsApp +86 137 3825 6697 — factory direct, reply within hours.


Comments
Post a Comment