Zipper Guide Foot Setup: Industrial Presser Foot for Fly & Zip Lines
A zipper guide foot turns a standard lockstitch machine into a repeatable zipper-setting station. This article covers how the guide constrains zipper tape and fabric, the specifications that matter when ordering, and a step-by-step installation and adjustment procedure for fly fronts, zip lines, and placket edges. It is written for garment factory managers, sewing technicians, and parts buyers who need the setup to work the first time, not after three days of trial and error.
Related guide: industrial presser foot — types, fitting and machine compatibility.
Setting a zipper on a flat-bed machine is one of the least forgiving operations on the sewing floor. The zipper tape has to sit parallel to the fabric edge, the teeth have to stay a constant distance from that edge, and the topstitching has to land at a fixed offset from the teeth. All three conditions are usually held by hand. An industrial presser foot with a built-in zipper guide replaces that hand control with a physical channel, which is the difference between a line running at 95 percent first-pass yield and one running at 75 percent.
What Problem an Industrial Presser Foot Solves on Zipper Operations
On a bare lockstitch machine, the operator sets a zipper by sight. The left hand feeds the zipper tape, the right hand steers the fabric, and the eyes track the edge of the zipper teeth against a chalk line or the edge of the foot. This works, but it depends entirely on the operator's hand stability and attention span.
The failure modes are predictable and expensive:
- Wandering offset. The distance between the zipper teeth and the fabric edge drifts by 1 to 2 mm over a 60 cm run. The zipper looks crooked when the garment is closed.
- Waviness. The operator stretches the tape or the fabric as they steer, and the seam ripples after washing.
- Needle strikes. On metal zippers, a misaligned pass puts the needle into a tooth. One strike dulls or bends the needle, and the next strike breaks it.
- Speed ceiling. Hand-guided zipper work rarely runs above 2,500 to 3,000 stitches per minute because the operator cannot correct fast enough.
A zipper guide foot addresses all four. The guide channel holds the zipper tape at a fixed lateral position relative to the needle, so the offset is set once by the technician and then repeated by the machine. The operator's job shifts from steering to feeding, which is a lower-skill, higher-speed task.
How the Guide Mechanism Works
The guide channel constrains the tape, not the fabric
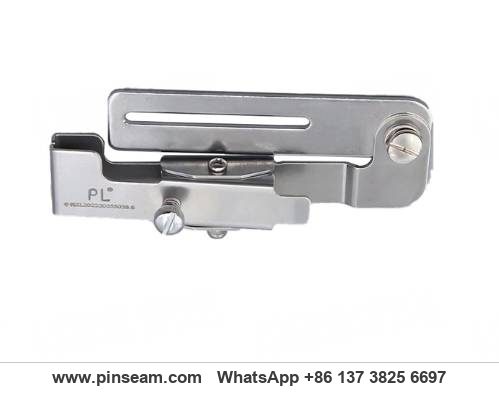
The core of the design is a channel or slot machined into the underside or the side of the foot body. The zipper tape slides through this channel. The channel wall that faces the needle acts as the reference surface: the distance from that wall to the needle is fixed by the geometry of the foot.
Because the tape is captured, it cannot rotate or drift laterally. The fabric, by contrast, is still fed by the operator and the feed dog. This asymmetry is deliberate. Fabric edges vary in width and straightness; zipper tape is manufactured to a tight tolerance. Referencing the stable part and letting the variable part follow is what makes the setup repeatable.
Single-side versus double-side guidance
Single-side guides have one wall and rely on the operator to keep the tape pressed against it. They are cheaper, easier to load, and adequate for most woven fly-front work.
Double-side guides enclose the tape on both sides. They are less tolerant of tape width variation but hold the zipper more rigidly, which helps on stretch fabrics, on narrow zippers below size 3, and on curved applications where the tape tries to twist. If your factory runs a mix of zipper types, a double-side guide with an adjustable wall is the more flexible purchase.
Integrated topstitch capability
Some versions combine the zipper guide with a topstitch guide, typically a second slot or a raised edge that the fabric edge rides against. These let the operator attach the zipper and run the topstitch in one pass, or at least in two passes without changing feet. The trade-off is a bulkier foot that obscures the needle area, which matters on short seam runs and tight curves.
Specifications and Materials to Check Before Ordering
Zipper guide feet are not interchangeable across all machines. The variables that determine fit and function are listed below. Buyers should confirm each one against the machine on the floor, not against a generic description.
- Shank type and height. Most industrial lockstitch machines use a standard low shank or a high shank. The foot must match. A mismatched shank will either not clamp or will sit at the wrong height and collide with the needle plate.
- Channel width. Matched to zipper size. Size 3 nylon tape, size 5 resin tape, and size 5 metal tape do not share the same channel width. A channel that is too wide defeats the purpose; too narrow and the tape drags.
- Adjustment range. The lateral offset between the guide wall and the needle typically adjusts over 0 to 6 mm or more via a screw and slot. Confirm the range covers your widest placket requirement.
- Guide material. Stainless steel or hard alloy for the wear surfaces. Polished contact faces matter more than the base material, because a rough face will abrade zipper tape and generate lint.
- Body material. Metal bodies resist deflection under pressure and are the right choice for denim and heavy canvas. Engineering-plastic bodies are lighter, cheaper, and adequate for light and medium wovens, but they wear at the screw threads and should be treated as consumables.
- Mounting method. Some feet clamp to the presser bar with the standard screw; others use a bracket that shares a screw with the needle plate. The needle-plate-mounted type is more rigid but takes longer to fit and remove.
For factories standardizing industrial sewing machine parts across a mixed machine park, the practical approach is to pick one shank standard and one adjustment mechanism, then stock guide feet only in the channel widths actually used. Reducing the number of SKUs on the shelf reduces the chance of a technician fitting the wrong foot.
Step-by-Step Installation and Adjustment
The procedure below assumes a single-needle lockstitch machine with the power off and the needle removed. Work through it in order. Skipping the hand-rotation check is the most common cause of a broken needle on the first stitch.
Step 1: Prepare the machine
- Switch off the machine and unplug it, or lock out the power if your facility uses lockout procedures.
- Remove the existing presser foot and the needle.
- Clean the presser bar, the needle bar, and the needle plate of lint and adhesive residue. A foot that seats on a dirty surface will not sit square.
Step 2: Fit the guide foot to the presser bar
- Slide the foot shank onto the presser bar. Confirm the shank sits fully home, with no gap between the shank top and the bar shoulder.
- Tighten the presser bar screw firmly. It should be tight enough that the foot cannot be rotated by hand, but not so tight that the screw threads deform.
- Check the foot height. With the presser bar in the down position, the foot sole should rest flat on the needle plate or on the fabric thickness you will be sewing. If the foot floats above the plate, the guide channel will not control the tape.
Step 3: Set the needle and check clearance
- Fit a new needle of the correct size and point for the fabric. For denim and heavy twill, a size 90/14 or 100/16 sharp point is typical. For light wovens, 70/10 or 80/12.
- Turn the handwheel slowly through a full cycle by hand. Watch the needle path against the guide foot. The needle must pass through the needle slot with clearance on both sides, and must not touch the guide wall at any point in the cycle.
- If the needle contacts the foot, stop. Do not adjust by bending the needle. Either the foot is the wrong shank type for the machine, or the needle bar height is wrong.
Step 4: Set the lateral offset
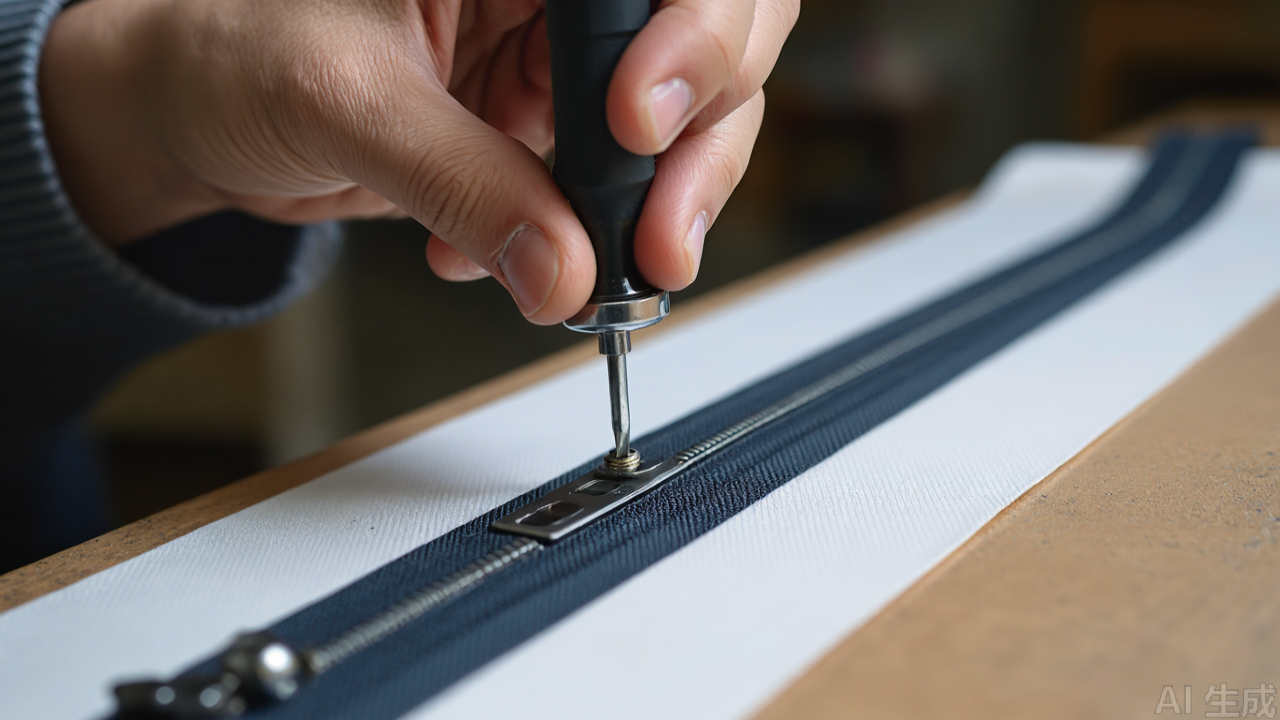
- Loosen the adjustment screw on the guide.
- Place a scrap of the actual zipper and the actual fabric under the foot, positioned as they will be in production.
- Slide the guide so that the zipper tape sits in the channel with the teeth just touching the reference wall. The tape should slide freely along the channel with light finger pressure, with no side-to-side play.
- Tighten the adjustment screw. Re-check by sliding the zipper through the channel again. A correct setting lets the tape move without drag and without lateral movement.
The offset you are setting is the finished distance from the zipper teeth to the fabric edge, minus the seam allowance consumed by the fold. On a standard fly front, this is usually 3 to 5 mm of visible tape beside the teeth. Set it with a steel rule rather than by eye, and record the setting so the next shift can reproduce it.
Step 5: Run a low-speed test
- Set the machine to its lowest speed, or use the handwheel for the first 20 cm.
- Sew a scrap piece with the same fabric and zipper combination. Do not push or pull the fabric. Let the feed dog move it and let the guide steer the zipper.
- Inspect the result. Check three things: the offset is constant along the run, the seam is flat with no ripples, and the zipper closes without the fabric edge rolling over the teeth.
Step 6: Confirm the topstitch pass
If the operation includes a topstitch line beside the zipper, run the second pass with the same foot if it has an integrated topstitch guide, or with the appropriate edge guide foot. The critical check is that the topstitch line runs parallel to the zipper teeth, not parallel to the fabric edge. On a wavy fabric edge these are not the same line, and referencing the zipper is what keeps the finished front looking straight.
Step 7: Record and standardize
Write down the foot model, channel width, offset setting, needle size, stitch length, and thread type. Tape it to the machine or enter it in the line's setup sheet. The value of a guided setup is repeatability, and repeatability depends on the settings being documented rather than remembered.
Suitable Machines and Fabrics
Machines
- Single-needle lockstitch machines. The primary application. Both mechanical and computer-controlled flat-bed machines accept guide feet, provided the shank matches.
- Direct-drive and servo machines. No special consideration, but the low-speed start function on a servo motor is useful for the test pass.
- Walking-foot and unison-feed machines. Guide feet are available for these, but the foot geometry differs and the guide is usually mounted on the needle plate rather than the presser bar, because the walking foot moves.
- Not applicable to overlock or coverstitch machines. Zipper setting on a serger is a different operation with different attachments.
Fabrics and zipper types
- Cotton and poly-cotton wovens. The easiest application. Standard single-side guide, size 3 or 5 nylon zipper.
- Denim and heavy twill. Use a metal-bodied foot and a larger needle. The guide must be rigid, because the feed force on heavy fabric will deflect a light foot and the offset will drift.
- Stretch and knit fabrics. Use a double-side guide and stabilize the zipper area with fusible tape. Without stabilization, the fabric stretches under the foot and the finished seam waves.
- Light leather and synthetic leather. A polished guide face is essential here. A rough or worn guide will mark the surface permanently.
- Metal zippers. The channel must be sized for the specific tape and tooth profile. Metal teeth are less forgiving of a misaligned pass and will damage the needle and the guide face.
Common Mistakes and Maintenance
Mistakes seen on the floor
- Forcing the fabric. The most common error. Operators accustomed to hand-guided zipper work keep pushing and pulling. With a guide foot, the correct technique is to hold the fabric lightly and let the machine feed it. Forcing defeats the guide and reintroduces waviness.
- Setting the offset by eye. A 0.5 mm error in the offset is visible on a finished fly front. Use a rule.
- Ignoring tape width variation. If a batch of zippers arrives with tape that is 0.3 mm wider than the previous batch, a tight channel will drag. Check incoming zipper lots against the channel width.
- Running the foot with a loose presser bar screw. A foot that rotates mid-seam will shift the offset without warning. Check the screw at the start of each shift.
- Using a worn guide. Once the reference wall has a groove worn into it, the tape sits deeper and the offset changes. A grooved guide is not adjustable back to spec; replace it.
Maintenance routine
- Daily: blow or brush lint out of the guide channel. Lint packed into the channel lifts the tape and changes the offset.
- Weekly: inspect the guide faces for scoring or grooves. Check the adjustment screw for tightness and the shank screw for torque.
- Monthly: check the foot sole for flatness against a straight edge. A bowed sole will not hold the fabric consistently.
- Per style change: re-verify the offset setting against the new placket width rather than assuming the previous setting carries over.
Spare parts planning should treat guide feet as a wear item, not a permanent fixture. In a line running zipper operations continuously, a plastic-bodied foot may last a few months, while a steel foot on light fabric can last a year or more. The failure signal is always the same: the offset drifts and the operator starts correcting by hand again.
Practical Selection Tips for Buyers
When specifying a zipper guide foot for a production line, the decisions that matter are fewer than the catalogue suggests. Work through these in order.
- Start from the machine, not the foot. Identify the shank standard on every machine that will run the operation. If the machine park is mixed, either standardize on one shank type or accept that you need two SKUs.
- Match the channel to the dominant zipper size. If 80 percent of production uses size 5 nylon, buy for that and use a second foot for the remainder. A universal channel that fits everything controls nothing well.
- Choose metal for heavy work, plastic for light work. The cost difference is small relative to the downtime from a deflecting foot on denim.
- Prefer adjustable over fixed. Placket widths change with style. An adjustable guide covers more styles per SKU.
- Buy one sample before committing to a line. Fit it to the actual machine, run the actual fabric and zipper, and measure the offset consistency over a full seam length. A presser foot for industrial machine applications is a low-cost item, but a wrong specification costs a shift of output.
- Confirm spare screw availability. Adjustment screws are small and get lost. A supplier who stocks the screws separately is easier to work with than one who only sells complete feet.
For buyers sourcing from a China sewing parts supplier or building a mixed catalogue of factory sewing parts, the practical checklist is: shank type, channel width, adjustment range, guide material, and screw availability. Get those five right and the foot will do what the specification claims. Get any one wrong and the line will be back to hand-guiding within a week.
Closing Note
A zipper guide foot is a simple part with a narrow job: hold the zipper tape at a fixed position so the operator does not have to. The gains come from consistency rather than speed, and consistency comes from setting the offset correctly, documenting it, and replacing the foot when the guide face wears. For any factory running fly fronts, zip lines, or placket topstitching at volume, an industrial presser foot with an integrated zipper guide is one of the lowest-cost improvements available to first-pass yield. Treat the setup procedure as part of the style changeover, not as a one-time installation, and the part will pay for itself in reduced rework.
Need this part for your workshop?
Get a Free Quote on WhatsApp: +86 137 3825 6697Browse the full catalog at pinseam.com · Free 2026 full catalog (PDF) · Related guide: industrial presser foot
📢 New arrivals & factory updates on Telegram — join our channel
Edited by the technical team at PL (Professional Leader) — high-quality sewing machine accessories from China. About our factory | Catalog: pinseam.com | WhatsApp: +86 137 3825 6697 | Telegram: @plsewingparts
Explore Our Parts Guides
- sewing machine accessories, needle threaders & thread guides
- industrial & magnetic seam guides
- presser foot guide: types & compatibility
- industrial presser feet for factory lines
- roller & rolled hemmer presser feet
- industrial sewing machine parts & spare parts
- wholesale sewing machine parts, factory direct
- about PL (Professional Leader)
Questions about a specific part? Chat with us on WhatsApp +86 137 3825 6697 — factory direct, reply within hours.


Comments
Post a Comment