SP-18 Edge-Guide Presser Foot: Precision Seam Allowance for Industrial Lockstitch Machines
SP-18 Edge-Guide Presser Foot: Precision Seam Allowance for Industrial Lockstitch Machines
SP-18 Edge-Guide Presser Foot: A Precision Seam Allowance Control Solution for Industrial Lockstitch Machines
Related guide: presser foot — types, fitting and machine compatibility.
Garment factories running high-volume lockstitch operations face a recurring quality problem: operators rely on visual alignment, which leads to inconsistent seam allowances. The all-steel chrome-plated SP-18 presser foot integrates an edge guide (material code: 1-5-B) that solves this by providing a physical reference surface, keeping the fabric edge at a fixed distance from the needle. Based on stitching tests in typical garment production scenarios, this article examines the structural principle, material specifications, installation steps, and practical selection criteria for this component.
Why an Edge-Guide Presser Foot Improves Seam Allowance Consistency
On a standard industrial lockstitch machine, the operator must simultaneously watch the fabric edge and the needle plate graduation marks. This dual visual inspection reduces productivity and introduces variation, especially when operators work at speeds exceeding 4,000 stitches per minute. Fatigue, lighting conditions, and fabric slippage all contribute to stitch line deviation, resulting in costly rework or rejected garments.
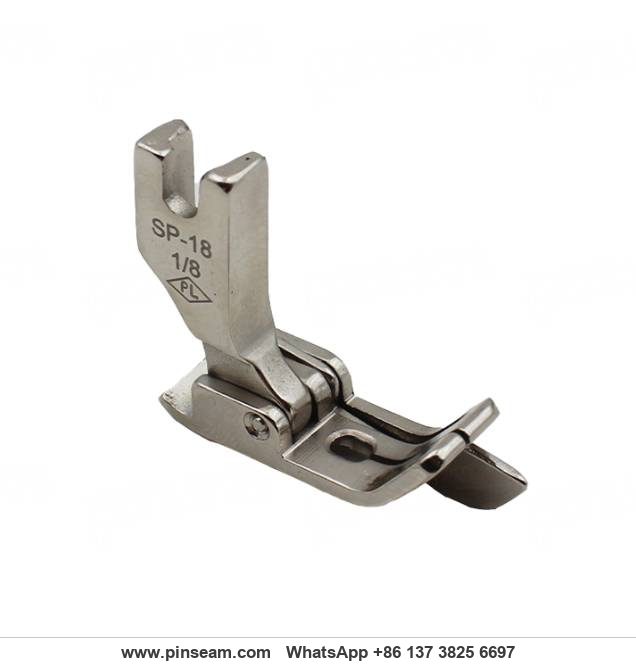
The SP-18 design eliminates this problem by mounting a vertical guide on the right side of the presser foot. The operator simply keeps the fabric edge against the guide during feeding. The distance between the guide and the needle center is set at 1/8 inch (approximately 3.2 mm) at the factory, corresponding to the most commonly used seam allowance width in shirt side seams, trouser inseams, and shoulder seams. This mechanical constraint ensures that every stitch line is exactly the same width, regardless of who operates the machine.
For factories producing basic garments in large volumes, this type of sewing machine accessory shortens training time for new operators and standardizes output quality across shifts. The guide also prevents lateral fabric drift during high-speed stitching, which is particularly useful when handling slippery synthetic fabrics or lightweight cotton blends.
Material and Construction: All-Steel with Electroplated Surface Treatment
The SP-18 is manufactured from carbon structural steel, formed through stamping or forging processes. This material choice provides the rigidity needed to withstand continuous high-speed operation without deformation. Each time the presser bar lifts and lowers during fabric changes, it subjects the presser foot to repeated impact; lower-grade zinc alloy components may bend or crack under such cyclic stress, while the all-steel construction maintains its geometry over extended production runs.
The electroplated surface—typically chrome or nickel—serves multiple functional purposes beyond aesthetics:
- Reduced friction: The smooth plated surface allows fabric to slide underneath the presser foot with less resistance, which is critical for uniform feeding of lightweight materials. Rough or unpolished surfaces can cause puckering or inconsistent stitch length.
- Corrosion resistance: Sewing environments typically involve humidity, fabric treatment agents, and chemicals from anti-static sprays or sizing residue. The plating prevents rust, which would otherwise roughen the contact surface and contaminate light-colored fabrics.
- Easy cleaning: Lint, dust, and oil do not adhere readily to the plated surface. A quick wipe with a dry cloth restores the presser foot to a clean condition, reducing maintenance downtime.
The SP-18 weighs 19.2 grams, deliberately designed to be lightweight. Presser foot weight directly affects the downward pressure applied to the fabric and feed dog. An excessively heavy presser foot may leave marks on delicate fabrics or cause the feed dog to imprint a pattern on the underside of the garment. The lightweight construction of this component is suitable for light to medium-weight materials while still providing adequate fabric control.
Understanding the 1/8-Inch Guide Dimension
The "SP-18 1/8" designation refers to the distance between the vertical guide and the needle center point. This 1/8-inch (3.2 mm) spacing is not arbitrary; it matches the standard seam allowance width used across a wide range of garment manufacturing operations. When the fabric edge is held against the guide, the resulting stitch line falls exactly 3.2 mm from the edge, creating a clean, uniform seam.
This fixed dimension offers a significant advantage over adjustable edge-guide devices. With adjustable systems, operators may inadvertently change the setting between shifts or when introducing different styles. The SP-18's fixed geometry eliminates this variable entirely. If a different seam allowance width is needed, the factory simply switches to another presser foot with the corresponding guide spacing—faster than recalibrating an adjustable guide.
It is important to note that the 1/8-inch measurement is the needle-to-guide distance, not the total width of the presser foot. The presser foot body extends beyond the guide to provide sufficient fabric contact area. This distinction is critical when evaluating whether the presser foot will clear existing needle plate slots or feed dog configurations on a specific machine model.
Compatible Machine Models and Fabric Range
The SP-18 is designed as a universal accessory for industrial single-needle lockstitch machines, commonly referred to as "flatbed" or "standard" machines in production environments. The mounting shank follows industry-standard dimensions, meaning the component fits machines from major manufacturers including JUKI, Brother, Jack, and ZOJE. However, factories should verify the shank type (flat shank vs. cylindrical shank) for their specific machine model before purchasing, as older or specialized machines may use non-standard mounting configurations.
This presser foot is not suitable for overlock machines (sergers), coverstitch machines, or household sewing machines. The shank geometry and presser bar interface differ fundamentally across these equipment categories. Attempting to adapt the SP-18 to an incompatible machine may result in damage to both the component and the machine's presser lifting mechanism.
In terms of fabric suitability, the SP-18 performs best on light to medium-weight materials:
- Woven cotton and cotton blends—shirting fabrics, blouse fabrics, lightweight twill
- Synthetic fabrics—polyester, nylon, and blends that tend to slip during feeding
- Silk and silk-like fabrics—the smooth plated surface minimizes drag and prevents snagging
- Lightweight denim—approximately 10 oz and below
- Linen and linen blends—provided the fabric thickness does not exceed the guide clearance
Heavyweight denim (14 oz and above), upholstery fabrics, or leather will exceed the capability of this presser foot. The guide height and the space between the presser foot bottom and the needle plate are optimized for thinner materials. Attempting to stitch thick stacks with the SP-18 may cause the fabric to jam at the guide or the presser foot lift to be insufficient for material placement.
Step-by-Step Installation and Adjustment
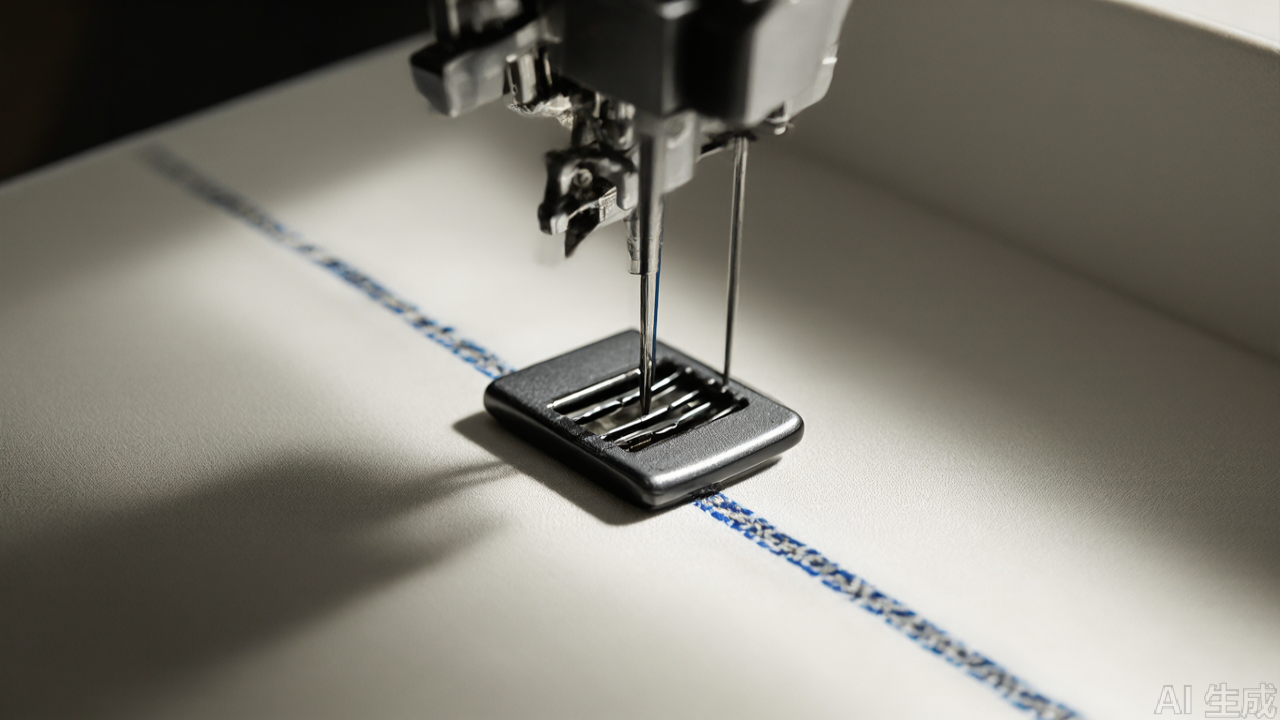
Proper installation of the SP-18 presser foot takes less than two minutes but requires attention to several critical details. The following steps apply to standard industrial lockstitch machines:
Step 1: Turn off the machine power. Switch off the motor and wait for all moving parts to come to a complete stop. Do not rely on pedal position or clutch disengagement; physical disconnection from the power source is the only safe condition for parts replacement.
Step 2: Remove the existing presser foot. Raise the presser bar to its highest position using the hand lever or knee lifter. Loosen the presser foot retaining screw (typically located at the front of the presser bar) using the appropriate hex key or screwdriver. Slide the old presser foot downward and off the shank.
Step 3: Install the SP-18. Place the new presser foot onto the shank with the guide facing to the right (as viewed from the operator's position). Ensure the presser foot sits flush against the bottom of the presser bar. Tighten the retaining screw, but avoid excessive torque, which may damage the threads or deform the shank bore.
Step 4: Verify needle alignment. Rotate the handwheel manually to bring the needle to its lowest position. Confirm that the needle passes through the center of the needle plate slot and does not contact the presser foot or guide. If contact occurs, slightly loosen the retaining screw, adjust the presser foot position, and retighten.
Step 5: Check presser foot pressure. Adjust the pressure regulating knob (usually located on top of the machine head) according to fabric weight. For lightweight fabrics, reduce pressure to prevent fabric marks. For medium to heavy materials, the standard pressure setting is usually sufficient. The lightweight construction of the SP-18 means less pressure is required compared to heavier presser feet.
Step 6: Test stitch on scrap fabric. Perform a test stitch using material representative of the production batch. Measure the seam allowance width from the fabric edge to the stitch line; it should consistently be 3.2 mm. Also verify that the fabric feeds smoothly without bunching at the guide entrance.
Practical Applications in Garment Production
The SP-18 presser foot delivers the greatest value in operations where seam allowance width directly affects garment fit and appearance. Standard side seams on shirts and blouses represent the highest-volume application. With the edge guide, operators achieve a uniform 1/8-inch seam allowance along the entire side seam length, including curved areas near the armhole where manual alignment typically degrades.
Trouser and jeans production benefits similarly for inseams and outseams. The guide maintains consistent seam allowance width through the thigh and knee areas, where fabric layers are thicker and more prone to shifting. However, factories should note that the SP-18 is not suitable for the heavyweight denim used in traditional five-pocket jeans; that application requires a heavy-duty presser foot with greater lift capability.
For decorative topstitching operations—such as shirt front plackets, pocket flaps, or waistband edges—the SP-18 provides consistent spacing between the fabric edge and the visible stitch line. Even experienced operators struggle to achieve this consistency through freehand stitching. The guide effectively converts a skill-dependent operation into a mechanized one.
Piping and cord insertion operations also benefit from the SP-18's guide. When stitching piping into a seam, the operator holds the piping cord against the guide, keeping it at the correct distance from the needle. This prevents the cord from shifting during stitching, which would otherwise cause inconsistent piping width along the seam.
Common Mistakes and Maintenance Guidelines
Several operational errors can compromise the SP-18's performance or cause premature component failure. Understanding these issues helps factories avoid unnecessary downtime and replacement costs.
Mistake 1: Forcing thick materials under the guide. The guide has a fixed height designed for medium-weight fabrics. Attempting to stitch multiple layers of heavy material or bulky items will jam at the guide entrance. Operators should switch to a presser foot with higher guide clearance or stitch the seam in multiple passes.
Mistake 2: Using the wrong needle plate. The SP-18 requires a needle plate with a slot width matched to the needle size and stitch type being used. A narrow slot designed for fine needles can cause the needle to strike the needle plate edge when stitching with heavier thread or when the needle deflects slightly during high-speed operation.
Mistake 3: Neglecting periodic inspection. Over extended use, the guide may bend or wear at the entry point where fabric edges repeatedly contact it. A bent guide produces curved stitch lines even when the operator feeds straight. Inspect guide alignment monthly by placing a straightedge against the guide surface to check for gaps.
Mistake 4: Improper cleaning methods. Avoid using abrasive pads or metal scrapers on the plated surface, as these scratch the finish and create rough areas that snag fabric fibers. Use a soft cloth with a mild solvent to remove oil and residue.
In terms of maintenance, the SP-18 requires virtually nothing beyond regular cleaning. The plated surface resists corrosion and does not require oiling. If the presser foot develops noise during operation, check the presser bar mounting screw for looseness rather than oiling the presser foot itself. The screw should be retightened to the manufacturer's specified torque.
In humid climates, storage of spare presser feet deserves attention. Although the SP-18's plating resists rust, prolonged exposure to high humidity or chemical vapors will eventually compromise plating integrity. Store spare components in sealed plastic bags with silica gel desiccant when not in use.
SP-18 vs. Other Seam Allowance Control Methods
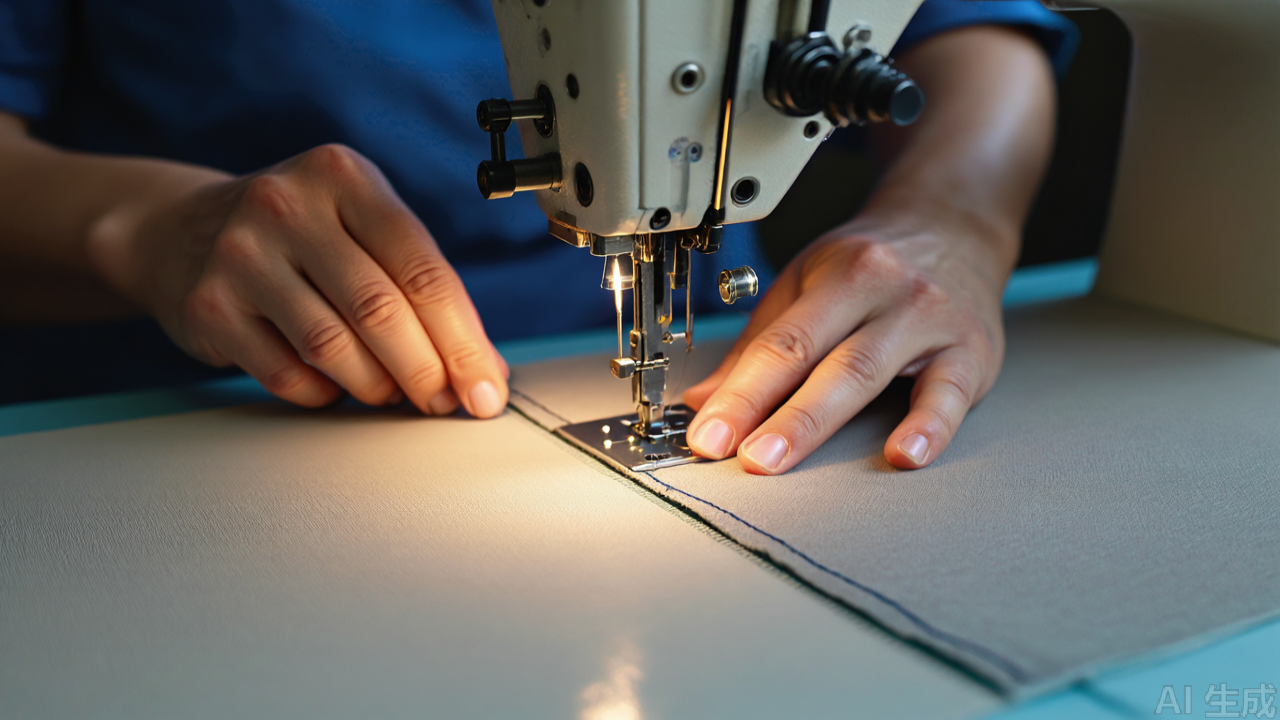
Factories evaluating the SP-18 should understand its strengths and weaknesses compared to other methods of achieving consistent seam allowances. Each method involves different trade-offs in cost, flexibility, and operator skill requirements.
Needle plate graduation marks. Most industrial lockstitch machines have etched graduation lines on the needle plate. Operators align the fabric edge with the appropriate line. This method costs nothing but relies entirely on operator attention and eyesight. At high stitching speeds, maintaining precise alignment is challenging, and results vary between operators and shifts.
Magnetic seam guides. These devices attach to the needle plate and provide a raised edge similar in function to the SP-18's guide. Magnetic guides offer adjustability—operators can reposition them for different seam allowance widths. However, the magnet can shift during stitching due to vibration, and the height they add above the needle plate may interfere with feeding in certain operations.
Adjustable edge guides on the presser foot. Some presser foot models include a movable guide that can be clamped at varying distances from the needle. These offer flexibility for factories running multiple seam allowance widths on the same machine. The trade-off is increased mechanical complexity: more parts that can loosen or wear, and the risk of inconsistent positioning by operators between shifts.
SP-18 fixed guide approach. The SP-18's fixed 1/8-inch geometry provides maximum repeatability with zero adjustment required. Once installed, the seam allowance width cannot drift. The limitation is obvious: if a different seam allowance width is needed, the operator must switch to another presser foot. For high-volume factories running a single dominant seam allowance width for extended periods, this trade-off is acceptable. For small-batch order factories with frequent style changes, an adjustable guide may be more practical.
Selection Criteria for Factory Purchasing Managers
When specifying the sewing machine parts needed for a factory, several factors beyond the basic part number deserve consideration. The SP-18 is available from multiple channels, and quality varies significantly between manufacturers. The following criteria help purchasing departments evaluate supplier quotations:
Steel grade verification. Genuine all-steel presser feet use carbon structural steel with appropriate hardness. Low-quality imitations may use thinner gauge steel or inferior alloys that deform under pressure. Request material certificates from suppliers, or perform a simple deformation test by applying lateral pressure to the guide. A quality component resists bending; a substandard one will flex noticeably.
Plating thickness and adhesion. Quality plating should be uniform, bright, and free of pits or bare spots. Thin plating wears through quickly at fabric contact points, exposing bare steel that will rust and roughen. Inspect the guide edges—the areas of highest wear—for signs of plating separation or flaking.
Dimensional accuracy. The 3.2 mm guide-to-needle distance must be precise. Even a 0.2 mm deviation produces visible differences in stitch appearance across a production line. Use calipers to measure the distance on incoming samples from each batch. Reject any components that fall outside the specified tolerance.
Shank fit consistency. The mounting shank must fit the presser bar without excessive play or binding. A loose fit causes the presser foot to wobble during stitching, producing uneven pressure and inconsistent feeding. A tight fit makes installation difficult and may damage the presser bar threads. Choose suppliers whose shank dimensions consistently match your factory's machine configurations.
For factories sourcing from China, the term China sewing machine parts supplier covers a wide range of manufacturers from small workshops to industrial-scale operations. The latter typically maintain stricter quality control and offer more consistent dimensional accuracy across production batches. Requesting batch inspection reports and maintaining an approved supplier list helps prevent quality fluctuations.
Cost Considerations and Total Cost of Ownership Analysis
The SP-18 presser foot represents a modest capital expenditure relative to the production efficiency gains it delivers. A factory operating 100 sewing machines, each using the SP-18 for seam allowance operations, would need to invest in 100 units plus spares. The payback calculation depends on the specific production environment:
- Reduced rework: If inconsistent seam allowances cause even 1% of garments to be resewn, the labor cost of rework quickly exceeds the presser foot investment.
- Increased operator output: Operators using an edge guide stitch faster because they do not need to stop and visually verify stitch alignment. This speed increase typically ranges from 5% to 15%, depending on operation complexity.
- Lower training requirements: New operators reach acceptable quality levels faster when a mechanical guide compensates for inexperience.
While considering these benefits, factories must weigh the cost of maintaining inventory for multiple guide widths. A factory running both 1/8-inch seam allowances for shirts and 1/4-inch seam allowances for trousers needs two presser foot models per machine. Standardizing to one width where possible reduces inventory carrying costs.
Future Trends in Presser Foot Technology
The SP-18 represents a mature, proven design that has served the garment industry for decades. However, factories evaluating long-term equipment strategies should be aware of emerging trends in presser foot technology. Some newer machines feature servo-driven presser feet with programmable pressure profiles that adjust dynamically through the stitching cycle. These systems offer advantages for specialized operations but come at significantly higher cost.
For most standard garment production, mechanical edge-guide presser feet remain the most cost-effective solution. Their simplicity means fewer failure modes, easier operator training, and predictable performance. The SP-18's all-steel construction and plated surface ensure a service life measured in years rather than months, provided basic maintenance guidelines are followed.
Factories should also consider standardization benefits when multiple production lines run similar products. Using the same presser foot across all lines simplifies spare parts inventory, reduces operator confusion when moving between machines, and enables a consistent quality baseline throughout the factory.
Summary: SP-18 as a Production Standardization Tool
The all-steel chrome-plated SP-18 edge-guide presser foot solves a fundamental quality challenge in garment manufacturing: achieving uniform seam allowance width at production speed. Its fixed 1/8-inch guide geometry removes operator judgment from the equation, converting seam allowance width control from a skill-based task to mechanical certainty.
For factories producing shirts, blouses, trousers, and similar light to medium-weight garments in volume, this industrial sewing machine part delivers measurable improvements in consistency, output, and operator training efficiency. The all-steel construction with plated surface treatment provides the durability to justify the modest investment, while the lightweight design ensures compatibility with delicate fabrics.
When sourcing this component, factories should prioritize dimensional accuracy, steel quality, and plating integrity over price alone. A reliable sewing machine spare parts supplier who maintains consistent manufacturing tolerances will deliver better long-term value than low-cost alternatives that introduce quality variability into the production process. The SP-18 is a simple product, but its contribution to standardized garment quality makes it an important consideration in any factory's sewing machine accessories strategy.
Need this part for your workshop?
Get a Free Quote on WhatsApp: +86 137 3825 6697Browse the full catalog at pinseam.com · Free 2026 full catalog (PDF) · Related guide: presser foot
📢 New arrivals & factory updates on Telegram — join our channel
PL (Professional Leader) supplies sewing machine parts for industrial lockstitch, overlock and interlock machines, including the industrial presser foot range, needle plates, feed dogs and related presser foot accessories.
Edited by the technical team at PL (Professional Leader) — high-quality sewing machine accessories from China. About our factory | Catalog: pinseam.com | WhatsApp: +86 137 3825 6697 | Telegram: @plsewingparts
Explore Our Parts Guides
- sewing machine accessories, needle threaders & thread guides
- industrial & magnetic seam guides
- presser foot guide: types & compatibility
- industrial presser feet for factory lines
- roller & rolled hemmer presser feet
- industrial sewing machine parts & spare parts
- wholesale sewing machine parts, factory direct
- about PL (Professional Leader)
Questions about a specific part? Chat with us on WhatsApp +86 137 3825 6697 — factory direct, reply within hours.


Comments
Post a Comment