How a High-Low Presser Foot Works: Mechanism and Internal Structure
A high-low presser foot is a specialized industrial sewing machine accessory that solves a specific and persistent problem: keeping stitch lines straight and even when the fabric surface is not flat. This article explains the internal structure, the mechanical principle behind the high-low toe design, and how the geometry of the foot interacts with the feed dog and needle plate to control multi-layer seams. It also provides a complete installation sequence and a fault-cause-fix troubleshooting reference for the problems technicians encounter most often on the production floor. It is written for garment factory managers, sewing technicians, and parts buyers who need to understand not just what this part does, but why it works.
Related guide: presser foot — types, fitting and machine compatibility.
Why a Standard Presser Foot Fails on Stepped Fabric
On a flat, single-layer seam, an ordinary presser foot performs well. The fabric sits level on the needle plate, the feed dog engages it evenly, and the stitch length stays consistent. The problem begins when the material under the foot is not uniform in thickness.
Consider a shirt collar after the collar band has been attached. The folded edge of the band creates a step — one side of the seam may be two or three layers thick, while the adjacent area is a single layer. When a standard flat presser foot rides over this step, the front of the foot tilts upward. The toe lifts off the thinner side, the fabric loses contact with the feed dog, and the stitch line drifts away from the edge. The result is an uneven seam allowance, commonly called a wavy or wandering stitch.
This is the core problem that a high-low presser foot — also called a step presser foot, collar re-pressing foot, or interlining stitch foot depending on the region — is designed to solve. It is not a universal replacement for a standard foot. It is a purpose-built tool for a specific class of operations: topstitching, edge stitching, and parallel row stitching on collars, plackets, pocket flaps, and similar stepped assemblies.
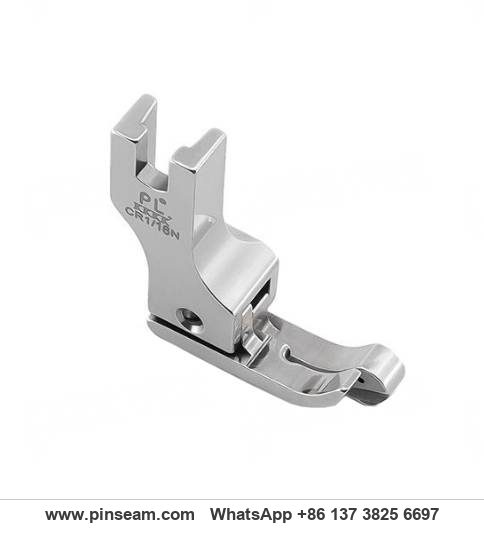
Internal Structure of a High-Low Presser Foot
The Toe Geometry: Left-High, Right-Low
The defining feature of this foot is the vertical offset between its two toes. In the standard configuration, the left toe sits higher than the right toe, with a step of approximately 1–2 mm. Some versions are mirrored or custom-ground for specific operations, but the left-high/right-low layout is the most common in garment production.
This offset is not arbitrary. It corresponds to the typical layer stack in collar and placket work. The higher toe rides on the thicker, raised portion of the fabric — the folded edge or the multi-layer side — while the lower toe presses down on the thinner, single-layer side. Both toes maintain contact with their respective fabric surfaces simultaneously, which keeps the foot level relative to the seam rather than tilting.
The practical effect is that the fabric is held flat and controlled across the full width of the foot, even when the underlying material is stepped. The feed dog can then advance the fabric evenly, and the stitch line stays parallel to the edge.
Toe Width and Length
Typical toe width on these feet ranges from about 3 mm to 6 mm. A narrower toe provides better visibility of the stitch line and the fabric edge, which matters when the operator is guiding a collar edge by eye. A wider toe distributes pressure over a larger area, which can help on softer or more compressible fabrics where a narrow toe might sink in and cause the fabric to pucker.
The toes are also relatively long compared to a standard foot. The extended toe length serves two purposes: it provides a longer contact patch for the feed dog to work against, and it gives the operator more time to adjust fabric position as the seam approaches a curve or corner.
The Sole and Bottom Surface
The bottom surface of the foot is machined flat and smooth. On a plated foot, the underside receives the same electroplated finish as the exterior. This matters because the fabric slides against this surface continuously during sewing. A rough or poorly finished sole creates friction, which drags the top layer of fabric and causes it to shift relative to the bottom layer — a common cause of mismatched seams on multi-layer work.
The sole is also free of burrs and sharp edges. Any burr on the toe or the slot would snag the fabric, pull threads, or leave a visible mark on the finished garment. This is one reason why plated feet are preferred over bare machined steel in production environments: the plating process covers minor surface imperfections and provides a harder, smoother bearing surface.
The Needle Slot and Shank
The needle slot is the opening through which the needle passes. On a high-low foot, the slot is typically open at the front — a design sometimes called a "hinged" or "snap-on" style, though the term depends on the specific mounting system. An open slot allows the operator to thread the needle and position the fabric without fully removing the foot, which saves time during setup.
The shank — the vertical portion that connects to the presser bar — follows the standard industrial interface. The mounting hole diameter and the shank width are sized to fit common single-needle lockstitch machines. This is a critical compatibility point: a foot that fits a domestic machine will not fit an industrial presser bar, and vice versa. Buyers should confirm the presser bar diameter and mounting screw position before ordering.
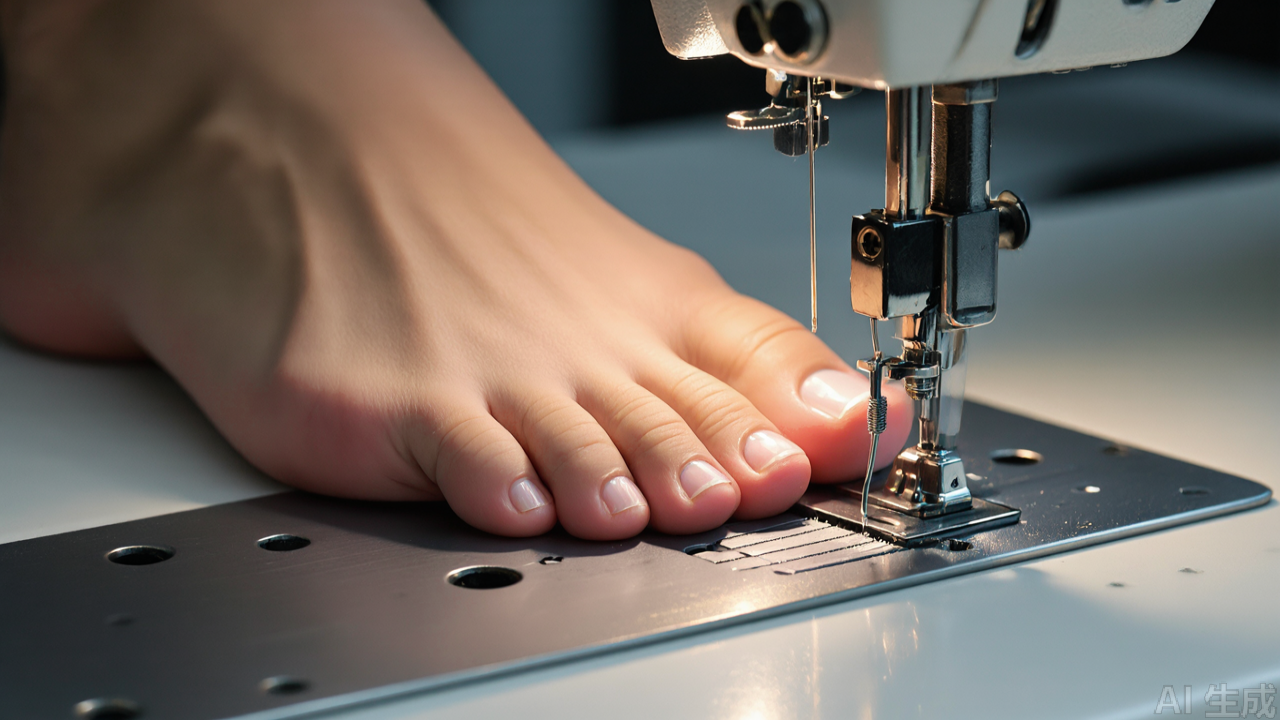
How the High-Low Mechanism Controls the Stitch Line
Pressure Distribution Across the Step
When the foot is lowered onto stepped fabric, the spring-loaded presser bar applies downward force through the shank. On a flat foot, this force concentrates on the highest point of the fabric stack, and the foot tilts. On a high-low foot, the two toes contact the fabric at different heights, so the force is distributed across both levels.
The higher toe contacts the thicker side first. As the foot descends, the lower toe makes contact with the thinner side. At the working position, both toes are in contact, and the foot sits level relative to the seam line. The operator can then guide the fabric edge along the toe with consistent reference, because the foot is not rocking or tilting as the seam progresses.
Interaction with the Feed Dog
The feed dog sits beneath the needle plate and advances the fabric by engaging it from below. For the feed dog to work effectively, the fabric must be pressed against it with consistent force. If the presser foot tilts and lifts on one side, the fabric on that side loses contact with the feed dog teeth, and the feed becomes uneven — one side of the seam advances faster than the other.
The high-low foot maintains even pressure across both sides of the step, so the feed dog engages the full width of the fabric consistently. This is particularly important on operations like parallel row stitching (also called interlining stitch or edge stitch), where two or more rows of stitching must remain equidistant from the edge and from each other. Uneven feed causes the rows to converge or diverge, and the defect is difficult to correct after the fact.
Edge Reference and Visibility
Most high-low feet have a narrow toe on the side that runs along the fabric edge. This narrow toe serves as a visual and tactile guide. The operator can see the fabric edge relative to the toe and adjust accordingly. On wider feet, the edge is partially obscured, and the operator must rely on the stitch line itself as a reference — which is too late, since the stitch has already been formed.
The open needle slot also contributes to visibility. With the slot open at the front, the operator can see the needle penetration point and the fabric edge simultaneously, which reduces the need to stop and check alignment.
Materials and Specifications
Steel Selection and Forging
These feet are made from steel, typically a medium-carbon or alloy steel chosen for a balance of hardness, toughness, and machinability. The foot is forged or machined from bar stock, then heat-treated to achieve the required hardness. The hardness target is a compromise: too soft and the toe wears quickly against the feed dog and needle plate; too hard and the foot becomes brittle and may crack under the cyclic loading of high-speed sewing.
The forged construction is important for dimensional stability. A cast foot may have internal porosity that leads to premature failure, and the casting process does not produce the same fine grain structure as forging. For a part that undergoes millions of load cycles in production, forged steel is the appropriate choice.
Electroplating
After machining and heat treatment, the foot is electroplated. The plating serves three functions: corrosion resistance, surface hardness, and friction reduction. A plated surface resists rust in humid factory environments and against the moisture and oils present in fabric and thread.
The plating also provides a harder bearing surface than bare steel. This reduces wear on the sole and the needle slot, extending the service life of the foot. The smooth plated surface reduces friction against the fabric, which helps prevent the top layer from shifting during sewing.
Plating quality is visible in the finish. A well-plated foot has a uniform, bright surface with no pitting, flaking, or discoloration. These defects indicate poor surface preparation or contaminated plating bath, and they can lead to premature corrosion or fabric snagging.
Typical Specifications
- Toe width: approximately 3–6 mm, depending on the specific model and operation
- High-low step: approximately 1–2 mm between the two toes
- Material: forged steel, heat-treated, electroplated
- Mounting: standard industrial presser bar interface; confirm shank diameter and screw position
- Compatibility: single-needle and double-needle lockstitch machines with matching presser bar
These figures are nominal. Actual dimensions vary by model, and buyers should request a dimensional drawing or sample for critical applications. The step height, in particular, must match the fabric stack: too small a step and the foot still tilts; too large a step and the lower toe does not make contact with the thinner side.
Installation and Setup
Step-by-Step Installation Sequence
- Step 1 — Power off. Switch off the machine and, where possible, disconnect the power. A presser foot change involves working near the needle, and accidental activation is a serious injury risk.
- Step 2 — Raise the presser bar. Lift the presser foot lever to its highest position. This gives clearance to remove the old foot and install the new one.
- Step 3 — Remove the old foot. Loosen the presser foot screw (typically a thumbscrew or a slotted screw on the presser bar) and slide the old foot off. Keep the screw; it will be reused.
- Step 4 — Position the new foot. Slide the shank of the high-low foot onto the presser bar. Orient it so the correct toe (high or low) is on the correct side for the operation. For a left-high/right-low foot used on a collar edge, the lower toe typically runs along the edge.
- Step 5 — Tighten the screw. Secure the foot with the presser foot screw. Tighten firmly but do not overtighten, as this can strip the threads or deform the shank.
- Step 6 — Check clearance by hand. Rotate the handwheel slowly through a full cycle. Confirm that the needle passes through the center of the needle slot without touching the foot, and that the foot does not contact the needle plate or the feed dog.
- Step 7 — Set the needle plate and feed dog relationship. With the foot raised, check that the feed dog rises above the needle plate at its highest point and drops below it at its lowest. If the feed dog is set too high, it will strike the foot; if too low, the fabric will not advance. Adjust the feed dog height according to the machine manual before proceeding.
- Step 8 — Set presser foot pressure. Locate the pressure adjusting screw or knob on the machine head. Back it off to minimum, then increase gradually. The correct setting is the minimum pressure that produces consistent feed on the actual fabric.
- Step 9 — Check the needle position. Confirm that the needle is centered in the needle slot and that the needle size and point type are correct for the fabric. A bent or blunt needle will cause skipped stitches regardless of the foot.
- Step 10 — Thread the machine. Thread the machine fully, including the bobbin. Confirm that the thread passes through the take-up lever and the needle bar thread guide.
- Step 11 — Test sew at low speed. With a scrap piece of the production fabric under the foot, sew a short test seam at low speed. Check the stitch line position, the seam allowance, the stitch length, and the fabric feed. Adjust as needed before running production.
- Step 12 — Run a full-cycle check at operating speed. Once the low-speed test is satisfactory, run a short seam at normal production speed and inspect the result. High-speed sewing can reveal feed or tension problems that do not appear at low speed.
Adjusting Presser Foot Pressure
Presser foot pressure is controlled by a spring and an adjusting screw or knob on the machine head. The correct setting depends on fabric weight and the number of layers.
For thin fabrics, reduce pressure. Excessive pressure compresses the fabric, marks it, and can cause the feed dog to leave impressions. It also increases friction, which can distort the seam. For heavy fabrics or thick multi-layer stacks, increase pressure to maintain feed dog engagement and prevent the fabric from slipping.
The goal is the minimum pressure that produces consistent feed. Start low and increase gradually until the fabric advances evenly and the stitch length is uniform.
Aligning the Foot to the Seam
Once the foot is installed and the pressure is set, check the alignment of the foot relative to the needle and the seam line. The needle should pass through the center of the needle slot without deflection. If the needle contacts the side of the slot, the foot is misaligned or the presser bar is bent. Correct this before sewing, as needle deflection causes skipped stitches and can break the needle.
For edge stitching operations, position the fabric so the edge runs along the inner face of the narrow toe. The distance from the needle to the toe determines the seam allowance. If the required seam allowance does not match the foot, a different toe width or a different foot is needed — the foot cannot be adjusted to change the seam allowance.
Suitable Machines and Fabrics
Machine Compatibility
High-low presser feet are designed for industrial lockstitch machines. They fit single-needle machines and, where the presser bar interface matches, double-needle machines. The GC-series and similar single-needle lockstitch machines are common hosts, but the specific compatibility depends on the presser bar diameter and the mounting screw configuration.
These feet are not intended for overlock machines (sergers) or coverstitch machines. Those machines use different foot mounting systems and serve different seam types. A presser foot for a lockstitch machine will not fit an overlock machine, and attempting to modify it for that purpose is not advisable.
Fabric Types
The high-low foot is most effective on medium-weight fabrics where the layer step is significant relative to fabric thickness. Common applications include:
- Cotton and cotton blends: shirt collars, cuffs, plackets, and pocket flaps
- Polyester and synthetic blends: uniform and workwear garments with topstitched edges
- Light wool and wool blends: suit and coat collars, lapels, and facings
On very thin or delicate fabrics, the step height of the foot may be too large, and the lower toe may not make proper contact. In these cases, a smaller step or a different foot design may be needed. On very heavy fabrics, the foot may not have enough clearance, and the operator may need to reduce the layer stack or use a different approach.
Typical Operations
- Collar re-pressing (topstitching): the foot rides the folded collar edge and keeps the topstitch parallel to the edge
- Placket edge stitching: maintains a consistent distance from the folded placket edge
- Pocket flap edge stitching: controls the flap edge and prevents the stitch from wandering
- Parallel row stitching (interlining stitch): keeps multiple rows of stitching equidistant
Troubleshooting Table: Fault, Cause, and Fix
The table below covers the faults most commonly reported when a high-low presser foot is first installed or when seam quality deteriorates over time. Work through the causes in order — the simplest and most common causes are listed first.
- Fault: Stitch line wanders away from the edge. Cause: foot installed with the high and low toes reversed, so the foot tilts instead of sitting level. Fix: remove the foot, reverse the orientation so the higher toe rides the thicker side, and re-tighten. Test on scrap.
- Fault: Stitch line wanders even with correct orientation. Cause: step height does not match the fabric stack — the lower toe is not making contact with the thinner side. Fix: measure the actual thickness difference and switch to a foot with the correct step height.
- Fault: Uneven feed — one side of the seam advances faster than the other. Cause: presser foot pressure too low, so the fabric is not held against the feed dog. Fix: increase pressure gradually until feed is even. If pressure is already high, check the feed dog height and condition.
- Fault: Fabric puckers along the seam. Cause: presser foot pressure too high, or the needle is too large for the fabric. Fix: reduce pressure to the minimum that maintains feed. Check needle size and point type against the fabric specification.
- Fault: Skipped stitches. Cause: needle deflection because the foot is misaligned or the needle is bent; or the needle is contacting the side of the needle slot. Fix: rotate the handwheel by hand and observe the needle in the slot. Straighten or replace the needle, and re-align the foot. If the presser bar is bent, it must be replaced.
- Fault: Needle breakage. Cause: needle striking the foot or the needle plate. Fix: stop immediately. Check foot alignment, needle straightness, and needle bar height. Confirm the needle passes through the center of the slot through a full cycle before resuming.
- Fault: Fabric snagging or thread pulling at the toe. Cause: burr or damage on the toe or needle slot, often from a previous needle strike. Fix: inspect the foot under good light. A light burr can sometimes be polished out with fine abrasive, but a foot with significant damage should be replaced.
- Fault: Visible marks or impressions on the fabric. Cause: excessive pressure, a rough or damaged sole, or a feed dog set too high. Fix: reduce pressure, inspect the sole for burrs or plating damage, and check feed dog height against the machine manual.
- Fault: Top layer shifts relative to the bottom layer. Cause: friction between the foot sole and the fabric, often from a worn or poorly plated sole. Fix: clean the sole of lint and adhesive buildup. If the plating is worn through, replace the foot.
- Fault: Foot does not sit flat when lowered. Cause: incorrect shank fit on the presser bar, or debris between the shank and the bar. Fix: remove the foot, clean the presser bar and shank, and reinstall. Confirm the shank width and screw position match the machine.
- Fault: Stitch length varies along the seam. Cause: inconsistent pressure, a worn feed dog, or the operator varying speed through a curve. Fix: check pressure setting and feed dog condition. On curves, slow down and guide the fabric rather than pulling it.
- Fault: Foot contacts the needle plate or feed dog. Cause: feed dog set too high, or the foot is not the correct type for the machine. Fix: lower the feed dog to specification. If the foot still contacts, confirm the foot model matches the machine's presser bar and needle plate.
Maintenance
Clean the bottom of the foot regularly. Lint, thread fragments, and fabric dust accumulate on the sole and in the needle slot. This buildup changes the effective height of the foot and can cause the fabric to snag or the stitch to distort. A small brush or a blast of compressed air is sufficient for routine cleaning.
Avoid scratching the plated surface. Do not use abrasive tools or harsh chemicals on the foot. Scratches expose the underlying steel and create sites for corrosion and fabric snagging. If the plating is worn through or flaking, replace the foot.
Check for wear on the toe and the needle slot periodically. A worn toe changes the step geometry and reduces the foot's ability to control the seam. A worn or enlarged needle slot can allow the needle to deflect, causing skipped stitches or needle breakage. Replace the foot when wear becomes visible.
Also check the presser bar and the presser foot screw at each foot change. A worn screw or a damaged bar thread will allow the foot to shift during sewing, which produces the same symptoms as a misaligned foot. Replace worn screws and inspect the bar for bending or thread damage.
Practical Selection Tips
Selecting the right high-low presser foot requires matching the foot to the operation, the fabric, and the machine. There is no single universal foot.
- Measure the fabric step. The step height of the foot should approximate the thickness difference between the two sides of the seam. For a collar where the folded edge adds about 1.5 mm, a foot with a 1.5 mm step is appropriate.
- Match the toe width to the operation. Narrow toes for edge stitching where visibility matters; wider toes for parallel row stitching where pressure distribution matters.
- Confirm the mounting interface. Check the presser bar diameter, the shank width, and the screw position against the machine specification. A foot that does not fit correctly will not perform correctly.
- Consider the fabric weight. Light fabrics need lighter feet and lower pressure; heavy fabrics need more robust feet and higher pressure.
- Buy from a source that provides dimensional data. A presser foot manufacturer or supplier that publishes toe width, step height, and mounting dimensions makes selection straightforward. A supplier that provides only a photo and a model number leaves the buyer guessing.
- Test before committing to production. Order a sample, install it on the machine, and run a test seam on the actual production fabric. This is the only reliable way to confirm that the foot performs as needed.
A high-low presser foot is a small component, but its geometry directly affects seam quality, operator efficiency, and rework rates. Understanding how the internal structure — the toe offset, the sole finish, the needle slot, and the shank — interacts with the feed dog and the fabric stack allows technicians and buyers to select the right foot for the job, install it correctly, and diagnose problems when seams go wrong. For operations involving collars, plackets, and stepped fabric assemblies, the high-low presser foot is a practical and effective solution, provided it is matched correctly to the machine, the fabric, and the seam specification.
Need this part for your workshop?
Get a Free Quote on WhatsApp: +86 137 3825 6697Browse the full catalog at pinseam.com · Free 2026 full catalog (PDF) · Related guide: presser foot
📢 New arrivals & factory updates on Telegram — join our channel
PL (Professional Leader) supplies sewing machine parts for industrial lockstitch, overlock and interlock machines, including the industrial presser foot range, needle plates, feed dogs and related presser foot accessories.
Edited by the technical team at PL (Professional Leader) — high-quality sewing machine accessories from China. About our factory | Catalog: pinseam.com | WhatsApp: +86 137 3825 6697 | Telegram: @plsewingparts
Explore Our Parts Guides
- sewing machine accessories, needle threaders & thread guides
- industrial & magnetic seam guides
- presser foot guide: types & compatibility
- industrial presser feet for factory lines
- roller & rolled hemmer presser feet
- industrial sewing machine parts & spare parts
- wholesale sewing machine parts, factory direct
- about PL (Professional Leader)
Questions about a specific part? Chat with us on WhatsApp +86 137 3825 6697 — factory direct, reply within hours.


Comments
Post a Comment